


Real Estate Edition
Real Estate Version: Product Optimization Announcement
As the overseas real estate business continues to expand, the original product system has revealed the following issues:
- Certain features are disconnected from the core real estate transaction scenarios, with a cluttered layout that increases user learning costs.
- The overall workflow is cumbersome and complex, leading to reduced user efficiency and declining satisfaction.
To address these issues, the brand-new Real Estate Version has been launched. It is designed to provide users with a superior experience tailored to real estate transaction scenarios, supporting the efficient development and further expansion of overseas real estate services.

Core Functional Optimization
The Real Estate Version systematically integrates and optimizes fragmented real estate-related functions in the previous version, significantly enhancing functional coherence and operational efficiency.
(1) Module Integration: New Property Profile Feature
To resolve the issue of fragmented info (information) and setting modules in the previous version, the Real Estate Version deeply integrates these two modules into a new Property Profile feature, enabling seamless, "one-stop" property information management:
- Listing Information Editing: Users can now input, modify, save, and preview property information directly within the Property Profile, eliminating the need to switch back and forth with the previous info module, resulting in a smoother workflow.
- Agent and Agency Management: The agent management functionality from the original setting module is now integrated into the Property Profile. Users can add and manage agent details such as name, contact information, qualifications, and agency details, including name, logo, and service areas. All information can be linked with property listings in one click, ensuring consistency and completeness in external displays.
(2) High-Frequency Feature Optimization: Relocated Floor Plan Editor
Acknowledging the frequent use of the floor plan editor by VR content creators, the Real Estate Version has adjusted its entry point to the second position in the left-hand menu, right next to the core operational features.This adjustment aligns perfectly with users’ typical workflow—"Create a property listing → Edit the floor plan → Obtain property photos"—allowing users to access the floor plan editor quickly without repeatedly searching through the menu, significantly shortening the operational path.
For detailed guidance on using the floor plan editor, please visit: Floor plan editor
- The tutorial covers everything from basic drawing (e.g., walls, doors, windows, and room labels) to advanced configurations (e.g., room area unit display settings), helping users get started quickly.
(3) New Feature: Property Photo
To meet the demand for showcasing properties with both 3D Tours and high-resolution images, the Real Estate Version introduces the Property Photo feature, offering a professional-grade solution for property images:
- Ultra-HD Panorama Generation: After uploading property photos, the system automatically processes and generates ultra-HD panoramas. These can be linked with the 3D Tour so that users can seamlessly switch between panoramic views and 3D tours via the property details page, providing a comprehensive spatial presentation.
- Raw Format Image Export: To cater to professional photographers and agencies requiring post-processing, the Property Photo feature supports the export of uncompressed Raw format images, preserving original pixel and color information. This enables users to perform advanced editing with professional tools, meeting diverse display needs.
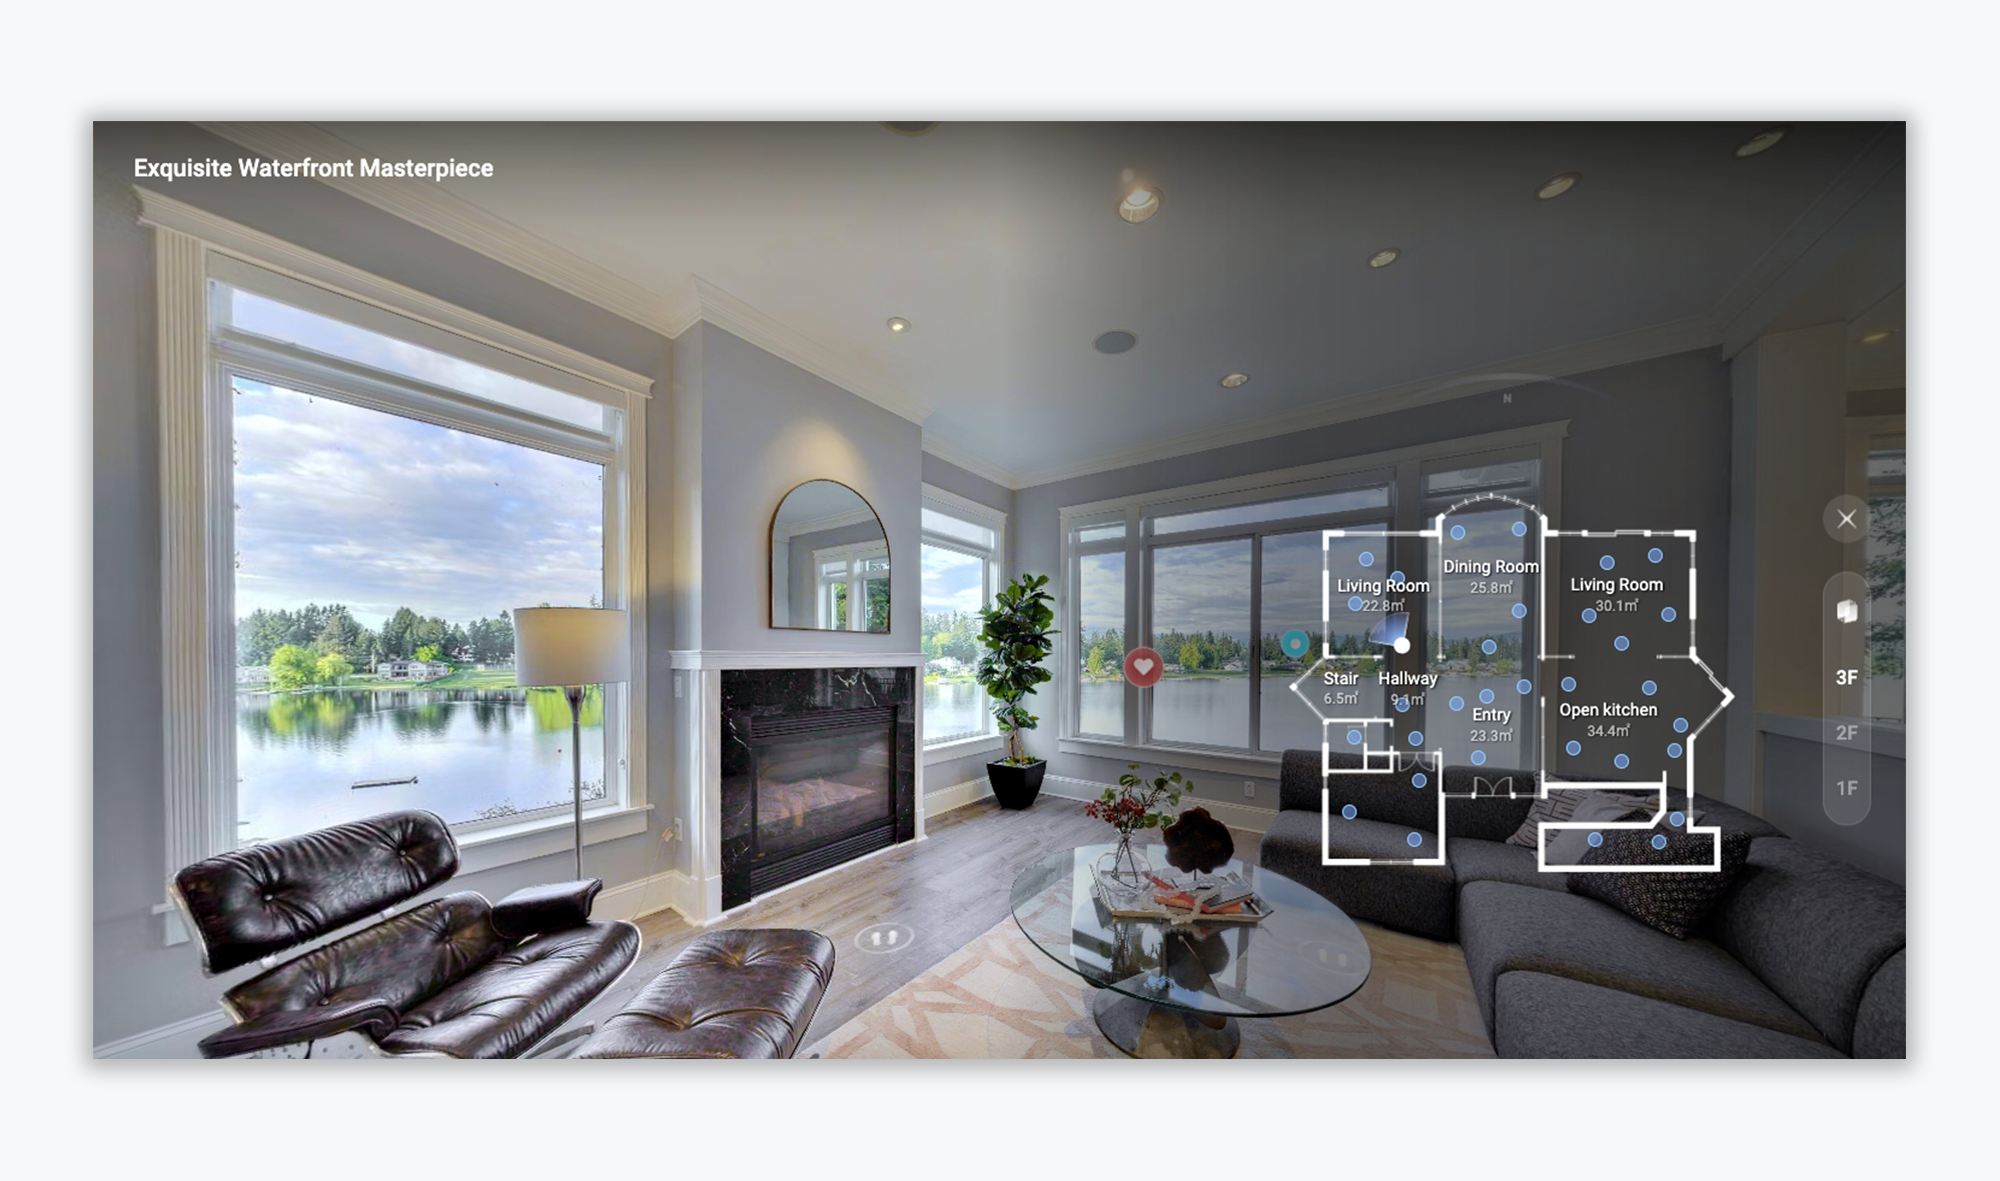
(4) Immersive VR Navigation: Real-Time Floor Plan Integration
The Real Estate Version introduces real-time floor plan navigation within VR tours, offering users an interactive and intuitive way to explore properties:
Immersive Viewing with Clear Orientation: A real-time floor plan map is now embedded into the VR experience, allowing users to reference the property layout and their current position at any time. This feature greatly enhances spatial awareness, ensuring users never feel “lost” during virtual tours.
Game-Like Experience: The navigation feels like exploring a virtual reality game, making the house-hunting process engaging and enjoyable while delivering a crystal-clear understanding of the property’s layout and flow.
User Feedback Channel
To ensure continuous improvement of the Real Estate Version, we warmly welcome users to share their valuable feedback.
- Feedback Email: lutina.suen@realsee.ai
- Response Time: We will respond to your feedback within 2 business days to ensure every suggestion or issue is addressed promptly.
We look forward to collaborating with you to drive product iteration and provide even better support for real estate transactions!