


Video Fusion
Video Fusion allows you to effortlessly blend videos and panoramas using advanced AI technology, creating an immersive experience for users.
Introduction
Video Fusion allows users to effortlessly blend videos and panoramas using advanced AI technology, creating an immersive experience.
Applicable Scenarios:
- Real Estate Displays: Record agent narration to help buyers understand property details.
- Online Education/Training: Integrate real-life training videos into the 3D tour.
- Mall/Exhibition Promotions: Embed real-life product demonstrations within the 3D tour.
Note:
- This feature is compatible with all methods of creating a 3D tour, including mobile phones, 360 cameras, and Galois.
- Use one video per spot. If there are multiple videos at one spot, ensure they do not overlap for an optimal viewing experience.
- Limit the number of videos to a maximum of 20 per 3D tour.
Sample
Our customer used the Panoramic Video feature to showcase a climber's performance. Click the link for an immersive rock-climbing experience!
Step-by-Step Instructions
Step 1: Capture 3D Tour and Record Videos
- Capture the 3D tour
- Record the video at the scan point where you want to integrate it:
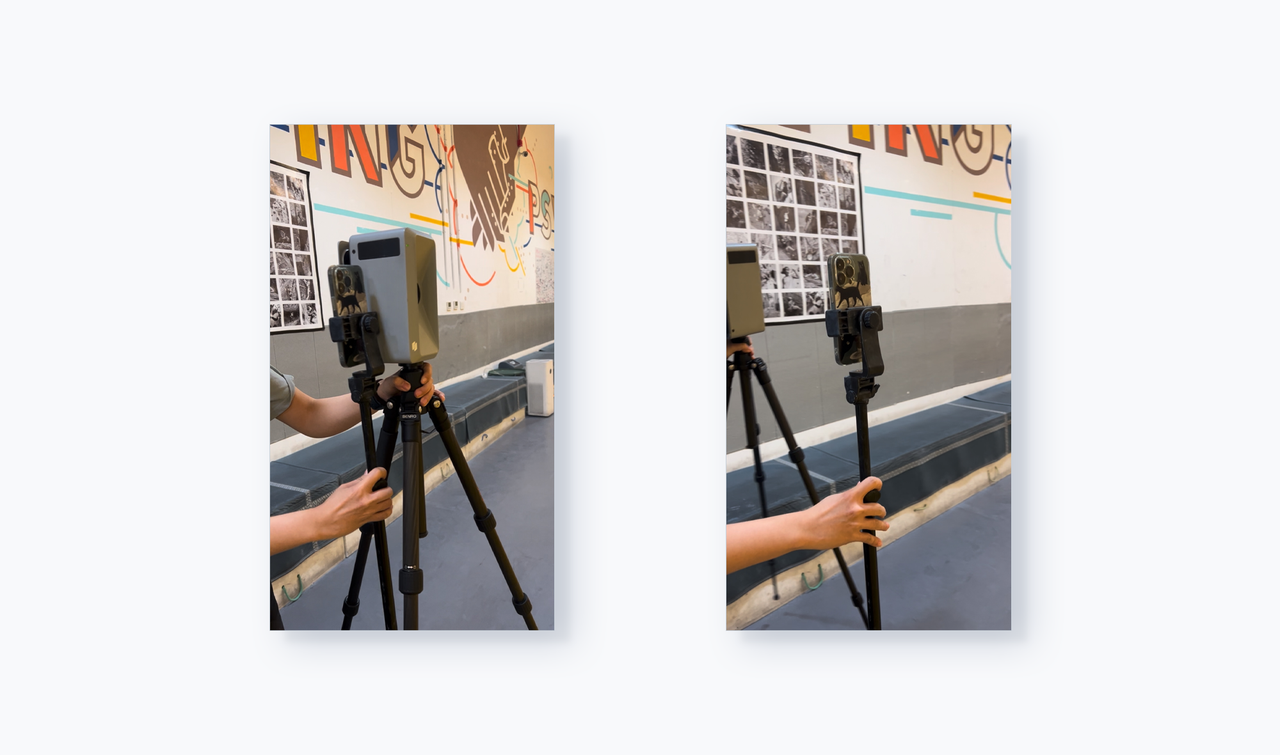
- First, capture the spot using Galois or a panoramic camera.
- Move your video camera or smartphone next to the Galois device, ensuring both lenses are aligned at the same height.
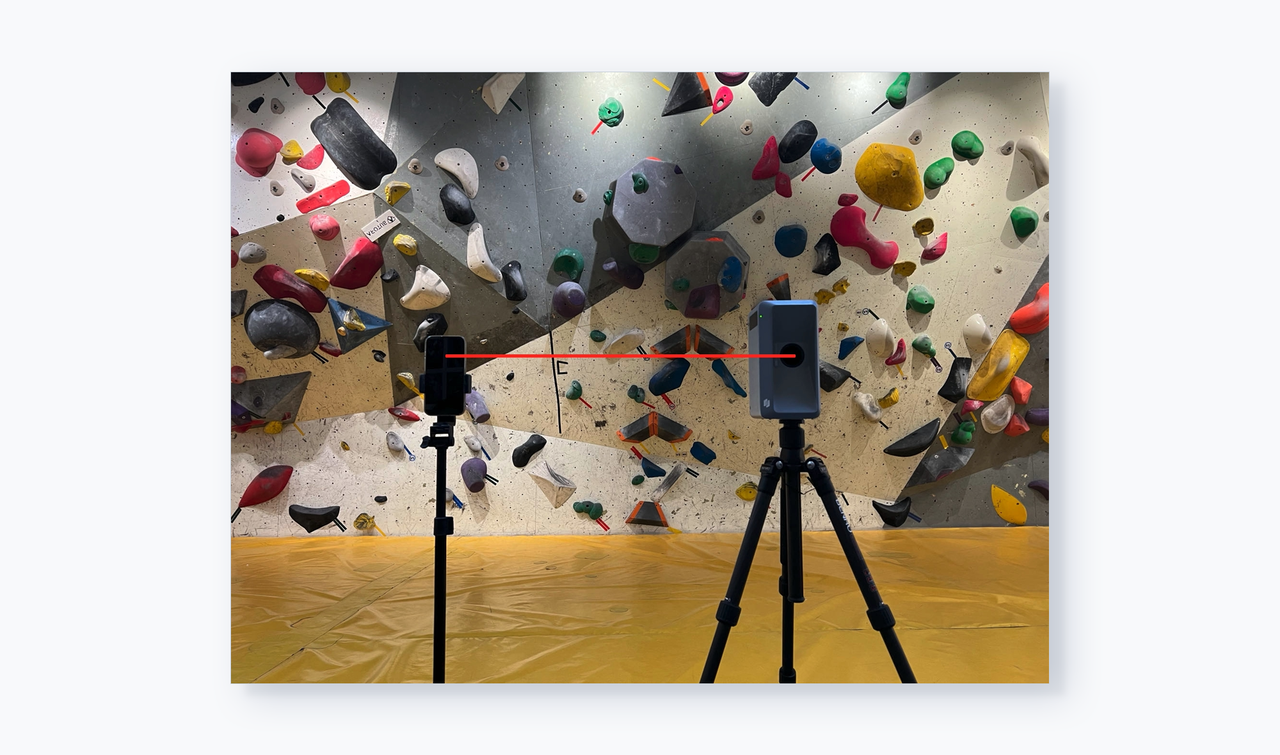
- Remove the Galois, then position your video camera or smartphone at the spot and start recording.
Step 2: How to Integrate Videos into the Virtual Tour
- Pre-process Your Videos: Before integration, we recommend trimming your captured videos, removing background noise, and adding your preferred music. For optimal viewing, keep the video under 2 minutes in length and the file size below 50MB.
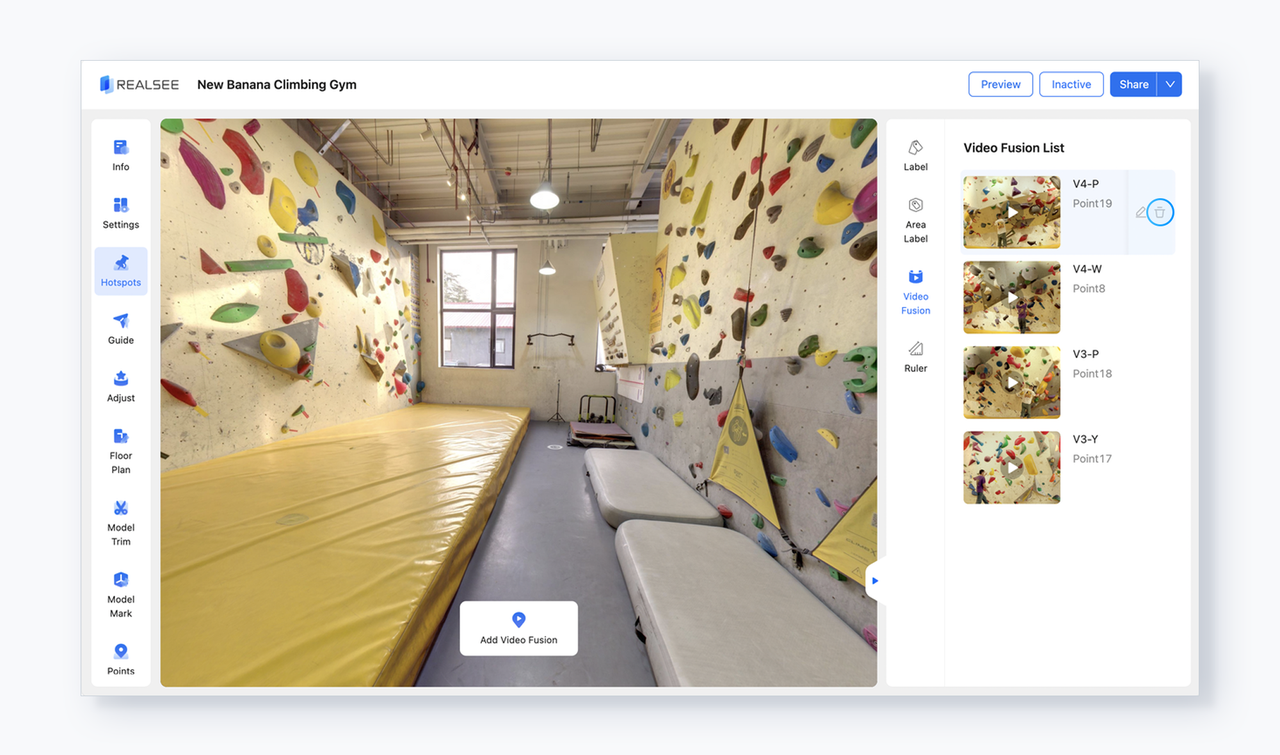
- Log in to Realsee Console: Select your processed 3D tour and enter the Editor. Click on Hotspots-Video Fusion to begin integration.
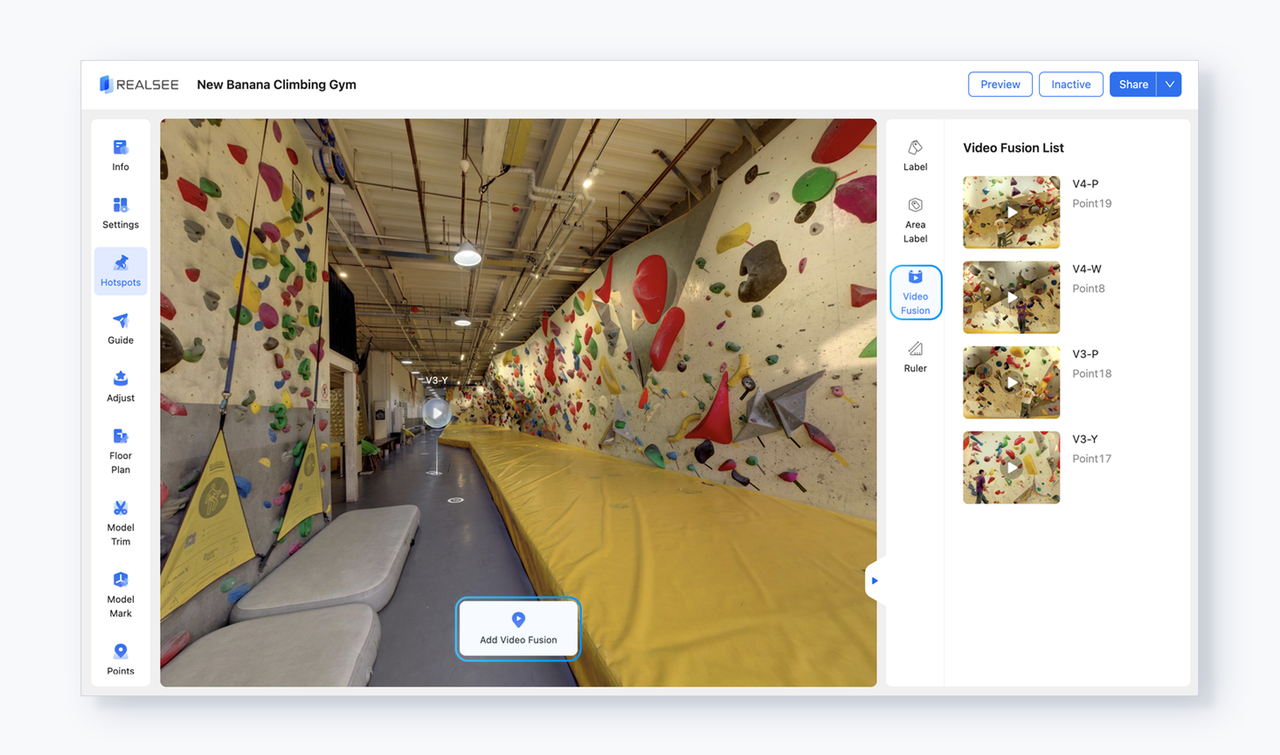
- Navigate to the desired point where you want to add the video and click Add Video Fusion to upload the corresponding video.
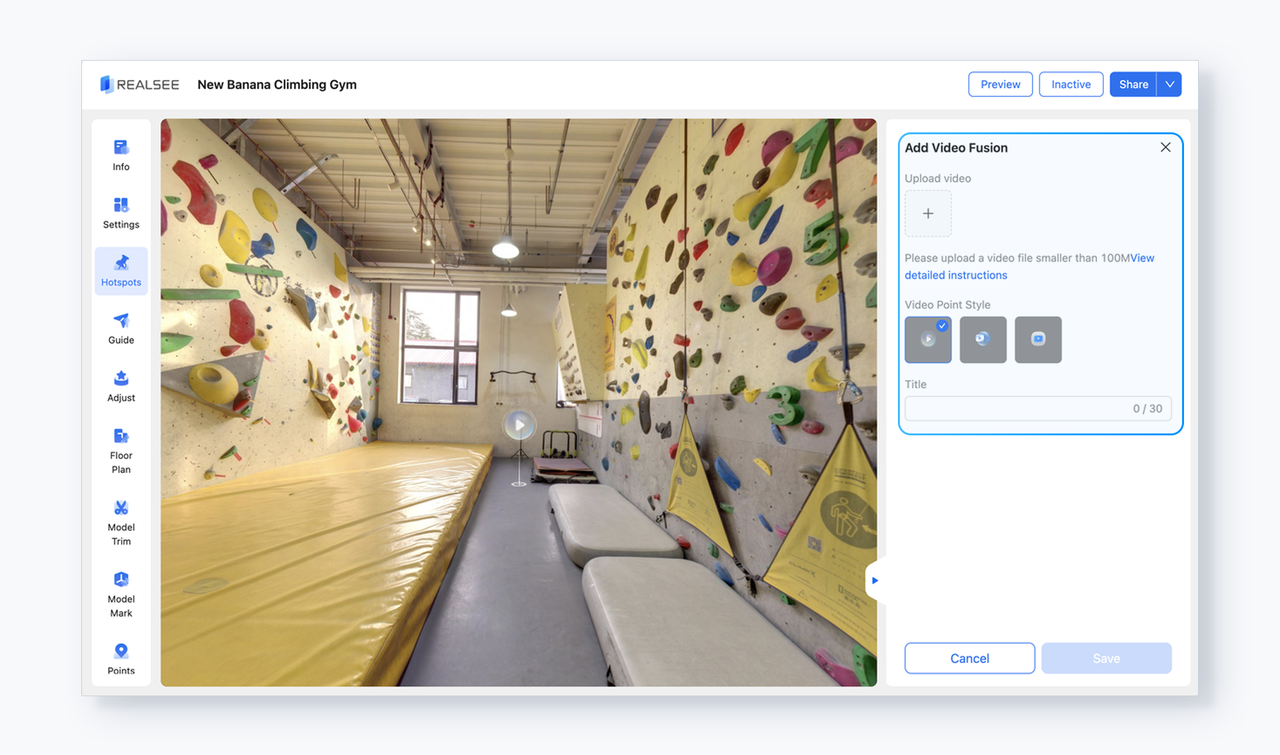
- Click Save, and the system will automatically blend the video with the panorama. This process may take 2 to 30 minutes, depending on the video size and scene complexity. You may navigate away from this page during processing and return later to check the results.
- The completed results will appear in the right sidebar. Click to preview the effect. If you are not satisfied with the blending, click the trash icon to delete it.
FAQ
- Why did my video blending fail?
Please check if the video capture location matches the scanning location of the blending spots. Misalignment can lead to failures. - Why are the edges of my video blurred after blending?
Blurring occurs if the panorama capture range exceeds the video frame. Please keep motions within the video frame to minimize this effect. - Why did my video upload fail?
Ensure your video size is within the 100MB limit. Additionally, check your network connection as interruptions may occur during lengthy uploads.
Feel free to join the Realsee Creator Community to participate in discussions with other Realsee creators, receive fresh product information, and obtain timely support.
Was this article helpful?
YesNo