Connect Aerial Pano with VR Space
Introduction
This article explains how to connect aerial panoramic images with Realsee 3D tours, providing users with a more comprehensive and immersive spatial experience.
Editing Steps
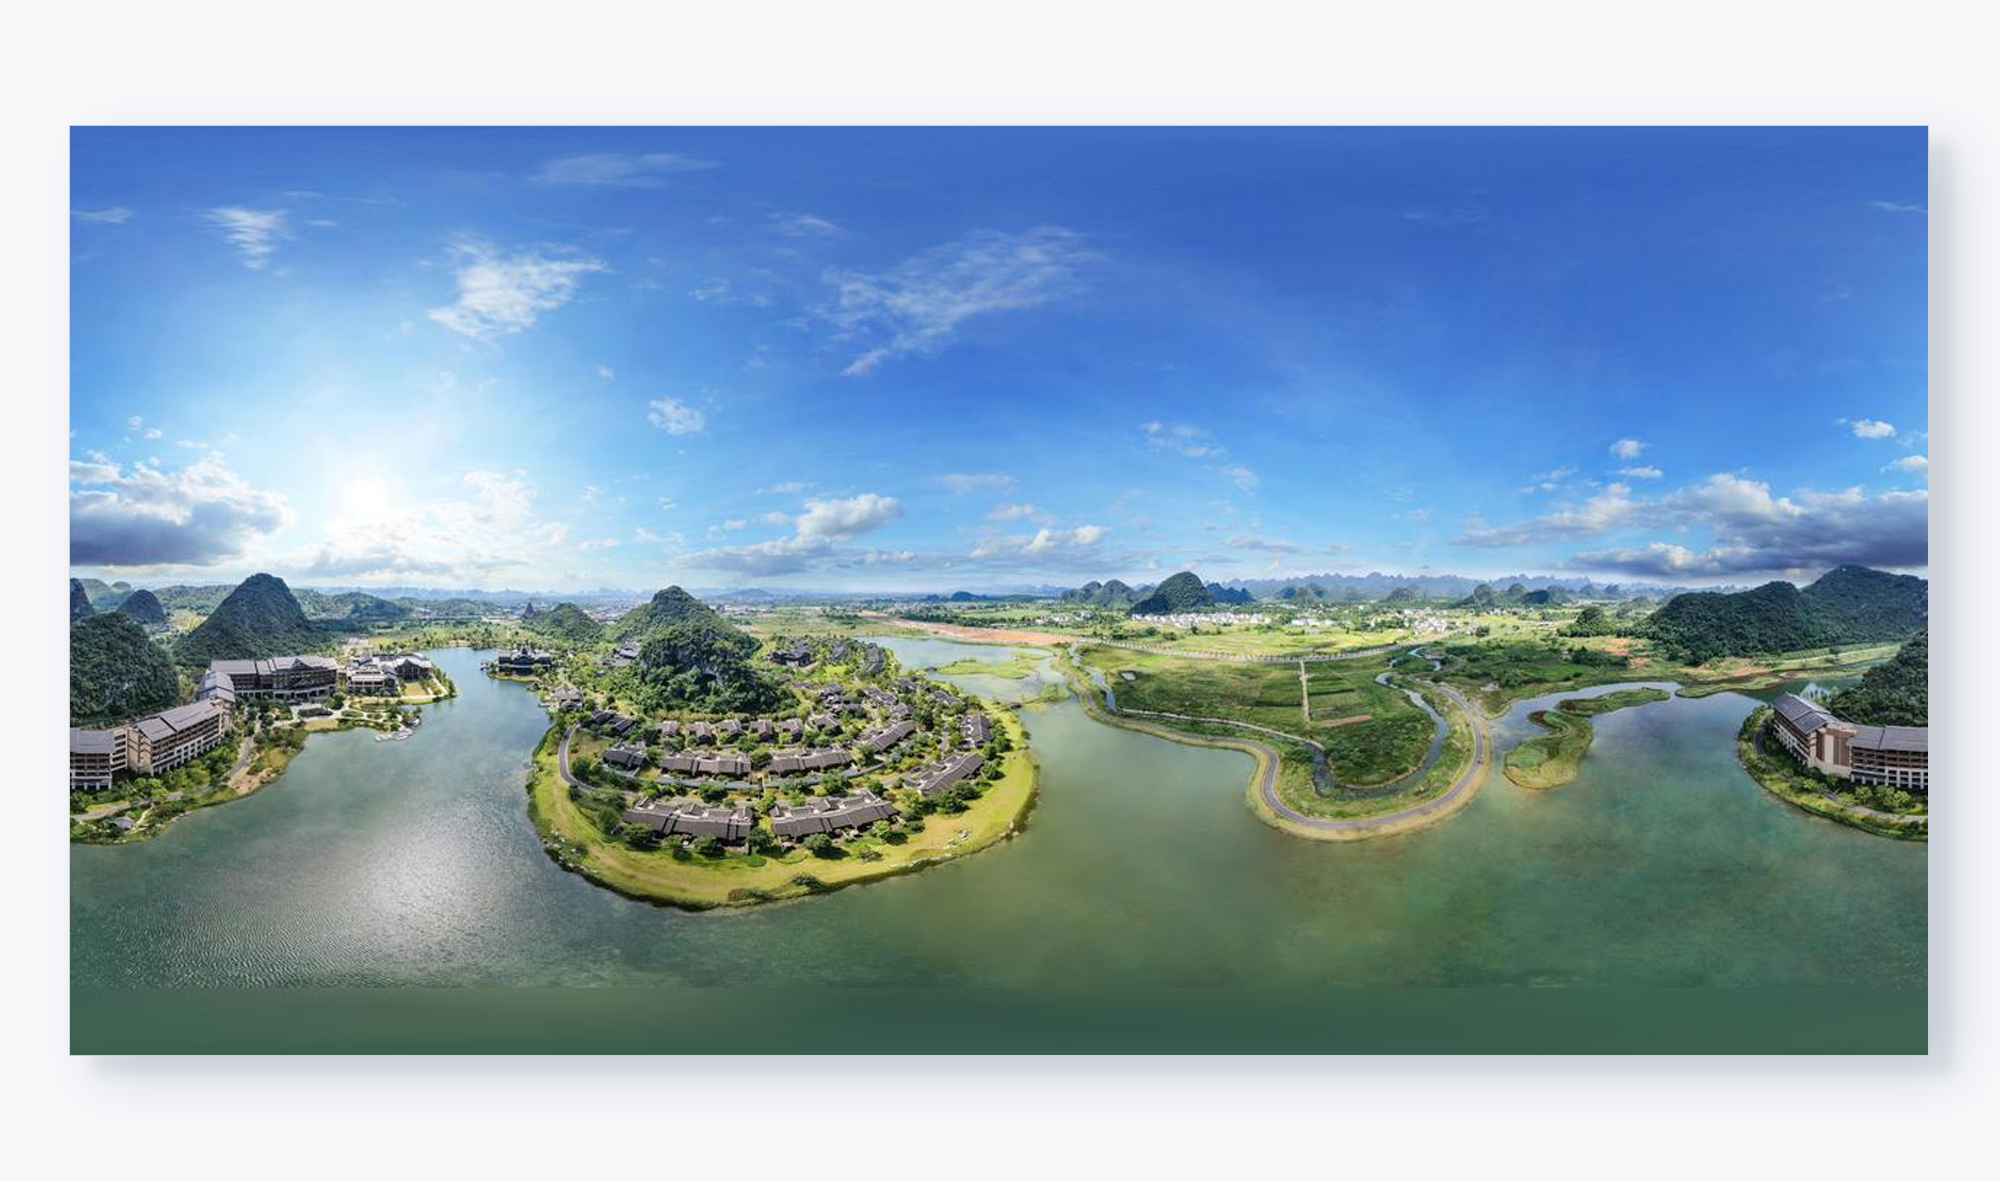
Step 1: Capture an Aerial Panorama
Step 2: Capture the Realsee 3D tours associated with the panoramic image
Step 3: Link the aerial panoramic image with the Realsee 3D tours
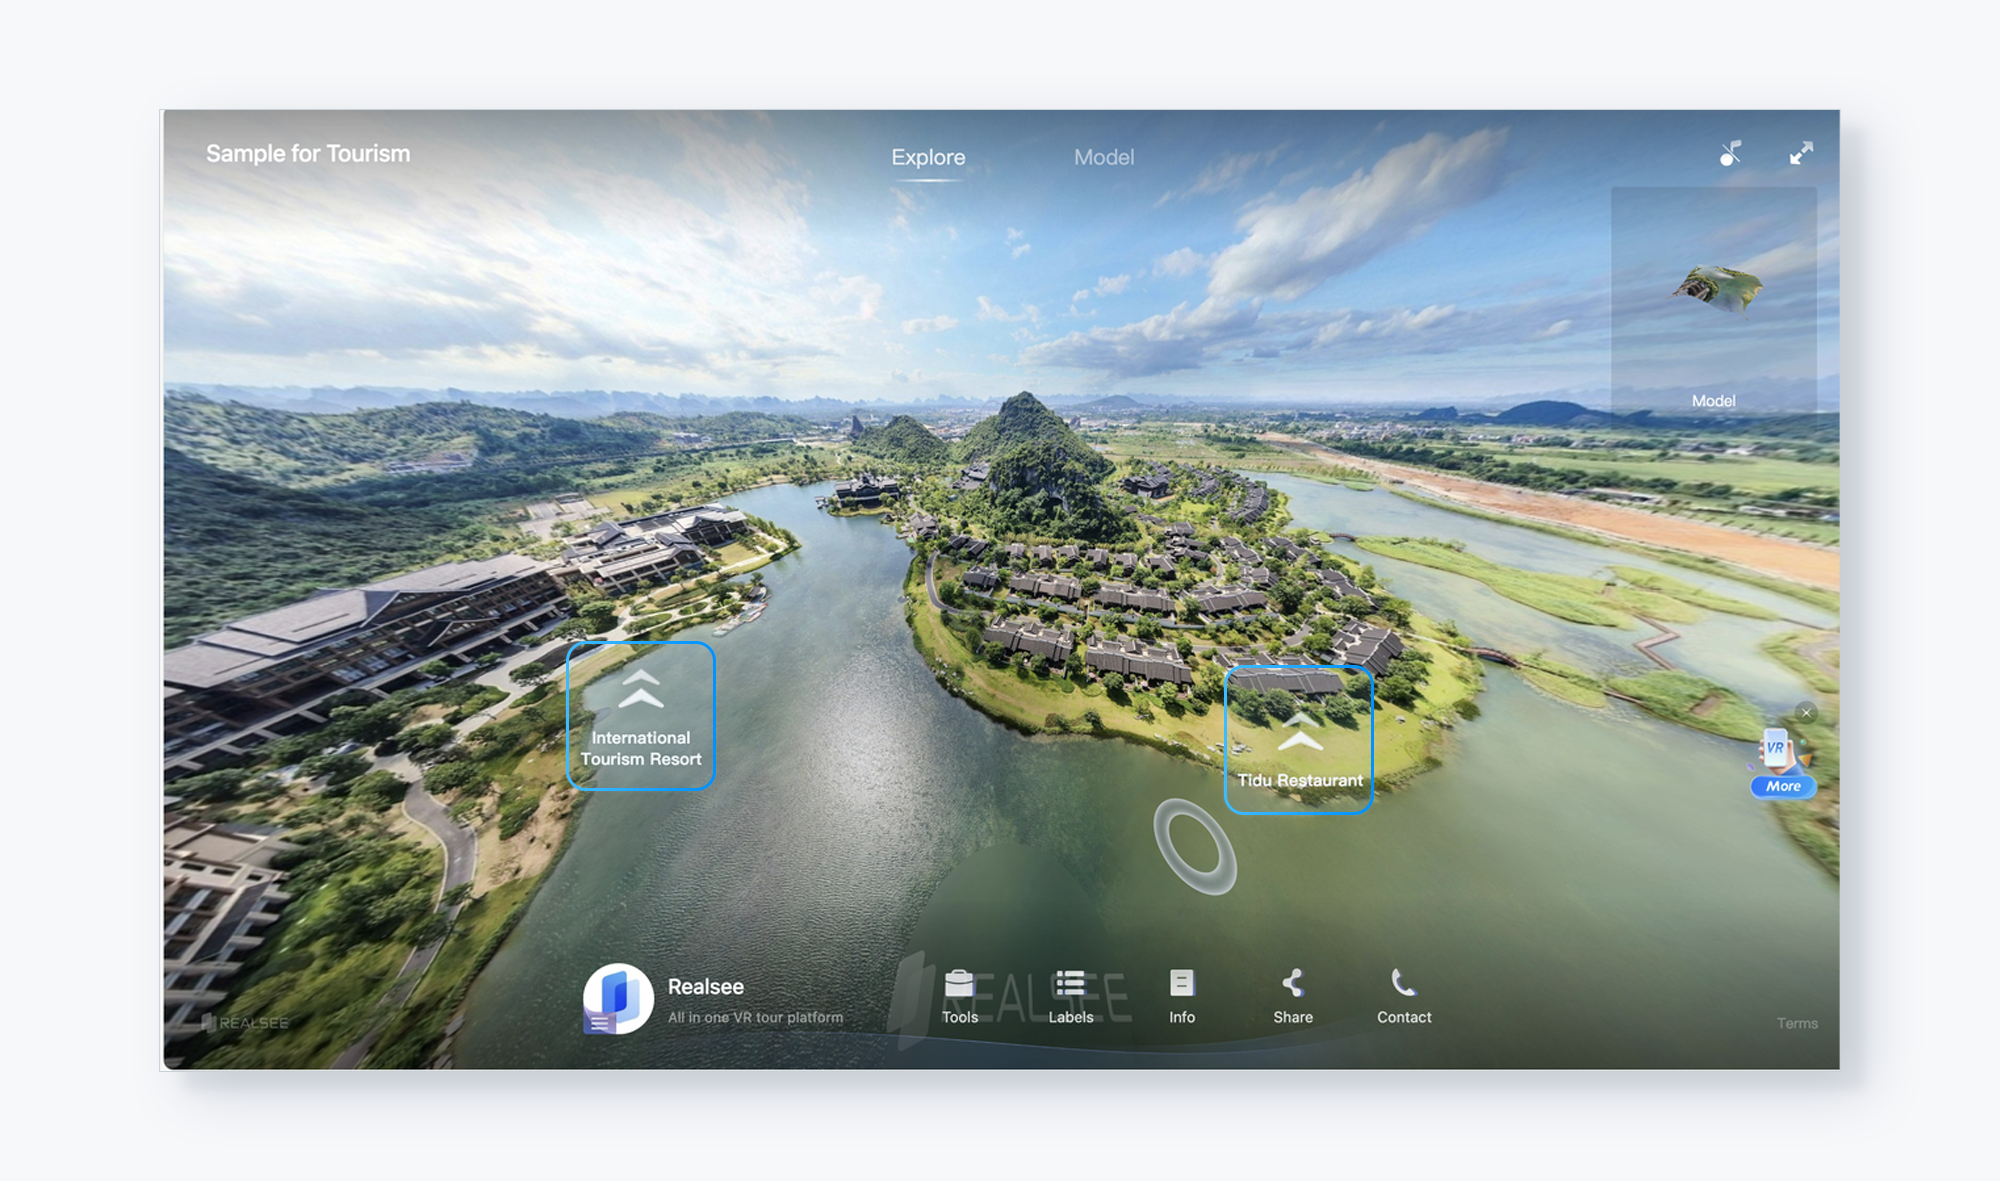
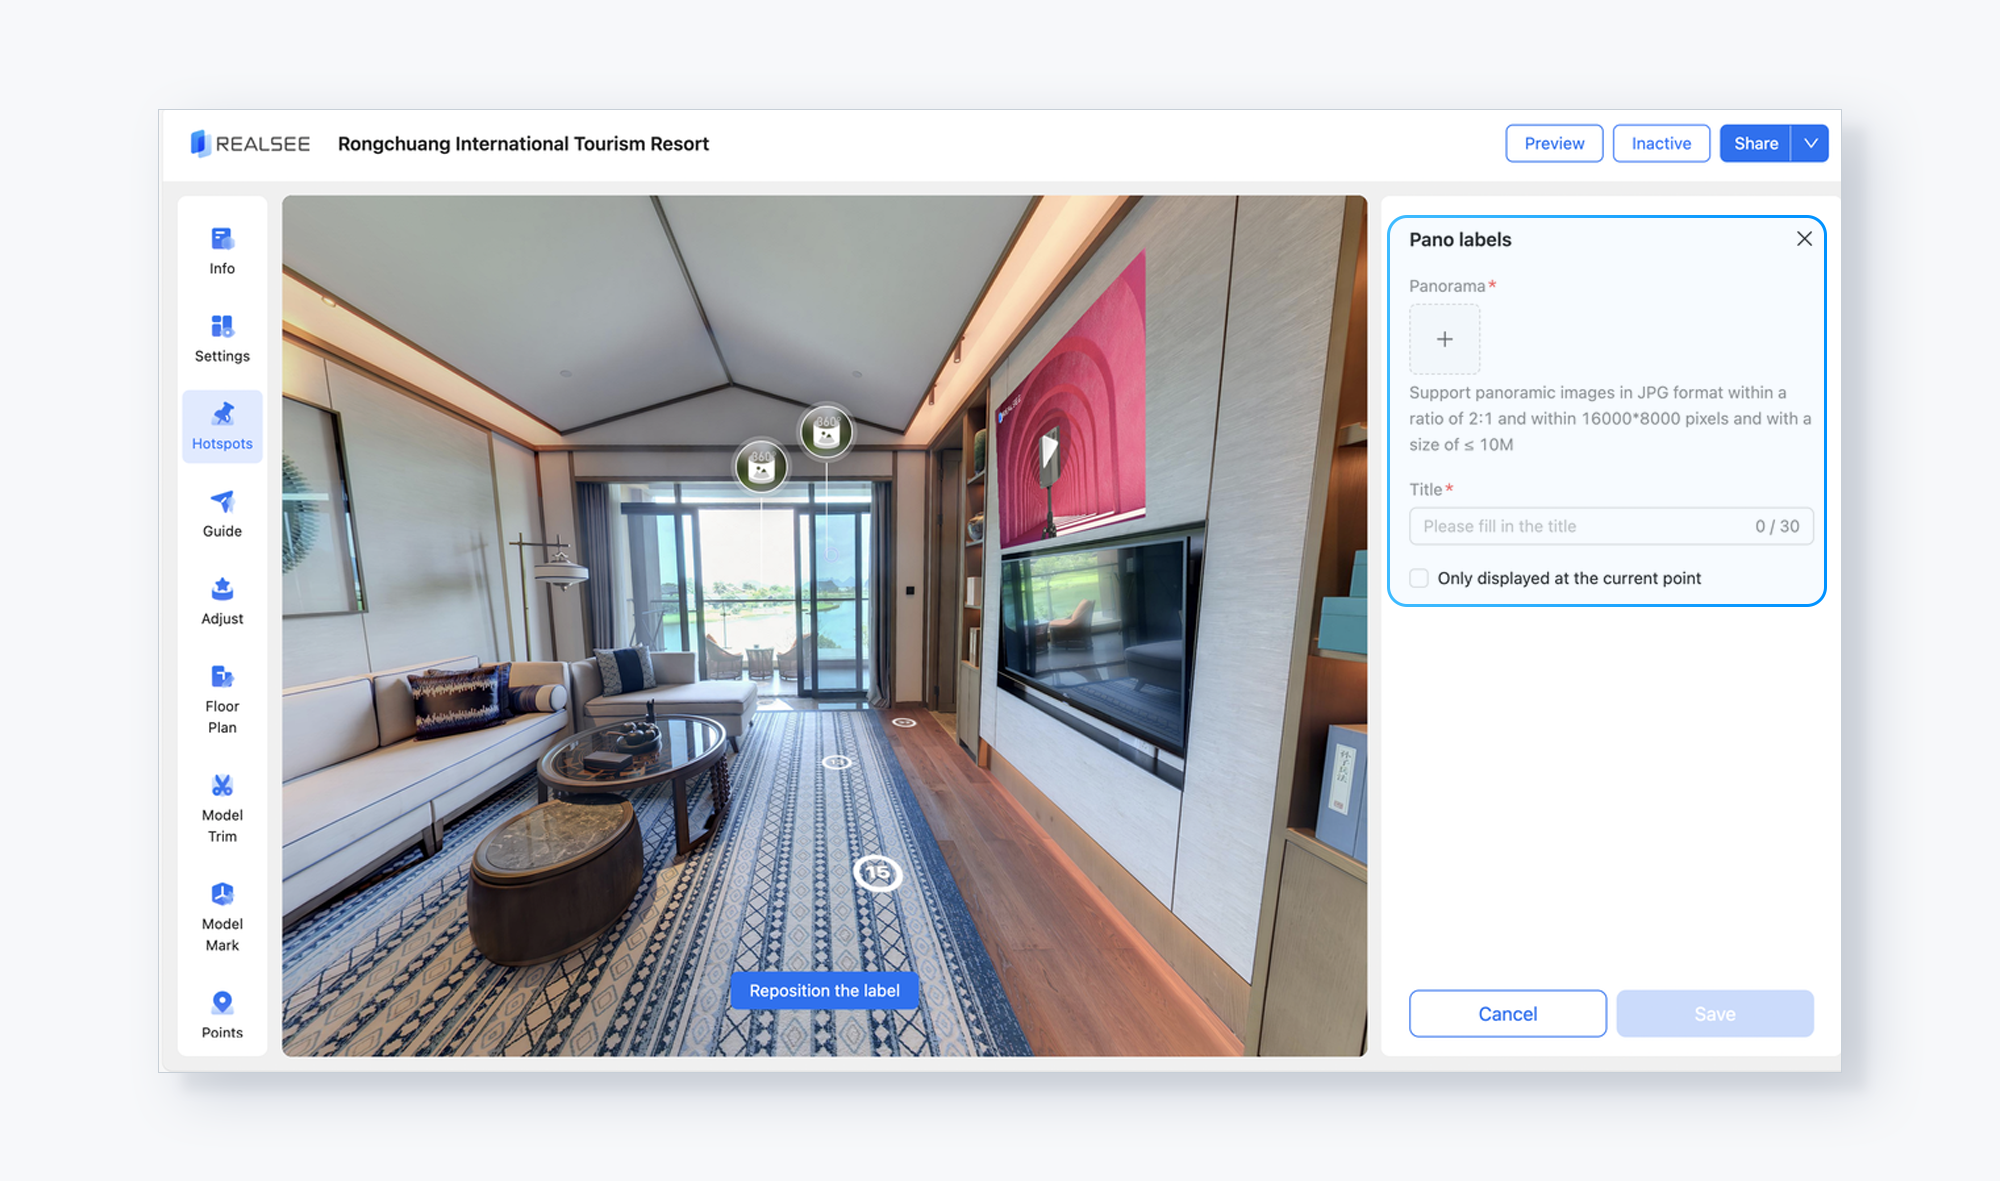
Method 1: You can add a Pano label in the Realsee 3D tours. Go to the Realsee Console, click on the corresponding project to edit, then navigate to Hotspot and select Pano label.

Place the cursor at the location where you want to add the Pano label, then click the '+' button on the right to upload the panoramic image. Enter the title and click Save.
Method 2: You can create a separate Realsee 3D tour from the aerial panoramic image and link it to other ground-level Realsee 3D tours.
- First, use Pano to 3D function to upload the aerial panoramic image and generate an aerial Realsee 3D tour. https://realsee.ai/GjVVpAbK (Note: This tour is generated from the aerial panoramic image mentioned above.)
- Then, add a Space Label at https://realsee.ai/GjVVpAbK to link to other Realsee 3D tours. Go to the Realsee Console, click on the corresponding project to edit, then navigate to Hotspot and select Space Label.

- On the right side, fill in the details of the 3D tour you want to link, including:
- The title for the space label.
- The title of the 3D tour to associate (Once entered, existing corresponding 3D tours will be recognized, and you can simply select one).
- After selection, a preview of the chosen 3D tour will appear. You can click to adjust the initial view.
- Once all information is completed, click Save.
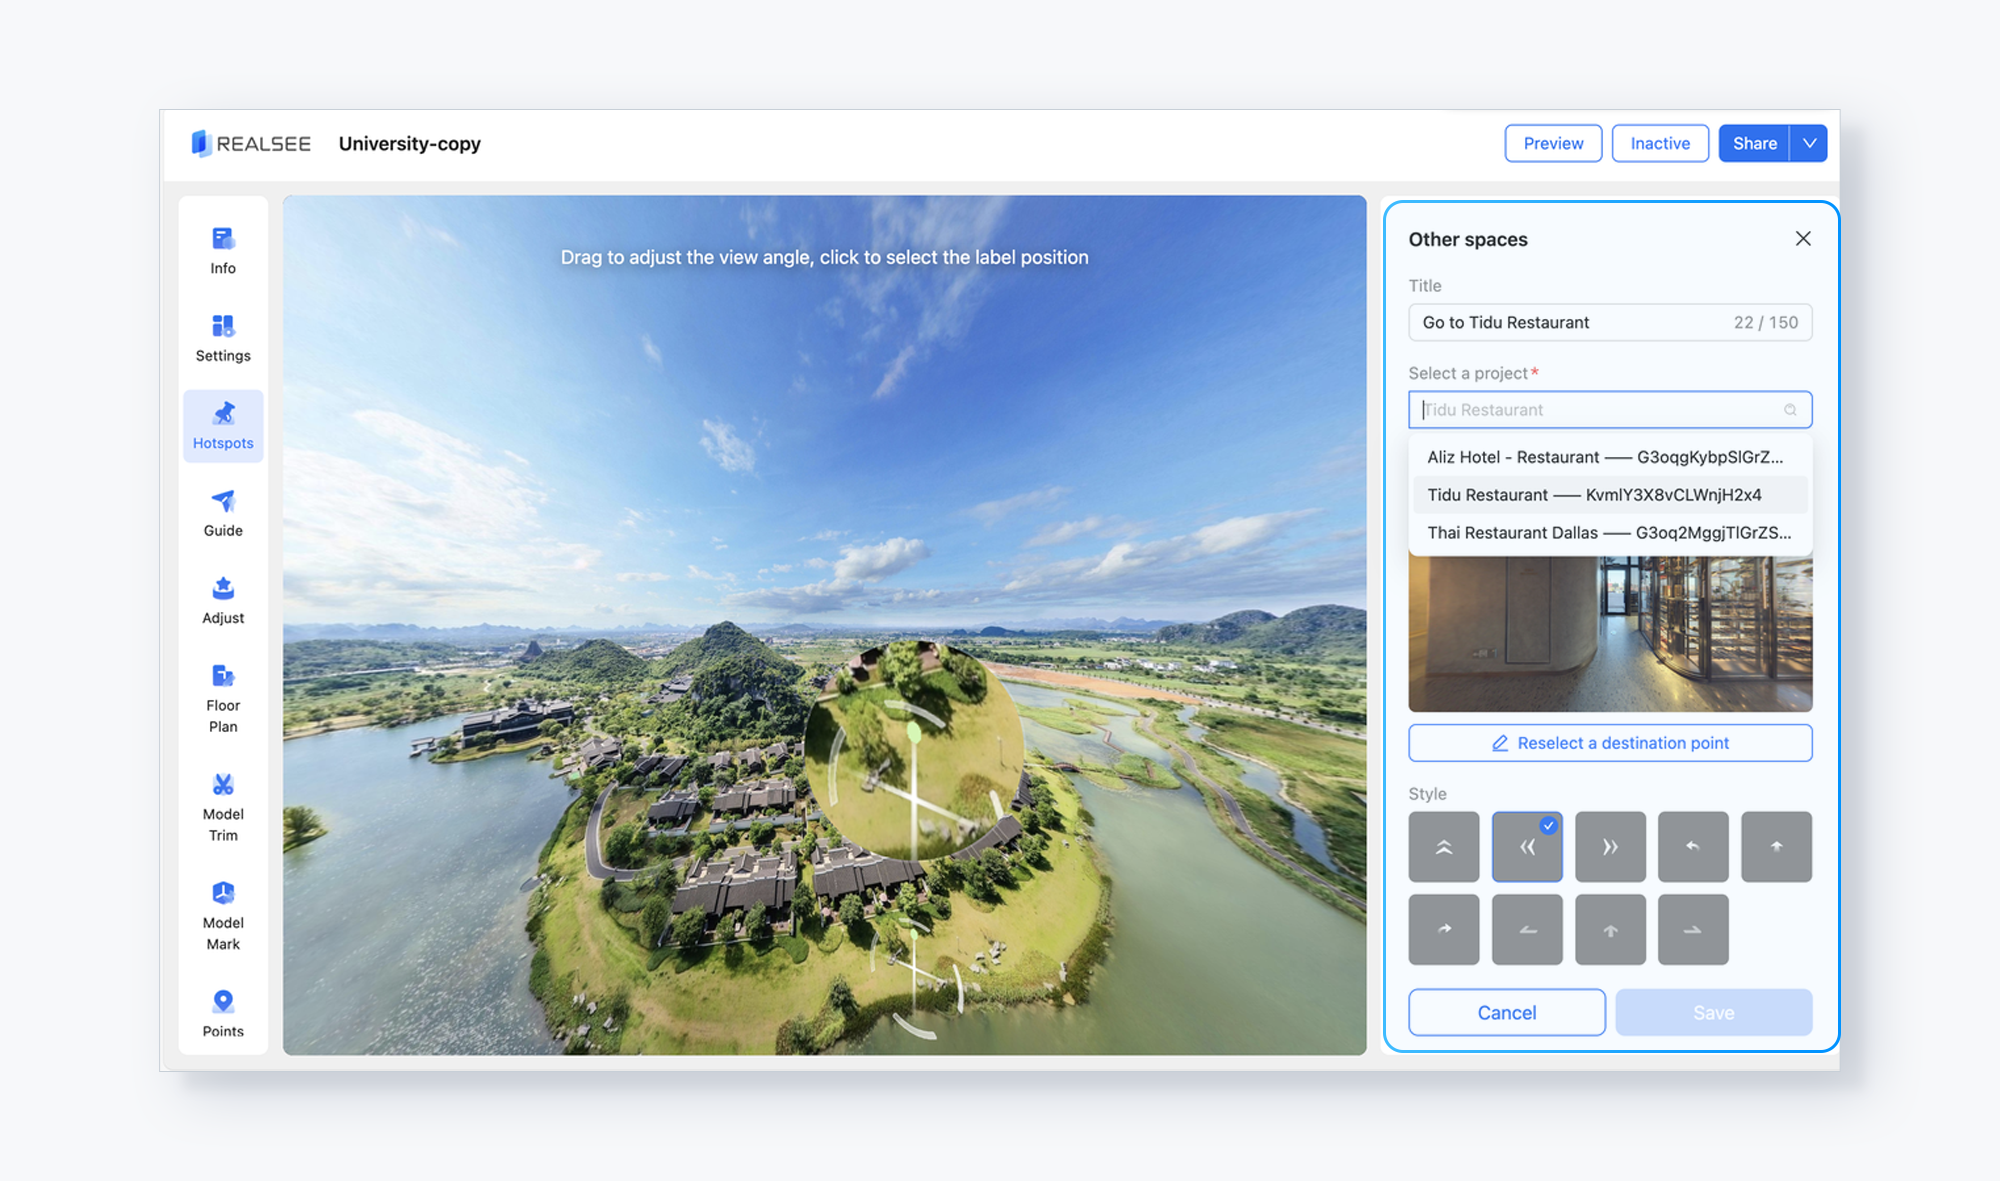
- You can link multiple 3D tours. All associated tours will be visible in the Label List.

Final Effect:
After linking the 3D tours, the effect is as follow: You can click the two arrows to enter the corresponding ground-level 3D tour spaces. https://realsee.ai/EOxxbze2