Multi-floor Space Capture with the G1 Device
Overview
This article serves as a comprehensive guide to multi-floor space capture with the G1 device, detailing step-by-step operational workflows to obtain an accurate and seamless VR space.
Scanning Guide
【First Floor Scanning】
After creating a new project, proceed with the first-floor scanning following G1 standard capture procedures.


Once the first floor is completed, continue scanning on the staircase. Adjust the tripod legs to a "two-long, one-short" configuration to ensure the device remains level on the stairs.
Note: All staircase captured points should be assigned to the first floor.
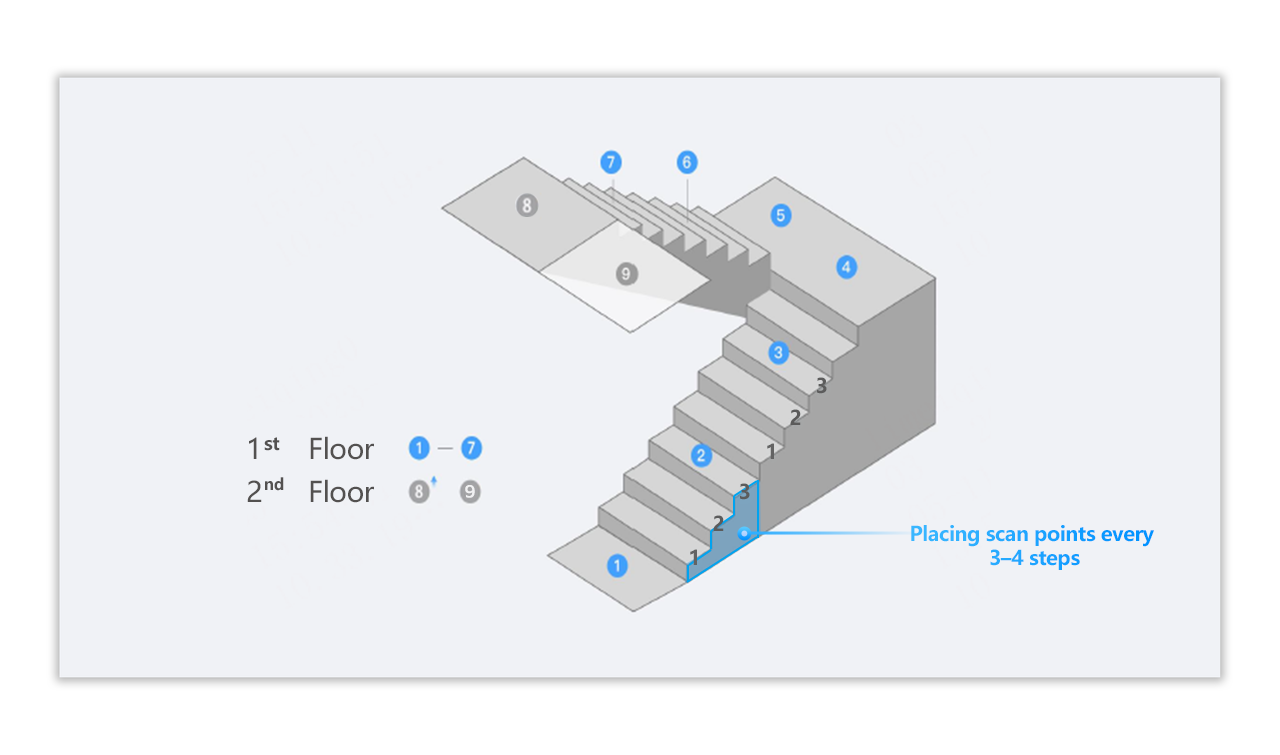
It is recommended to place scanning points every 3–4 steps—spacing them too far apart may affect the smoothness of exploring in VR Tour.

【Second Floor Scanning】
After completing the last scanning point on the staircase, tap the Floor Management function in the upper-right corner. Then, click Settings and select Add a new floor (up) or Add a new floor (down) to create a new floor.


After adding the new floor, begin by capturing the first point of the second floor. Proceed with the rest of the second-floor scanning following standard G1 capture procedures.

Please refer to the picture below about the detailed point placement between two levels. Points 1-7 belong to the 1st floor space, and point 8-9 belong to the 2nd floor space.