Pre-Capture Preparation of G1 Smart Gimbal
Watch this video to see how to attach your smartphone to the REALSEE G1:
Preparation Checklist
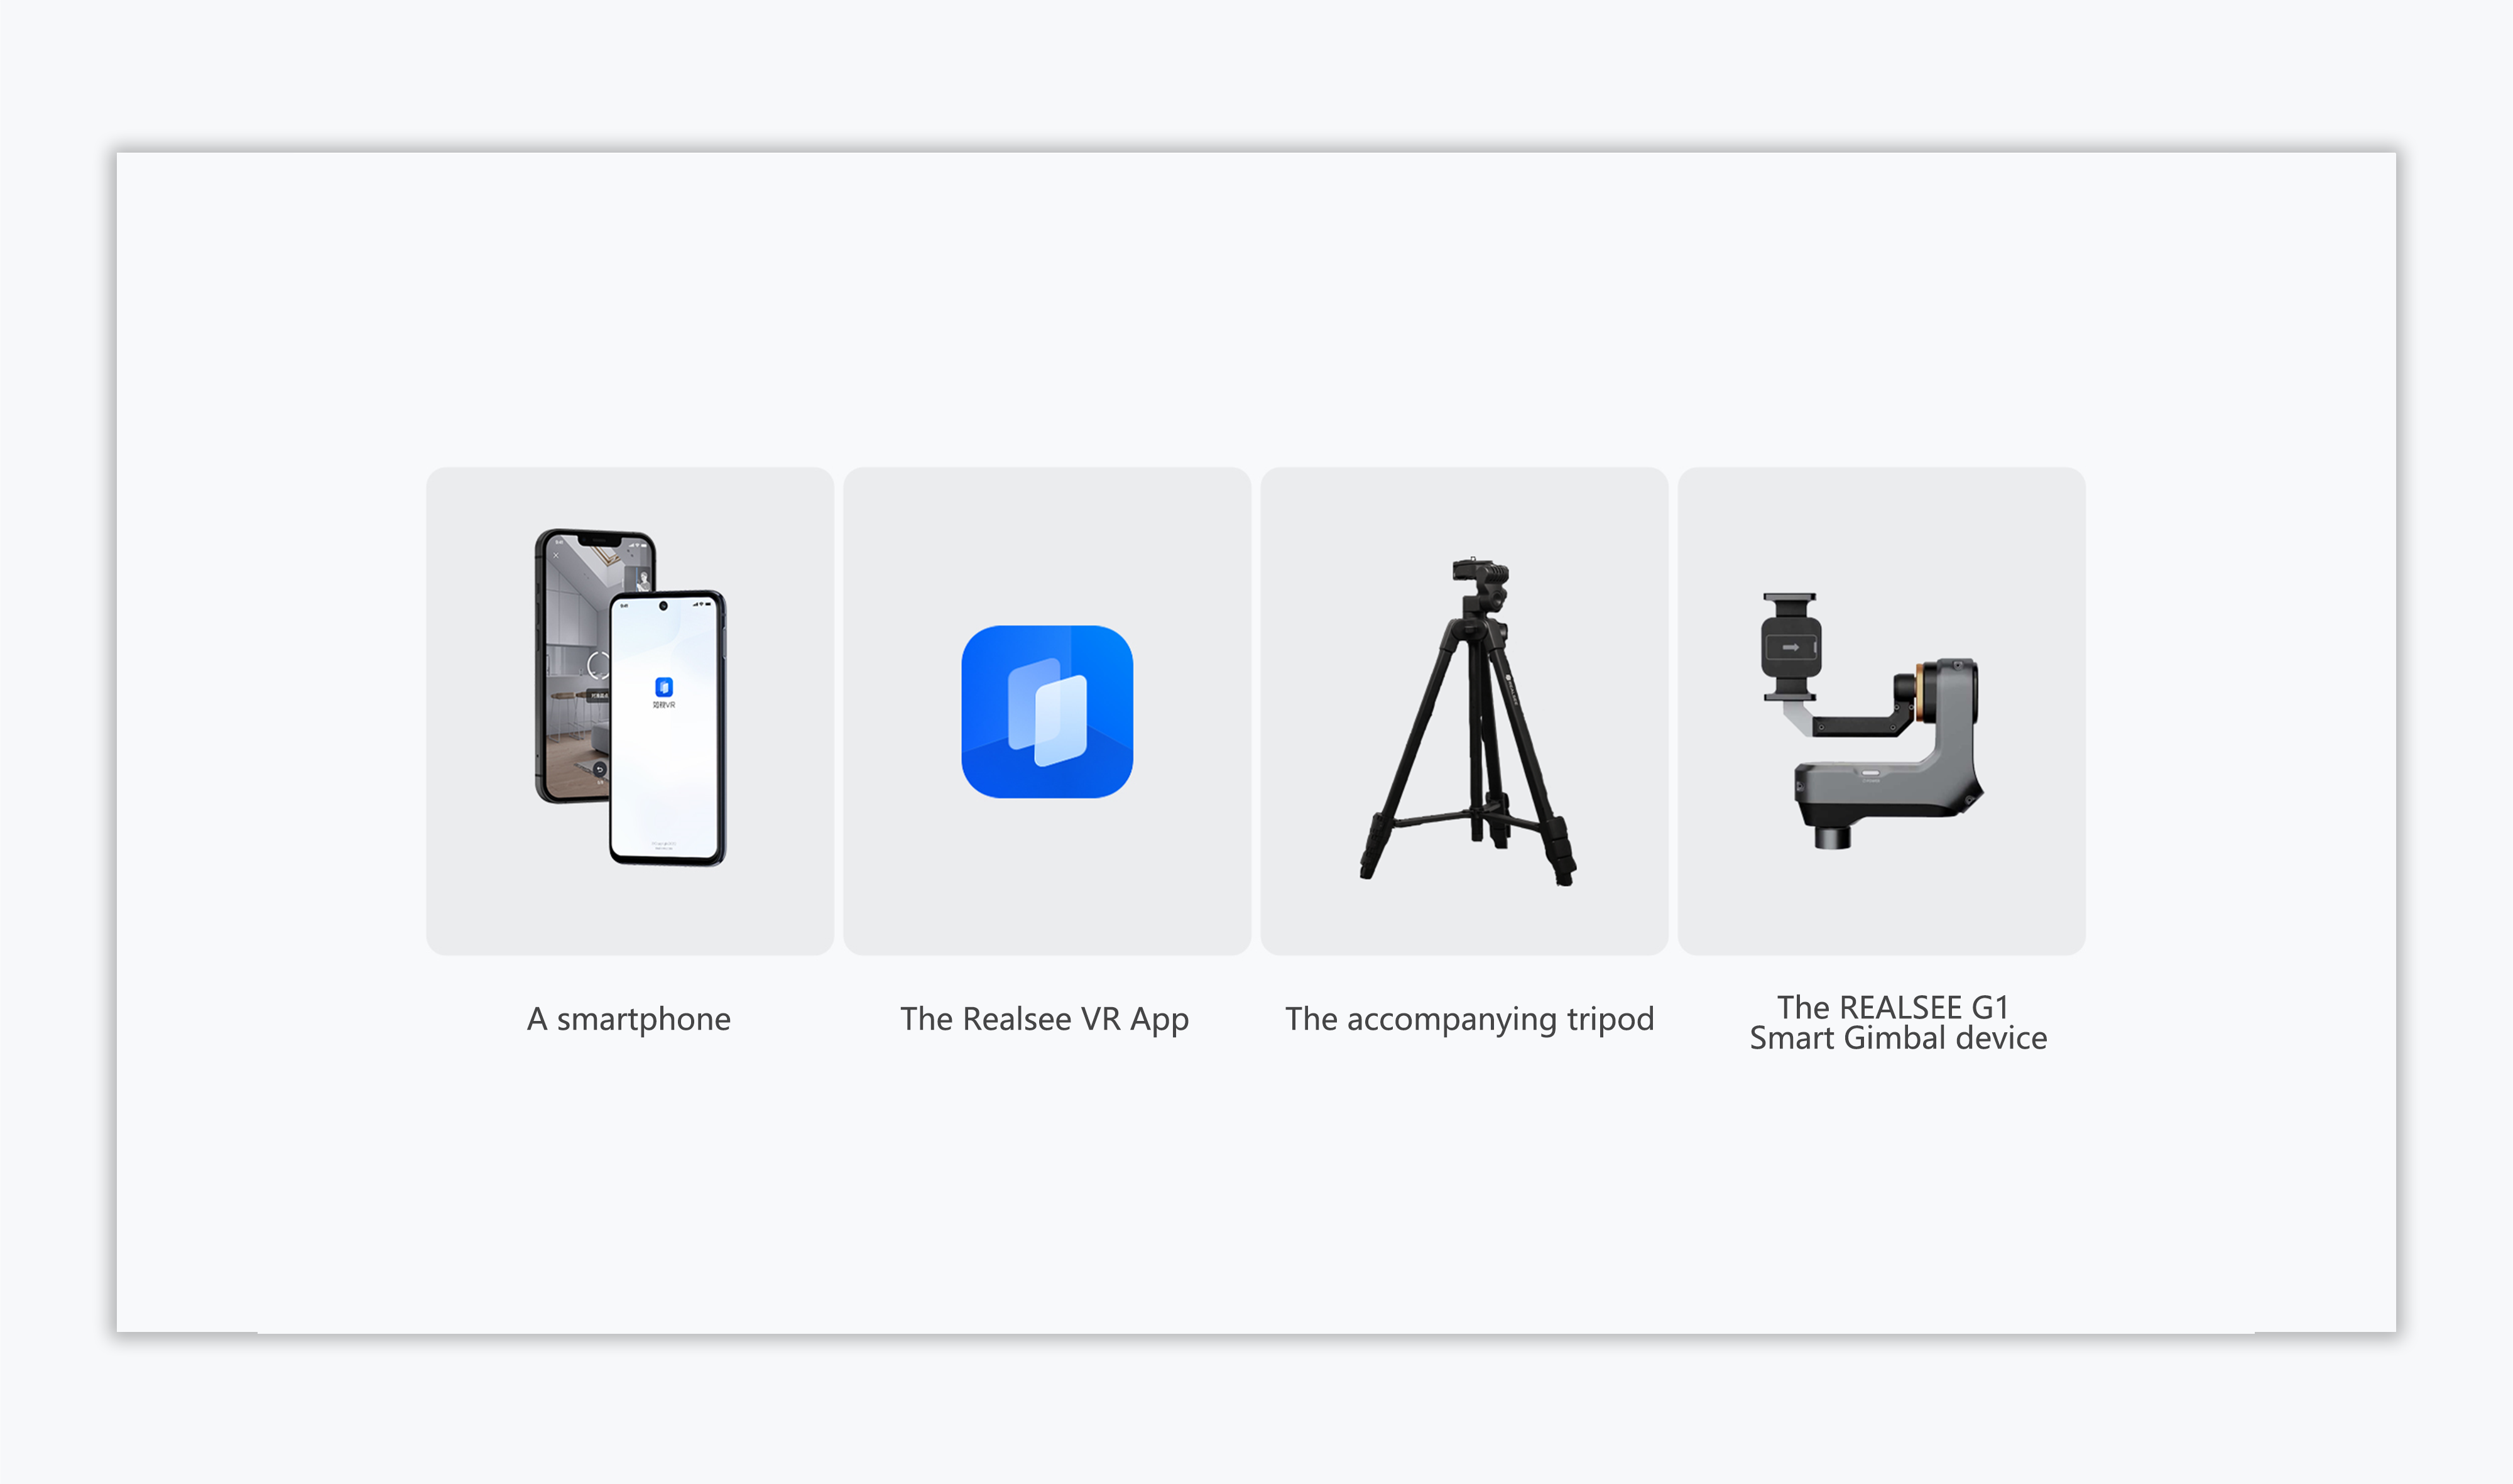
Before starting the capture process, users need to prepare the following items:
- A smartphone
- The Realsee VR App (downloaded and installed)
- The REALSEE G1 Smart Gimbal device
- The provided tripod
1.Mobile Phone Requirements
The REALSEE G1 is compatible with most mainstream smartphones on the market. The quality of the VR capture depends on the phone specifications. Phones with higher-resolution cameras will produce clearer panoramic images.
- iOS: iOS 13.0 or later, iPhone 8 series or newer
- Android: Android 8.0 or later, with at least 4GB RAM
Before capturing, ensure your phone has sufficient battery life and enough storage space for the capture process.
Tip: You can check your phone's system information and available storage in your device's Settings.
2.REALSEE G1 Smart Gimbal Pre-capture Requirements
- Before capturing, charge the device using the dedicated charger. It takes 2 hours to fully charge it, and a fully charged device can operate continuously for up to 8 hours.
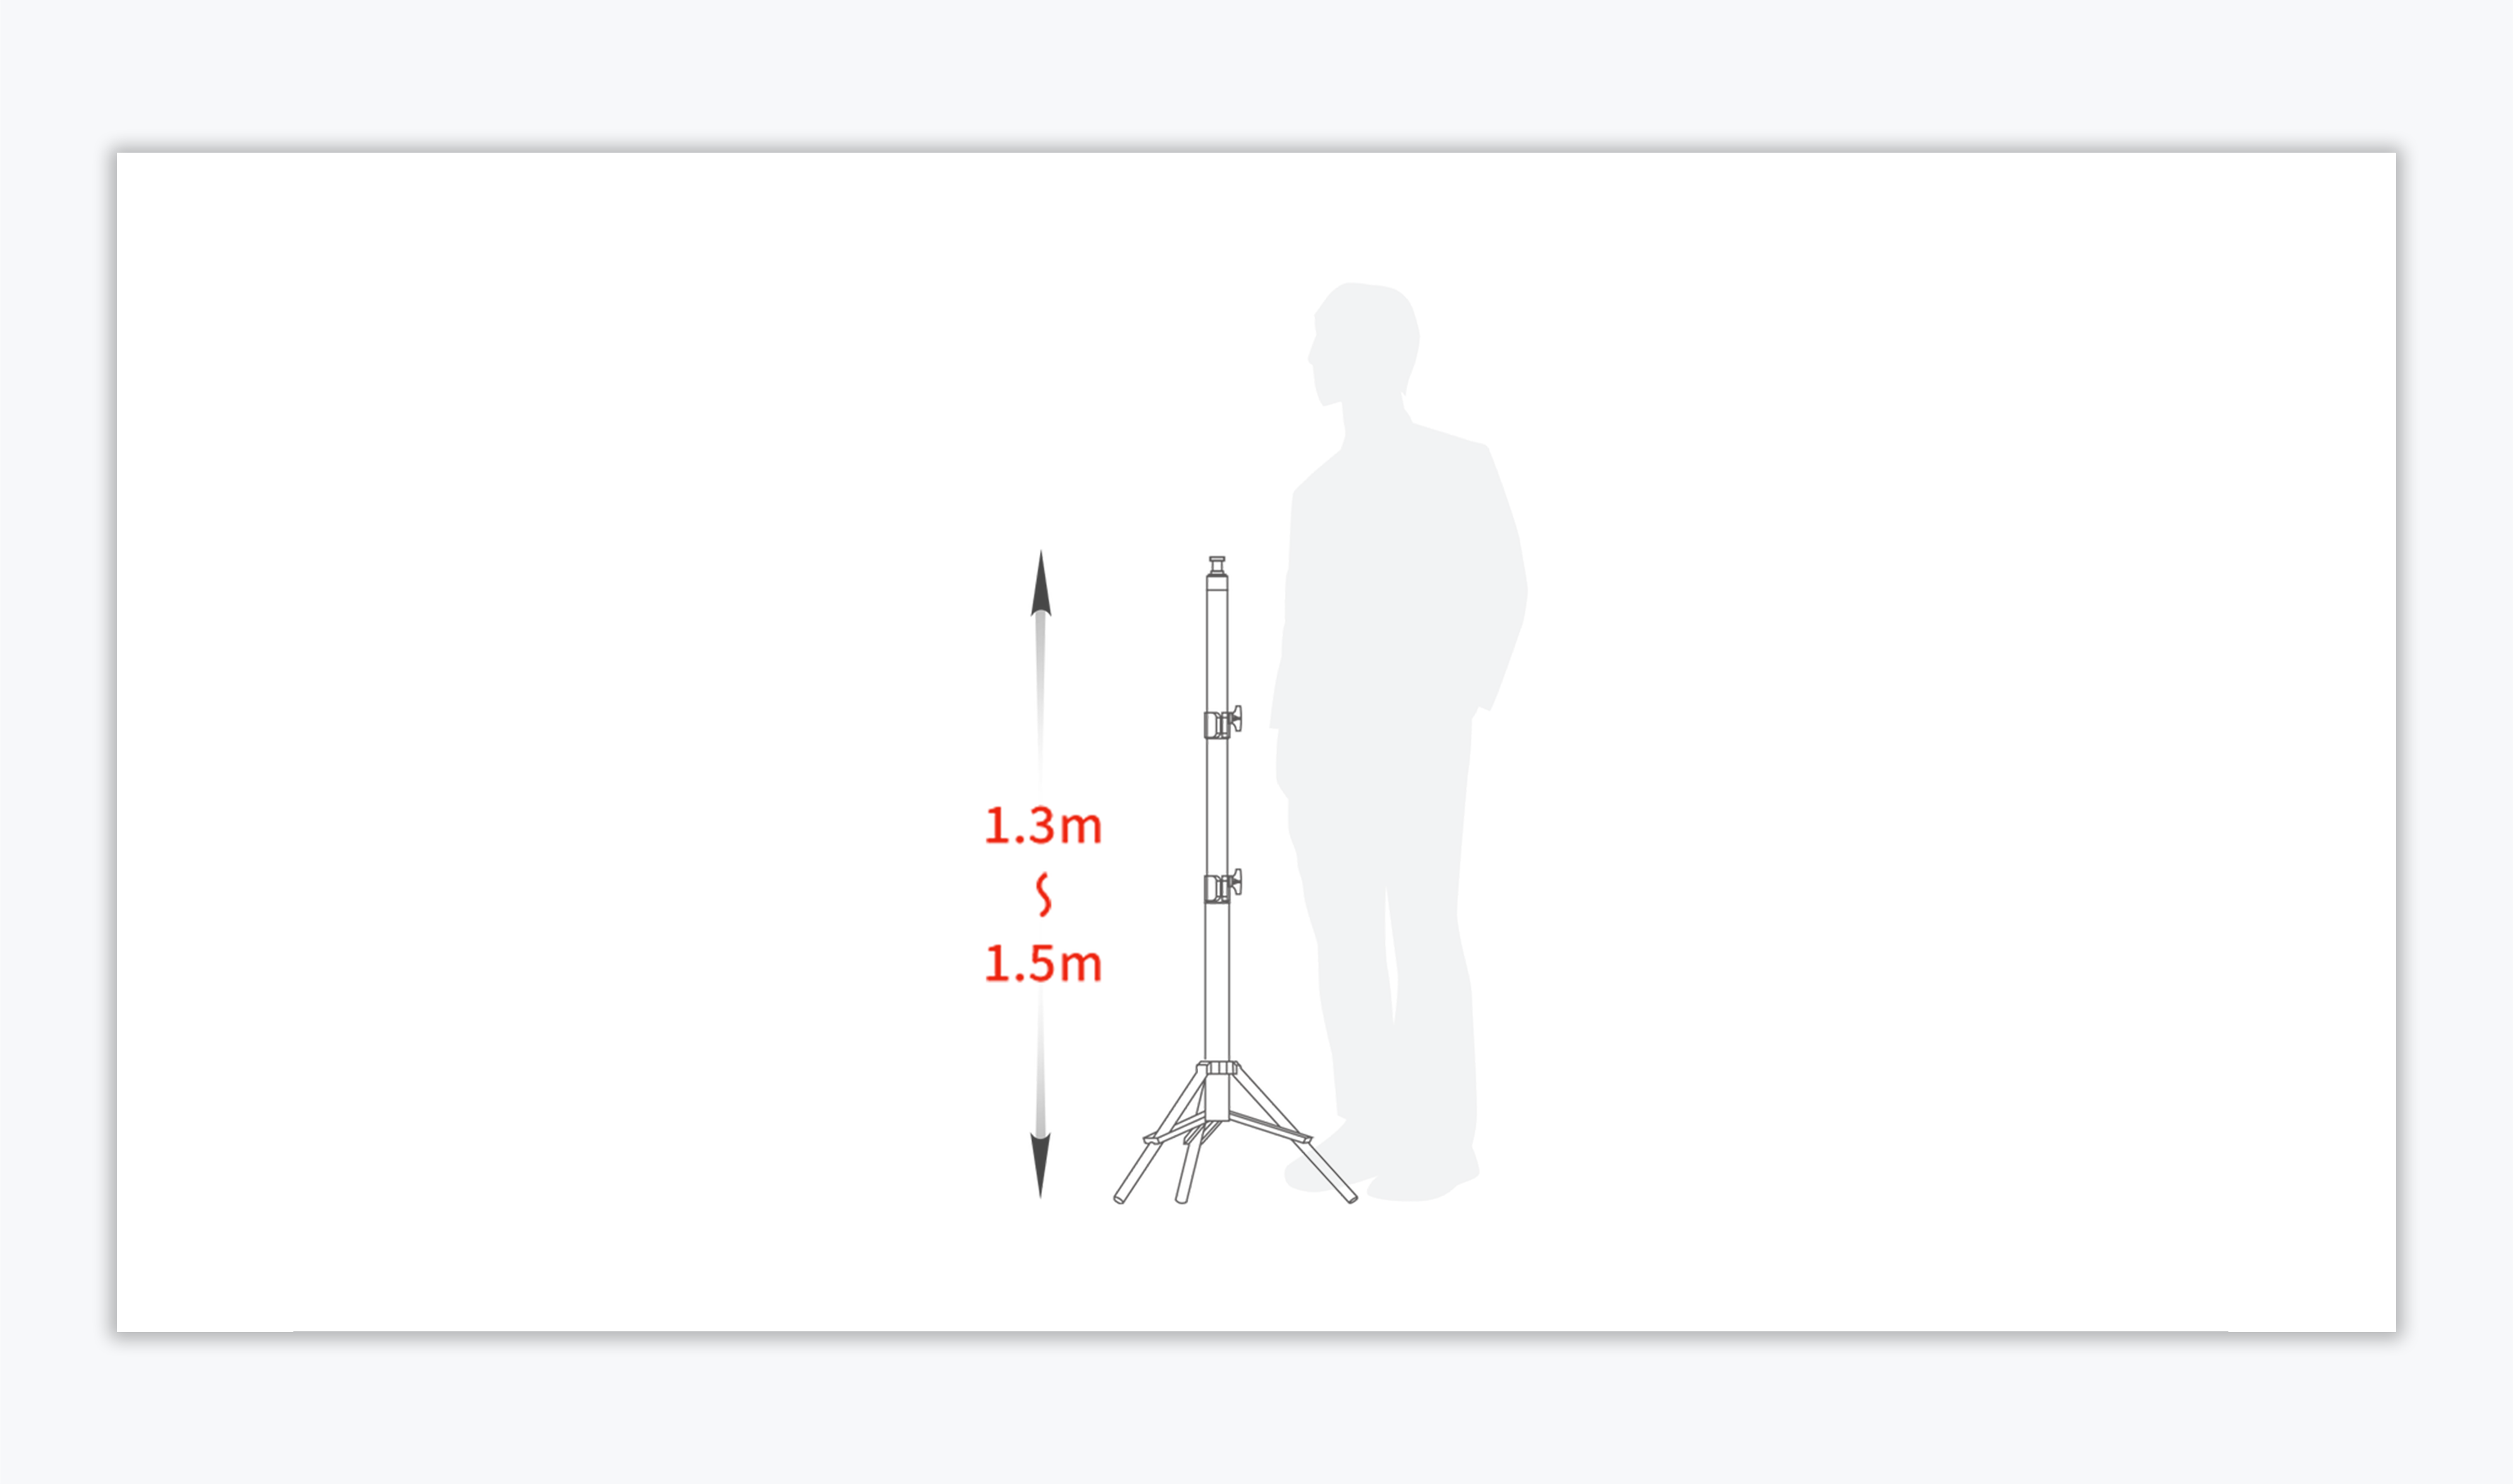
3.Tripod Installation
- The optimal tripod height for capture is between 1.3m and 1.5m.
Tip: The height of the tripod can significantly impact the quality of the captured results.
4.Identifying the Primary Camera on Your Smartphone
When using the REALSEE G1 Smart Gimbal to capture, only one camera is utilized for capturing. Many smartphones today are equipped with multiple cameras, including a primary camera and auxiliary cameras. Therefore, users need to identify the primary camera on their phone and ensure proper installation to achieve optimal capture results.
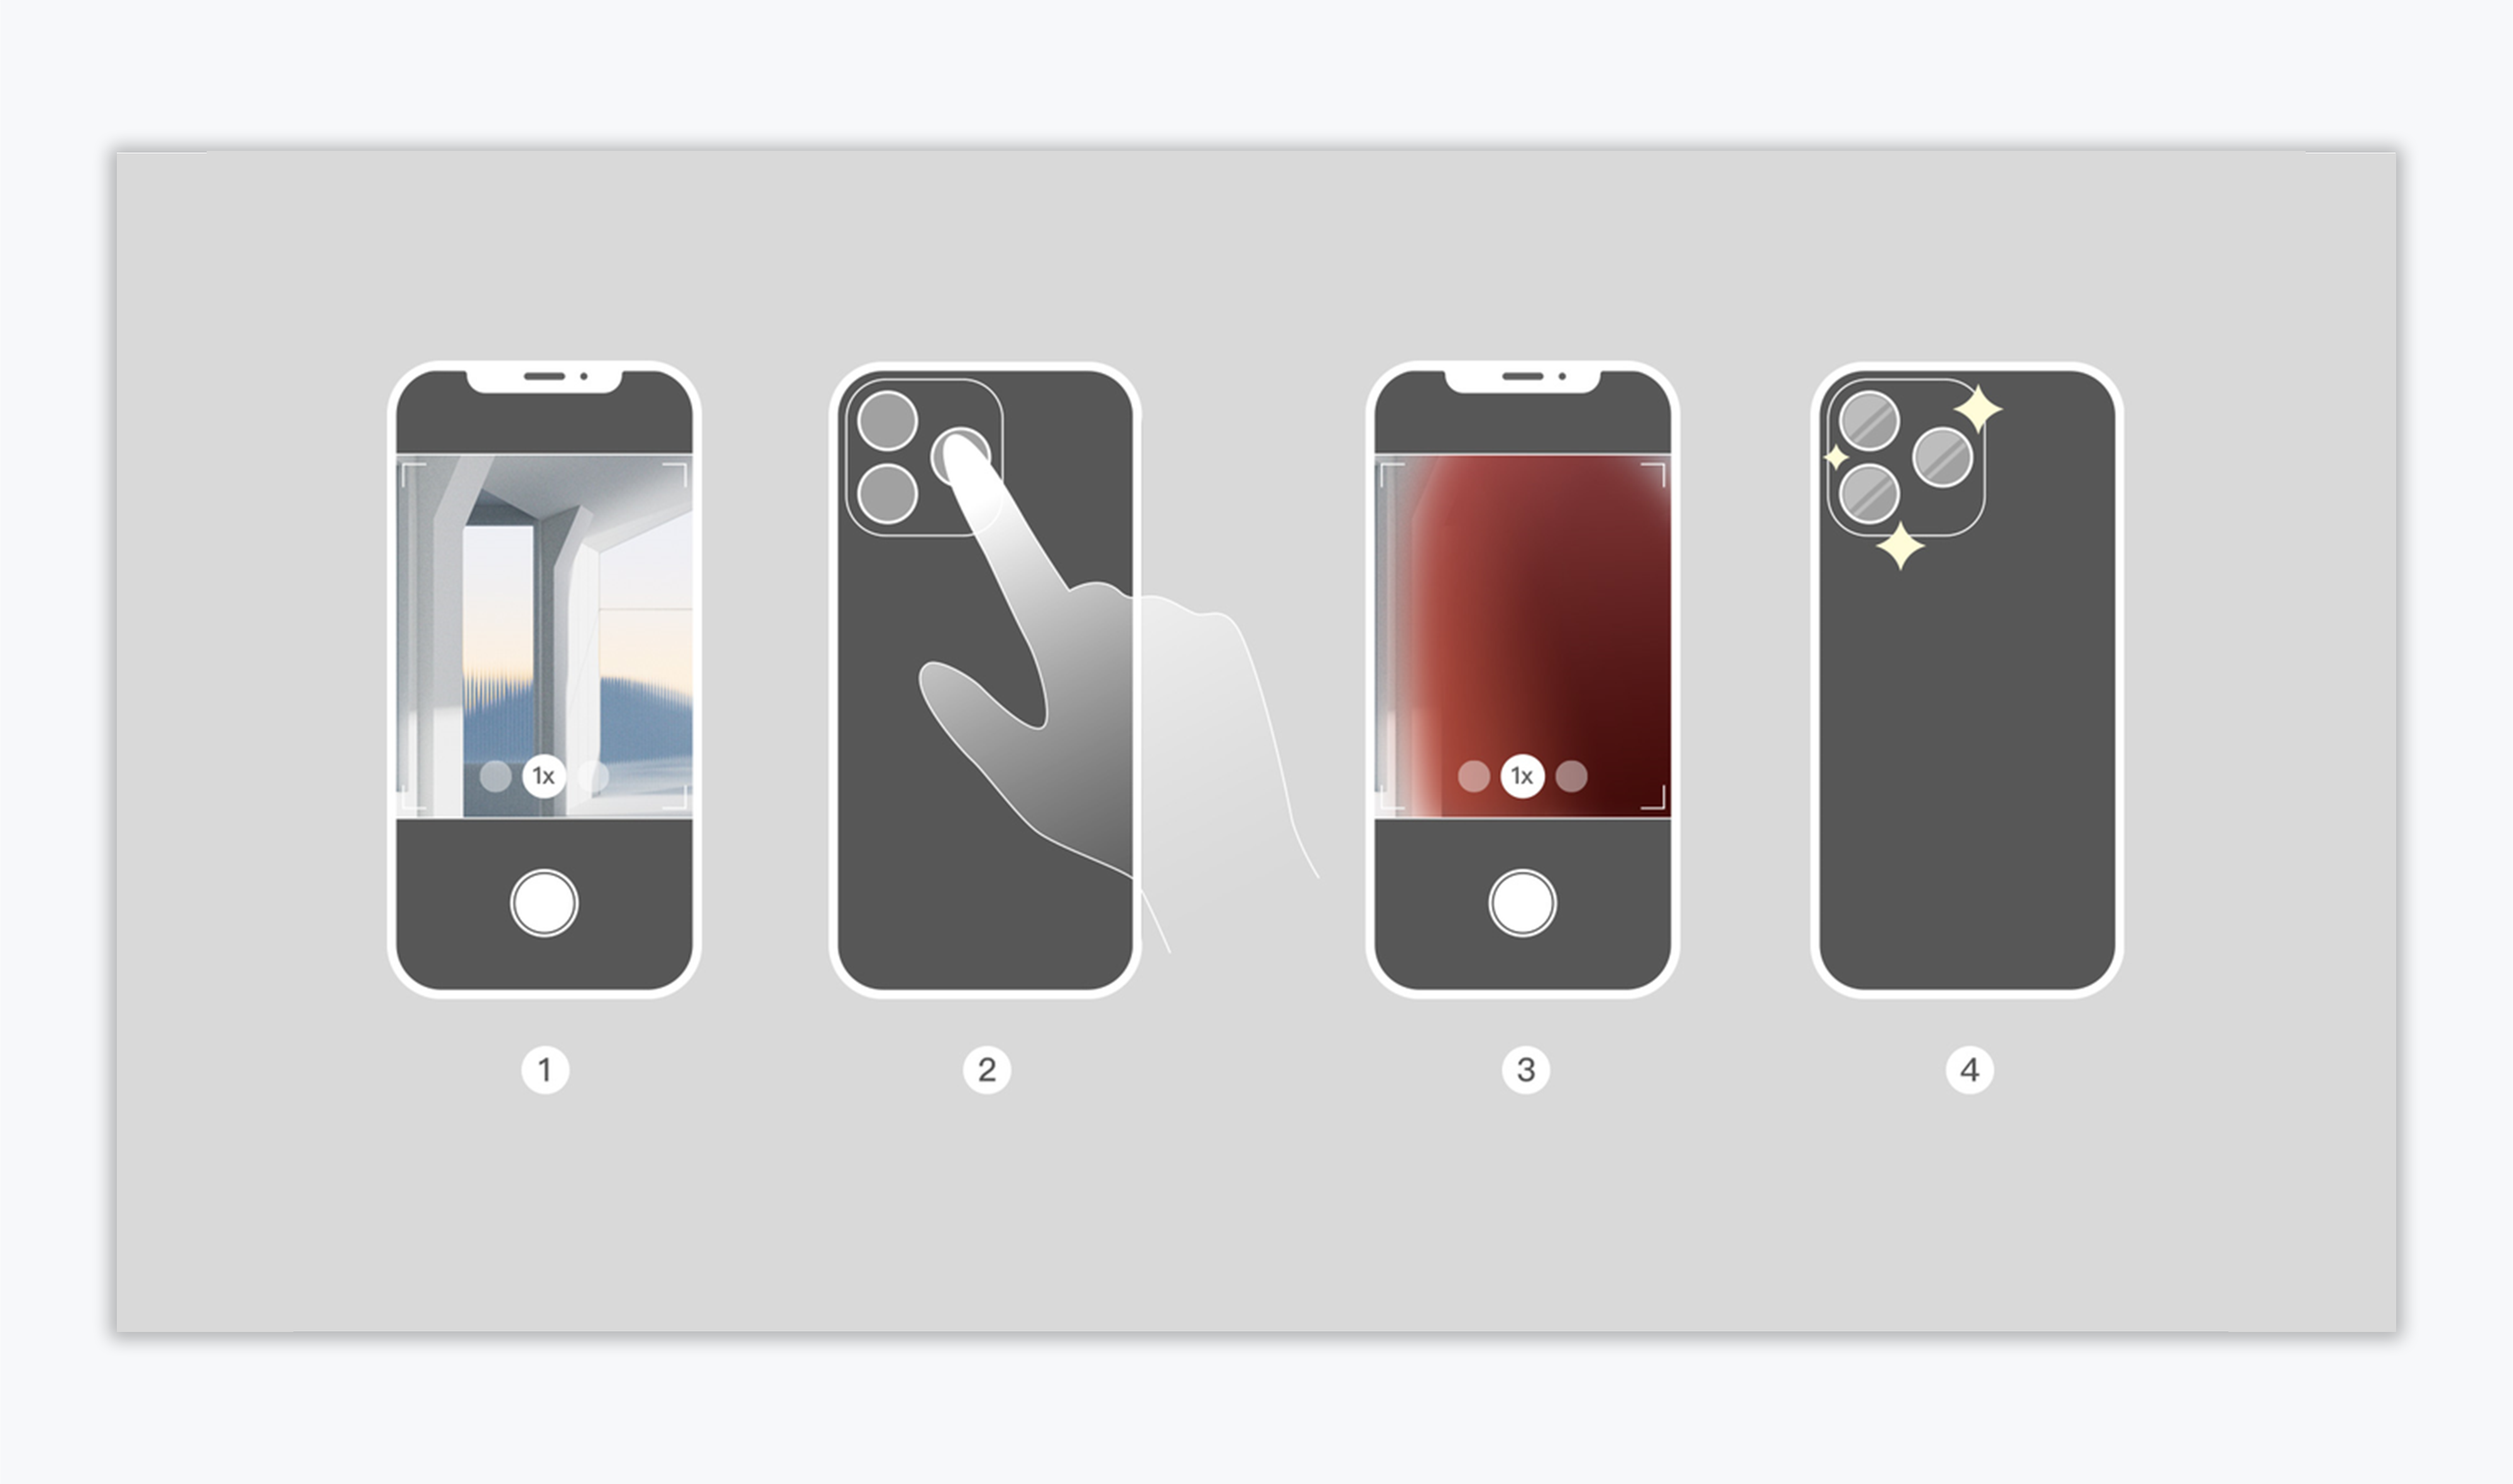
Steps to Identify the Primary Camera:
- Open the phone's camera app and switch to 1× mode.
- Use your finger to cover each camera lens one by one.
- The lens that, when covered, shows your finger in the viewfinder is your primary camera.
- After testing, remember to clean the phone's camera lens to ensure it is free of dirt or smudges. (Note: A dirty lens can negatively impact the quality of the captured images.)
5.Device Installation
- Mount the REALSEE G1 device on the tripod.
- Tighten the yellow metal washer at the bottom of the REALSEE G1 to secure the device during capture, as loosening may affect scan results.
6.Realsee VR App Download and Installation
Before starting the capture process, users need to prepare a smartphone and download the Realsee VR App.
For iOS (Apple) Phones: Search for and download the Realsee VR App from the App Store.
For Android Phones:
- Search for and download the Realsee VR App from the Google Play Store
- Or, click the below link on our homepage to download the Realsee VR App:
https://home.realsee.ai/en/download-realsee-vr
If you already have the Realsee VR App, ensure it is updated to the latest version for an optimal capture experience.
REALSEE G1 Smart Gimbal Connection
Press and hold the power button for 3 seconds. When the power indicator turns solid green, the device is powered on.
- Turn on your phone's Bluetooth.
- Click the Add device button in the lower-right corner of the app, select the Realsee G1 device, and wait for it to be detected.
- Once found, tap the Connect button—when the indicator on the G1 device turns blue, the connection is successful.
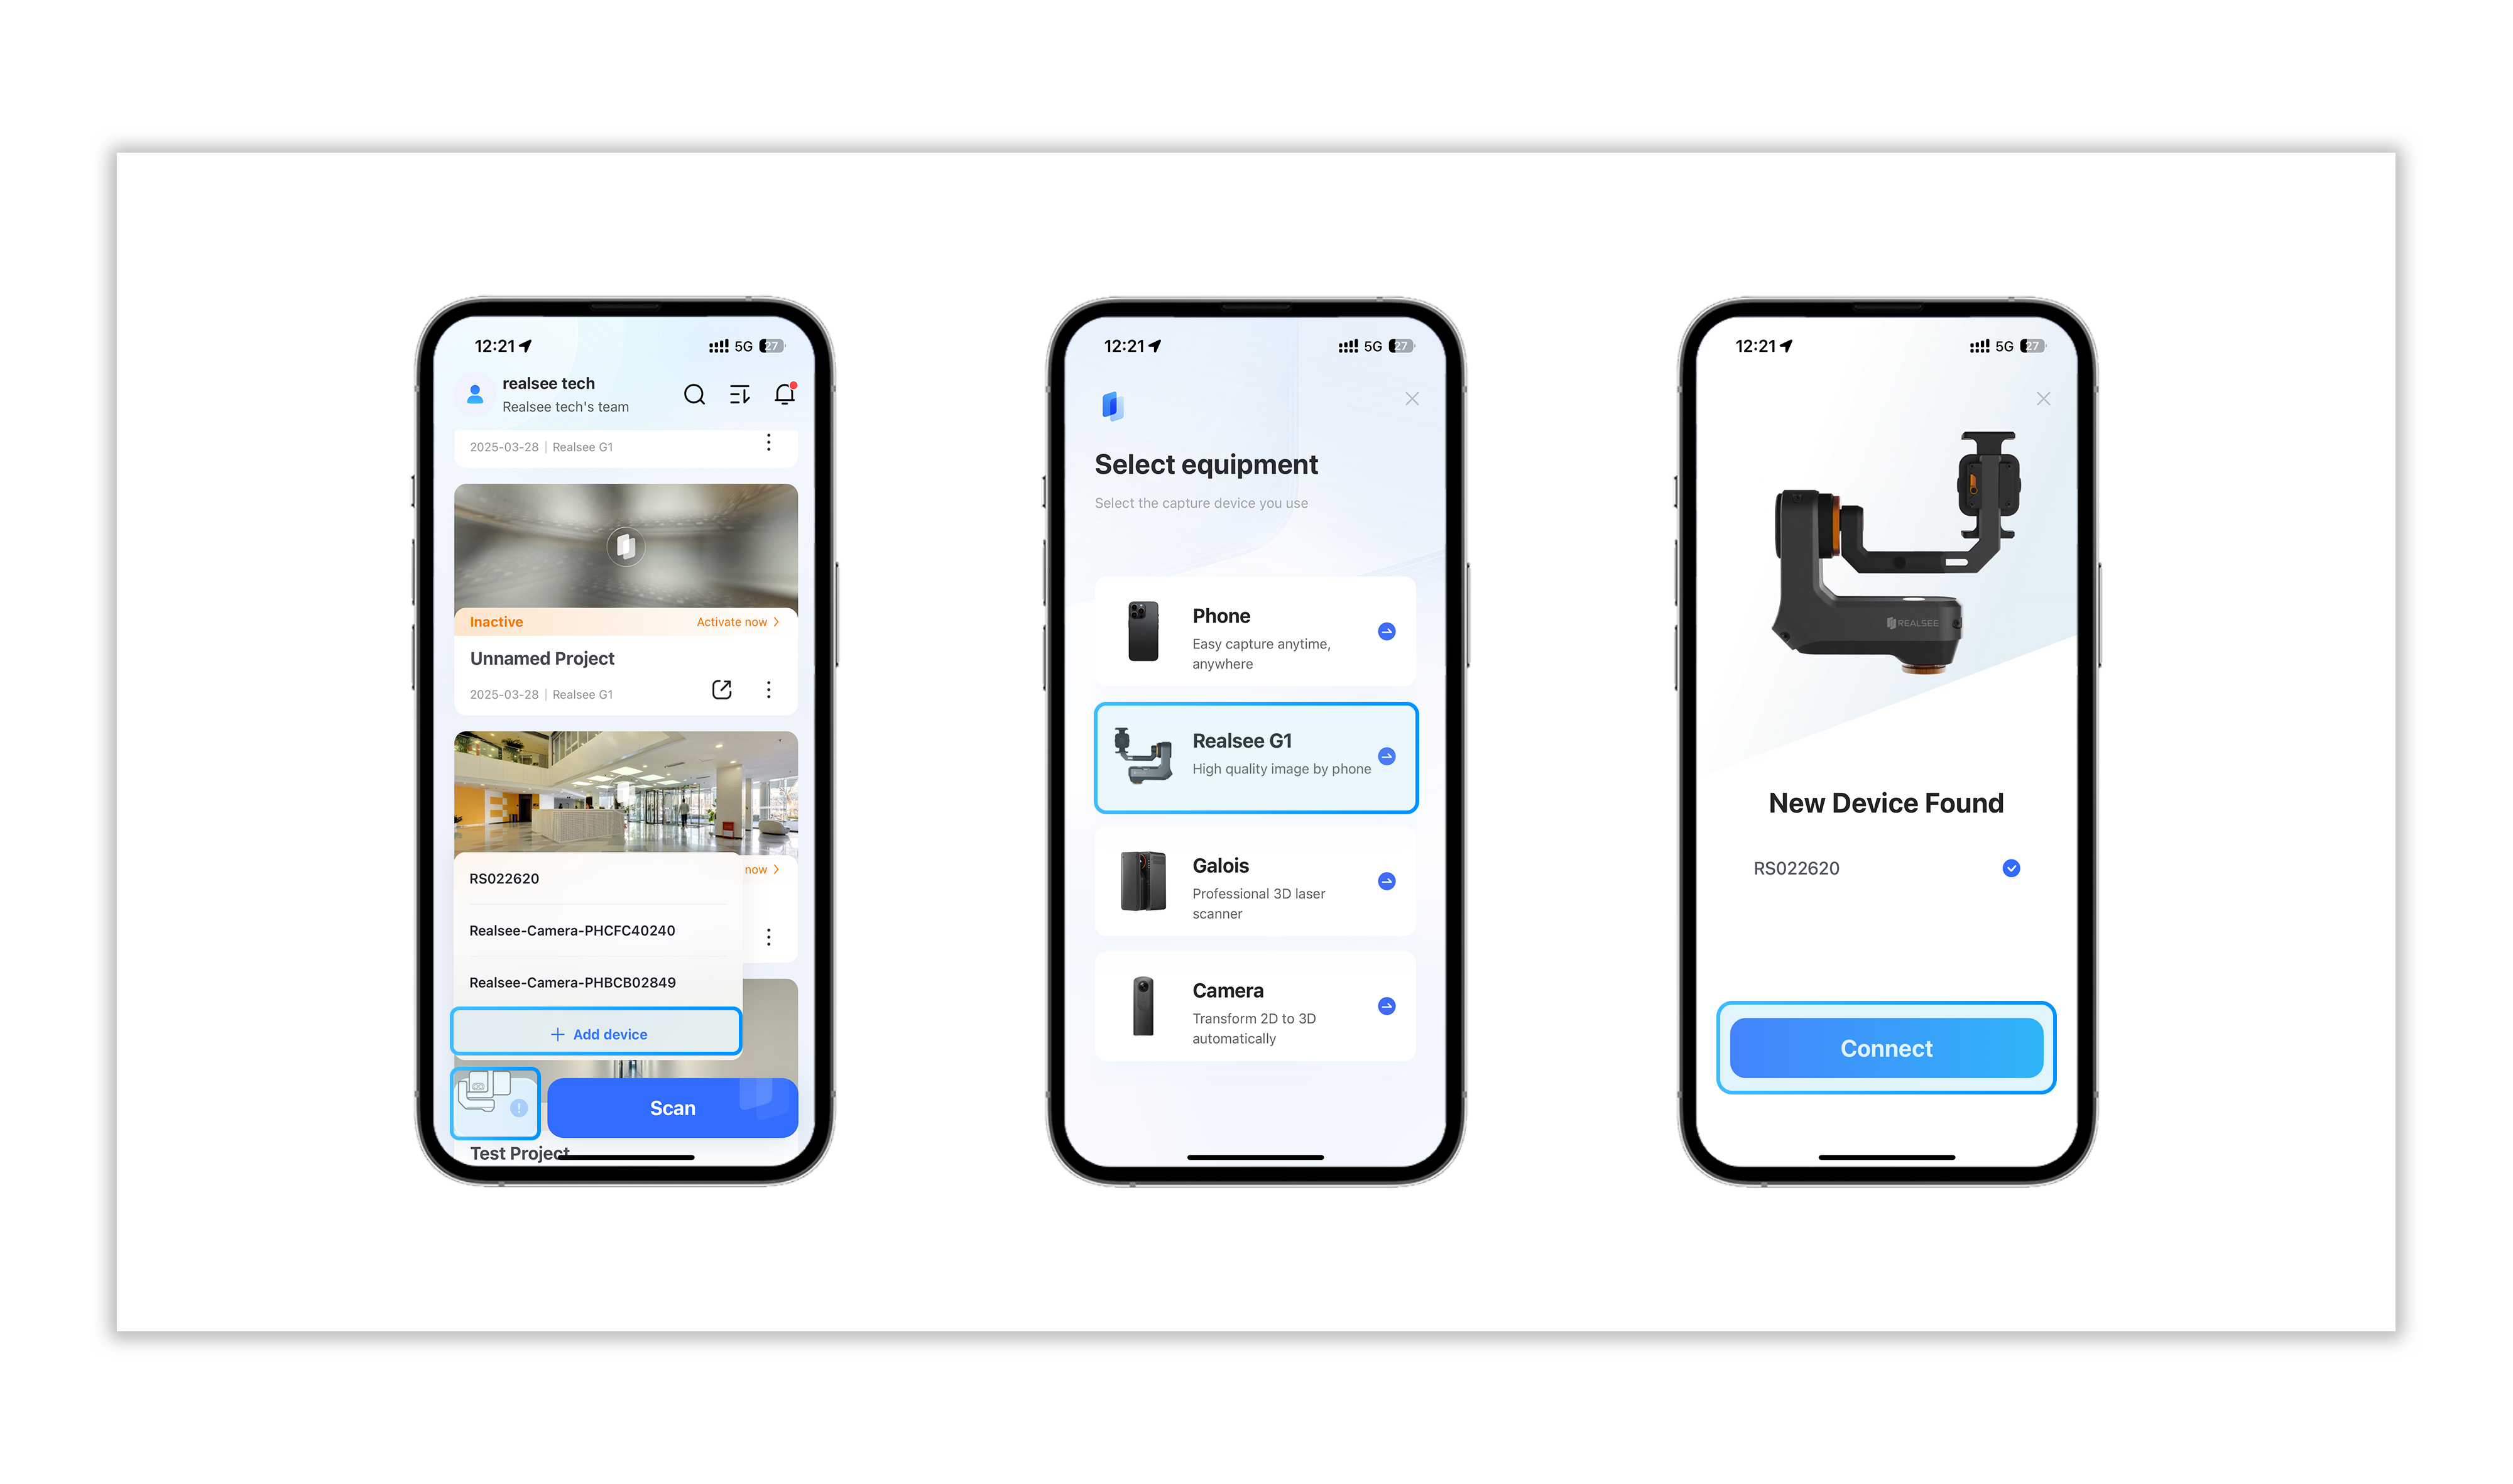
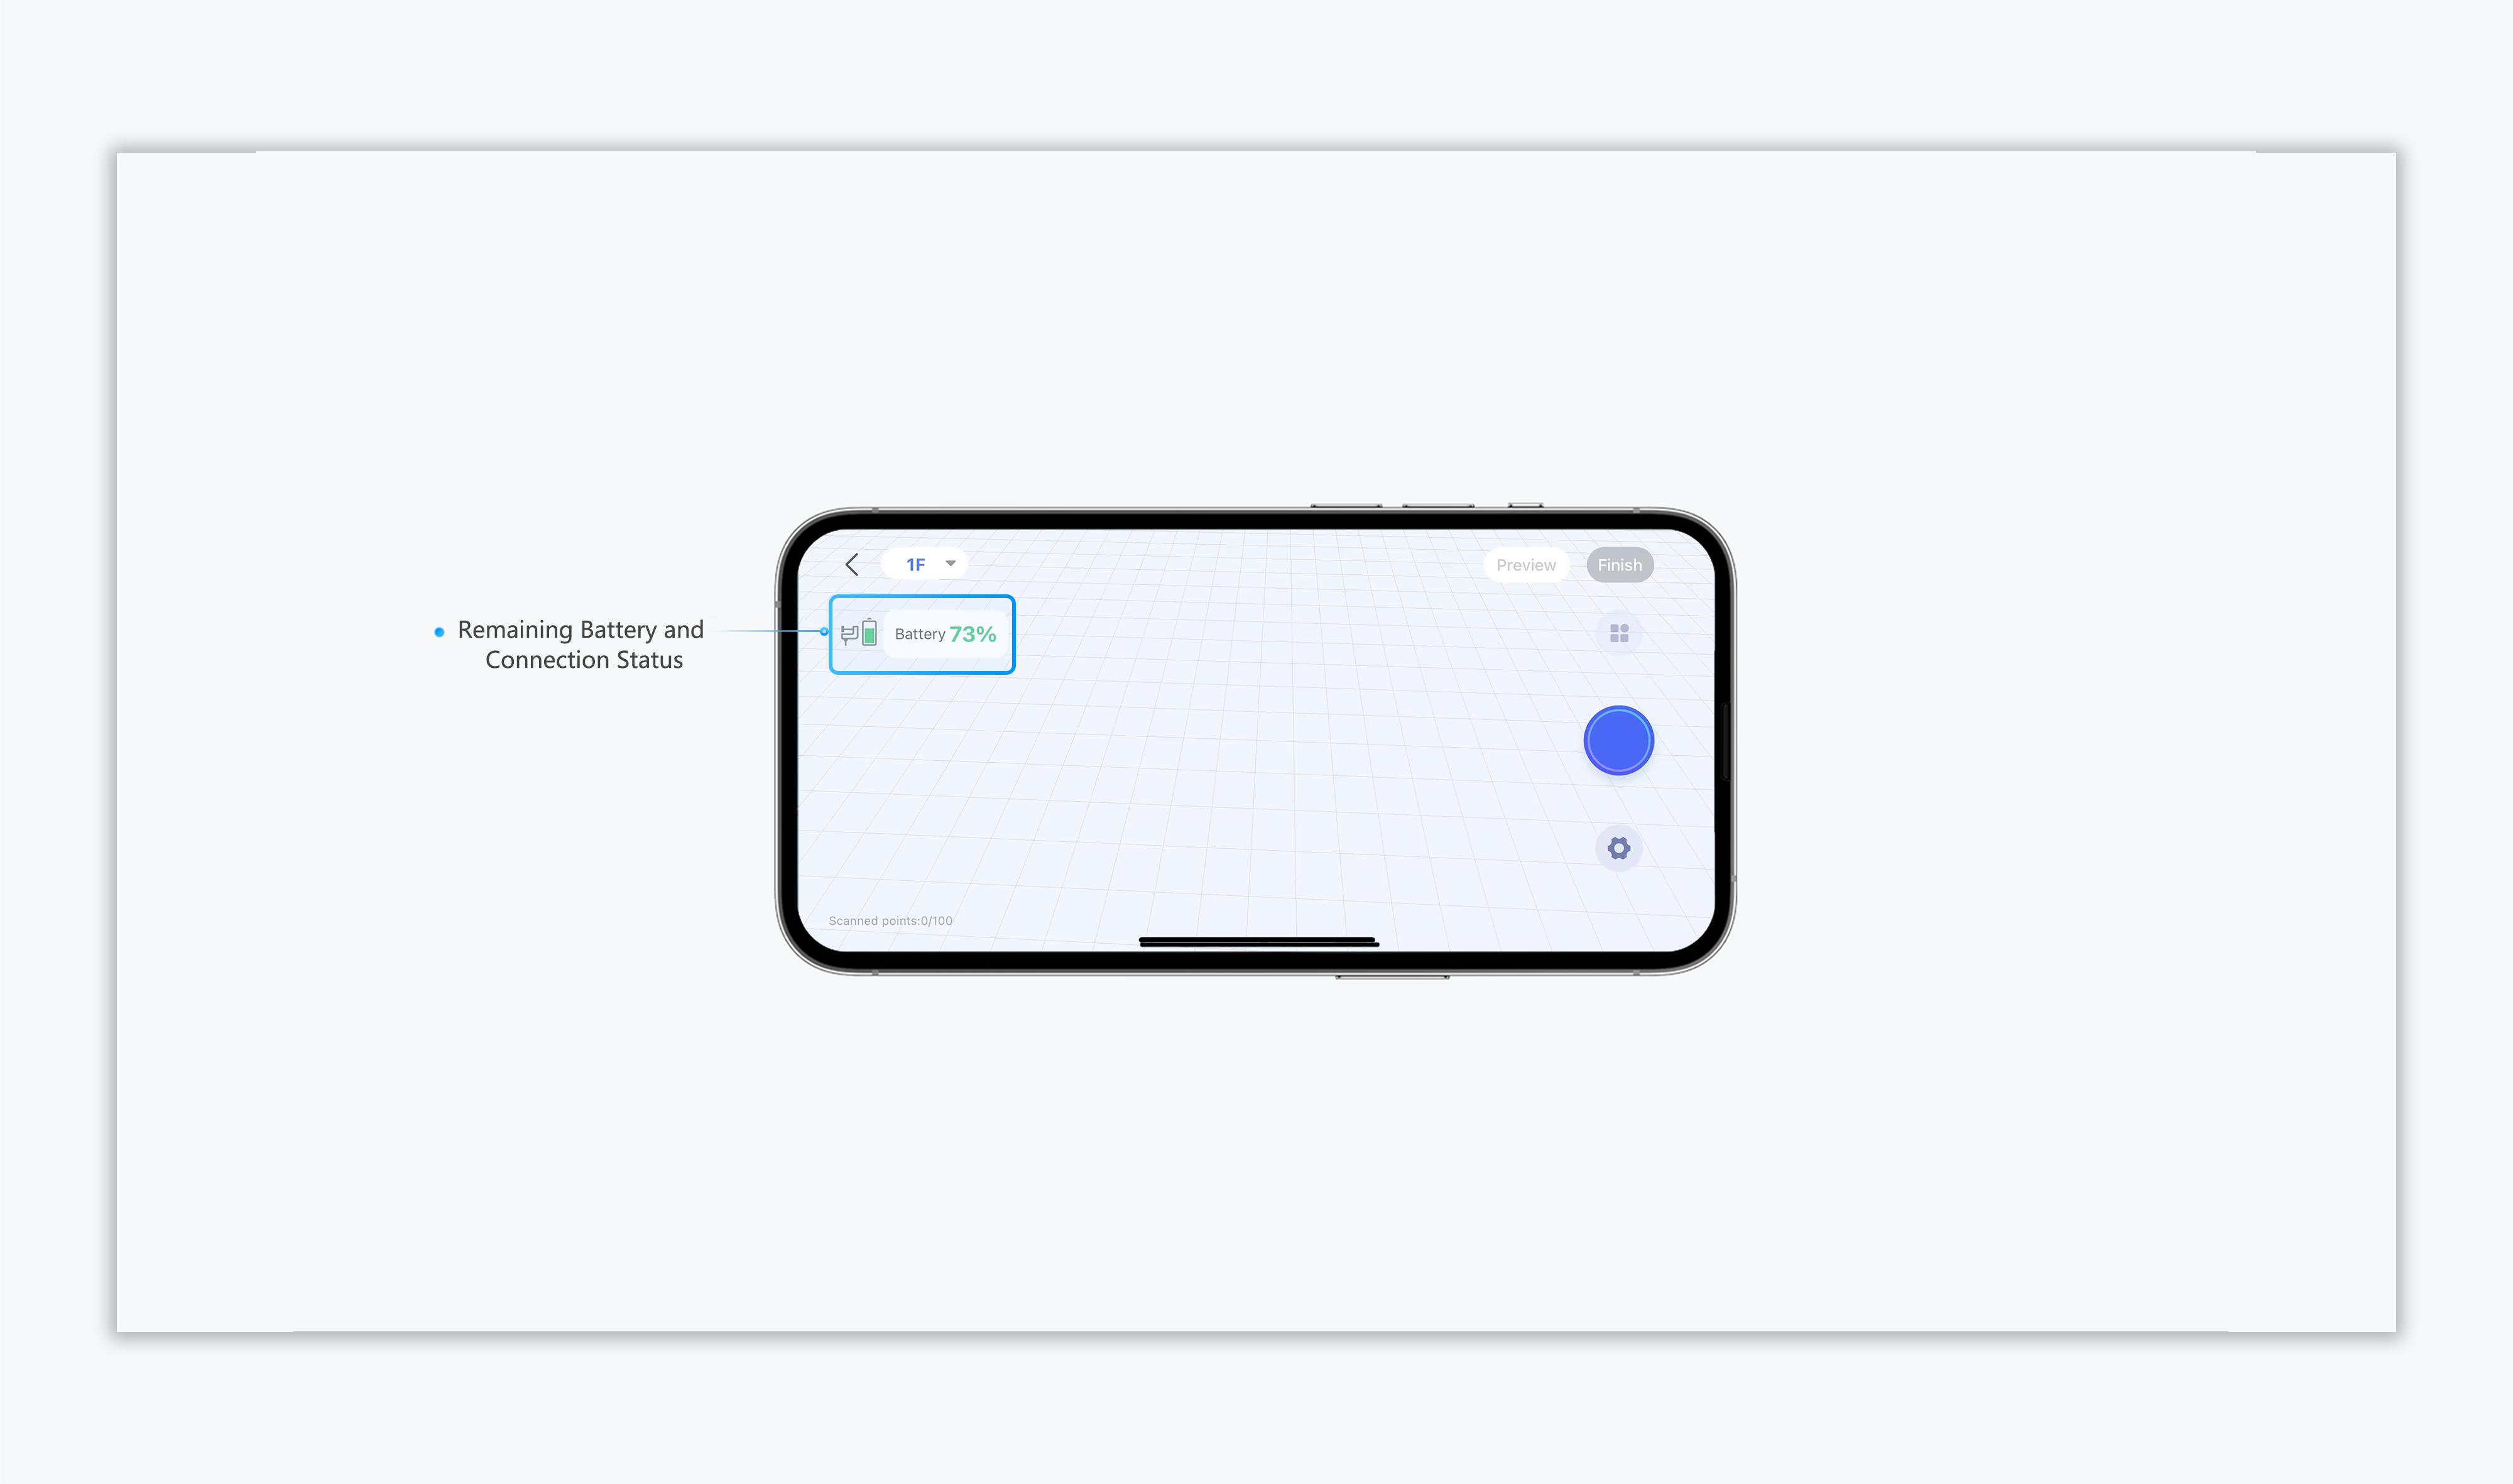
- After the device and phone are connected, you can check the device's battery level at any time through the connected device list or the capture page to ensure a smooth capture process.
Note: The REALSEE G1 device can only be connected via Bluetooth via the Realsee VR app, it is not possible to connect directly to the device via Bluetooth from your phone, this will cause the connection to fail.
Smartphone Installation
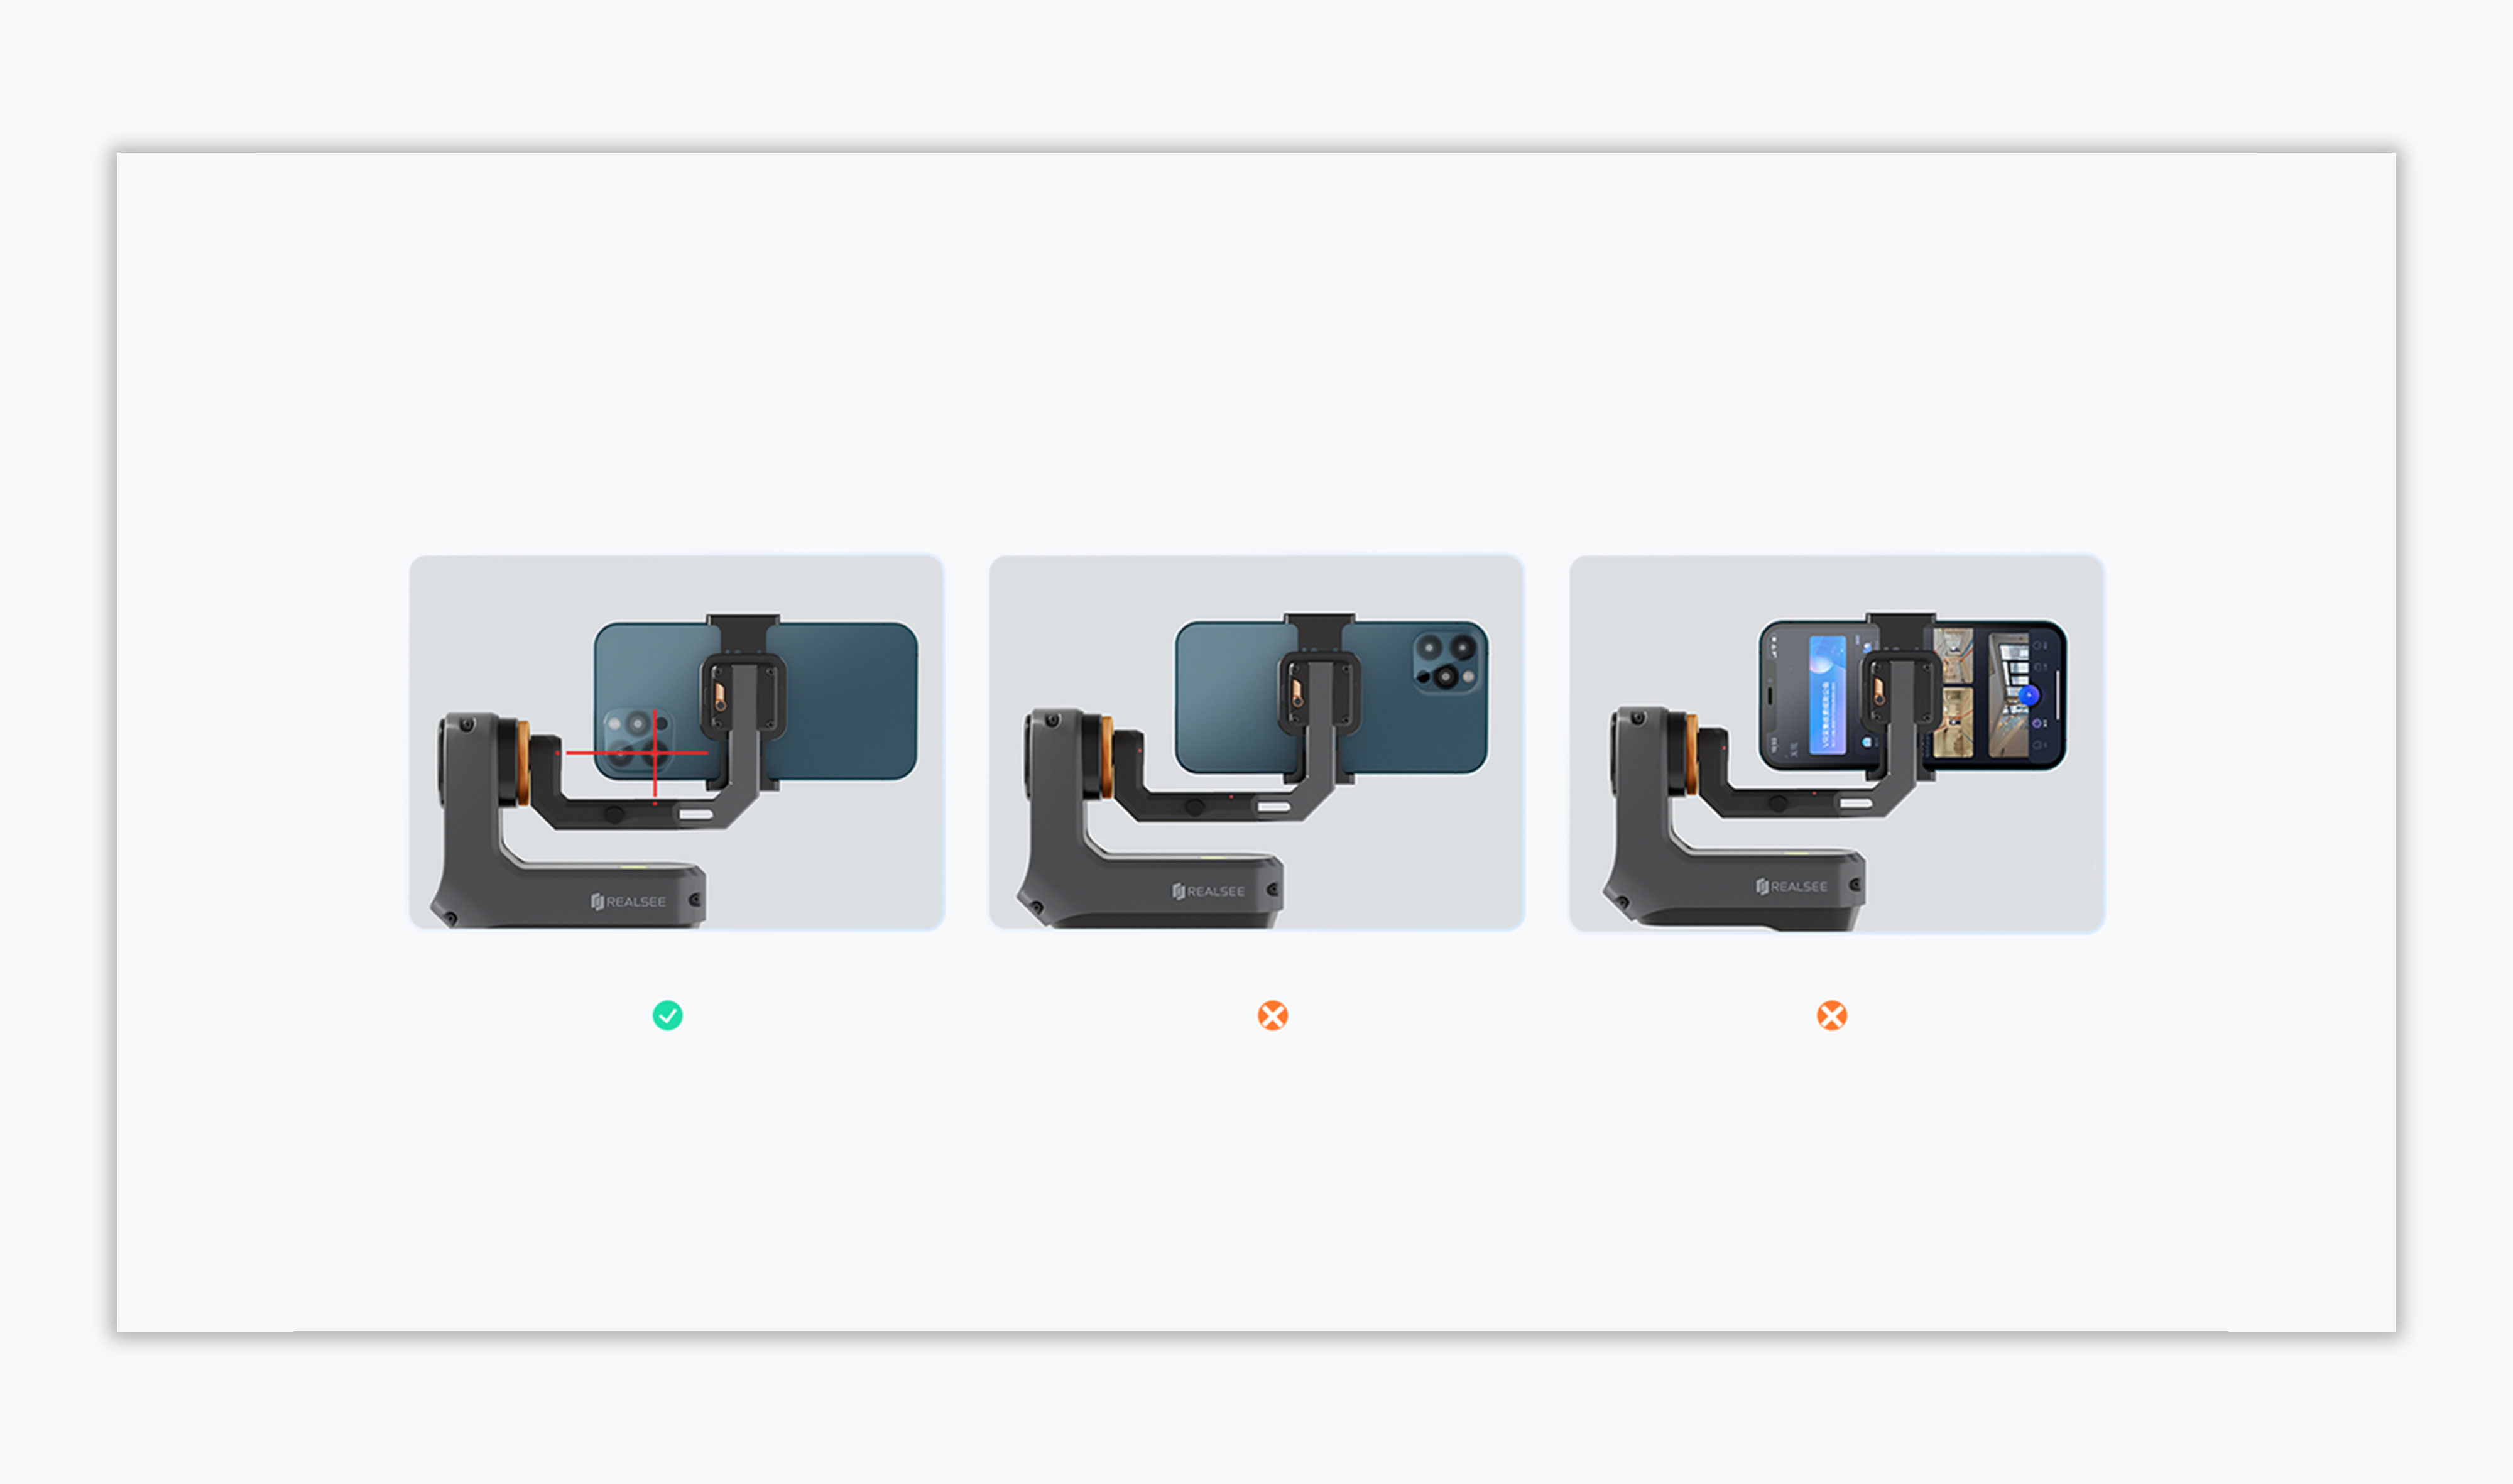
Attach the smartphone to the REALSEE G1 device, ensuring that the primary camera is aligned with the red marker's extension point on the device. This alignment prevents the device from capturing the bottom crossbar of the REALSEE G1 during VR capture, which could otherwise affect the quality of the capture quality.
Tip: When installing the smartphone, make sure the camera lens is not facing the wrong direction.