Overview of the Galois Capture Functions
Introduction to the functions in the Galois Capture page
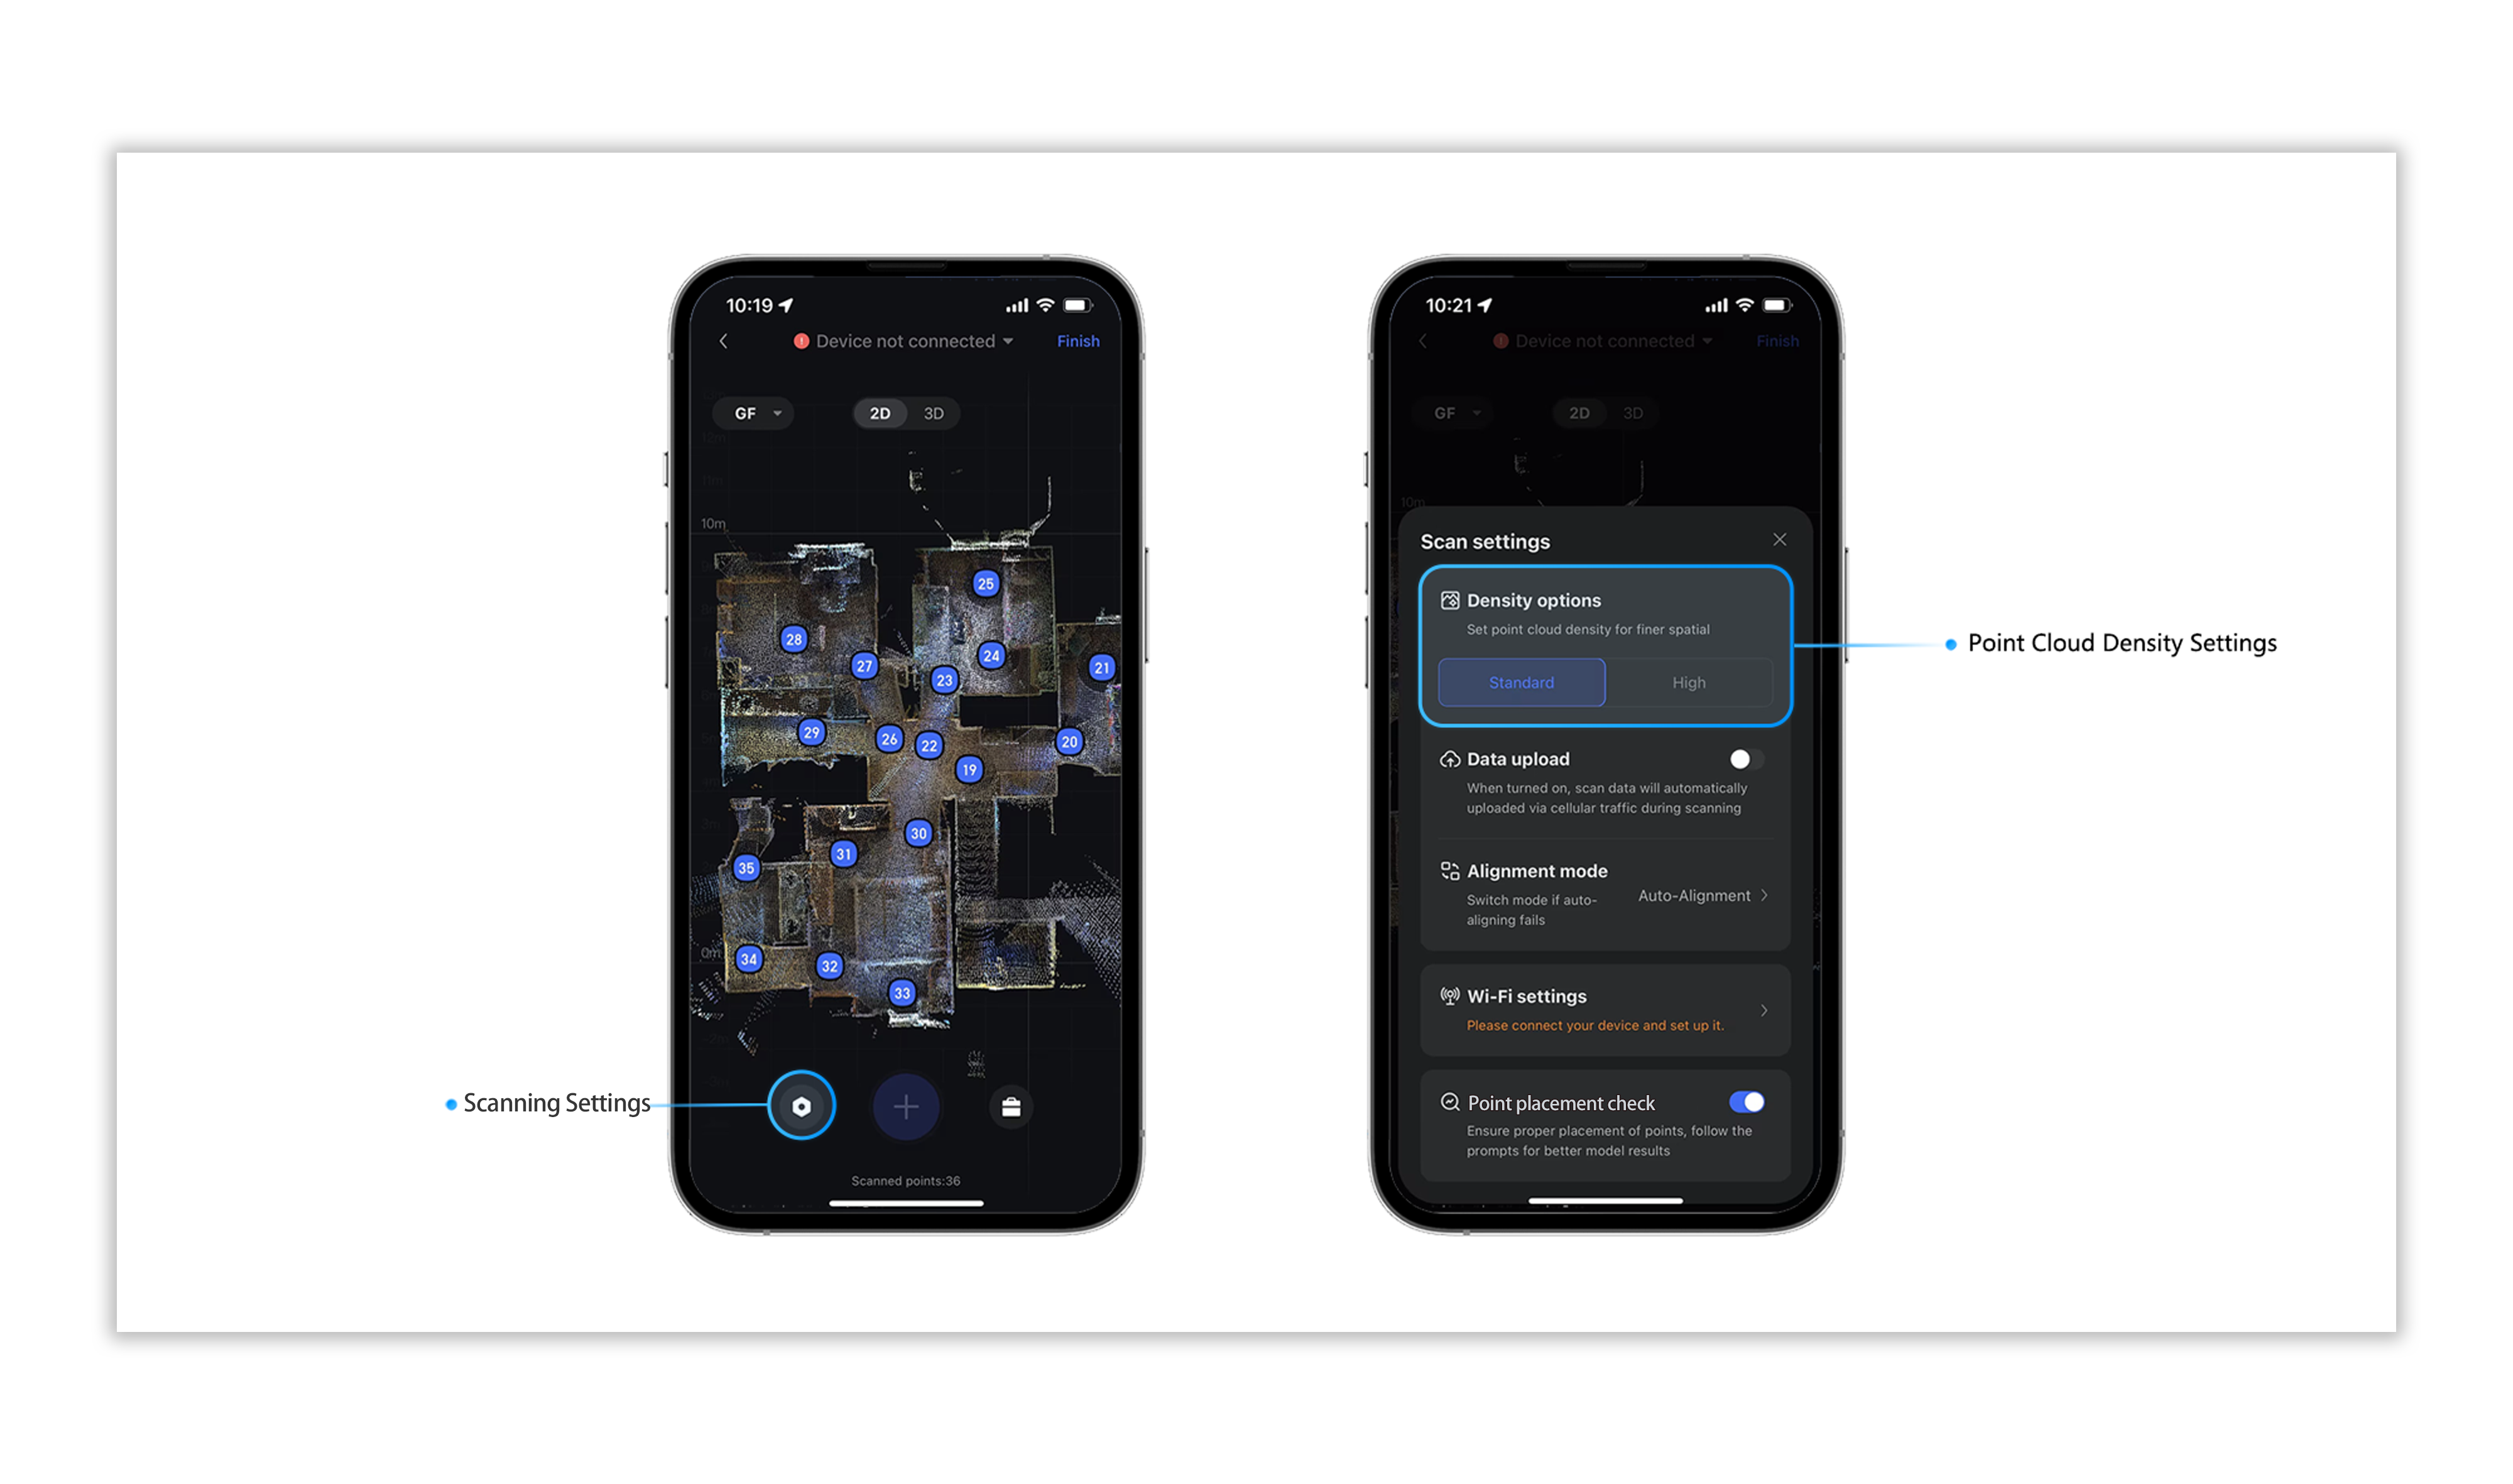
Density Options
The point cloud density is divided into two levels: standard density and high density. The differences between these levels lie in the point cloud density and the scanning time, which in turn affect the accuracy of the product. Users can set the density mode according to their needs.
- Standard:
Scanning time: Around 28 seconds
Maximum point cloud: 486,000 points
- High:
Scanning time: Around 60 seconds
Maximum point cloud: 1,944,000 points
- Ultra
Scanning time: Around 120 seconds
Maximum point cloud: 3888000 points
Tip: The Ultra mode is only suitable for those engaged in professional point cloud data operations. Regular users are not advised to use this function.
Setting Steps:
Click the Settings button in the bottom left corner - Select the desired density.
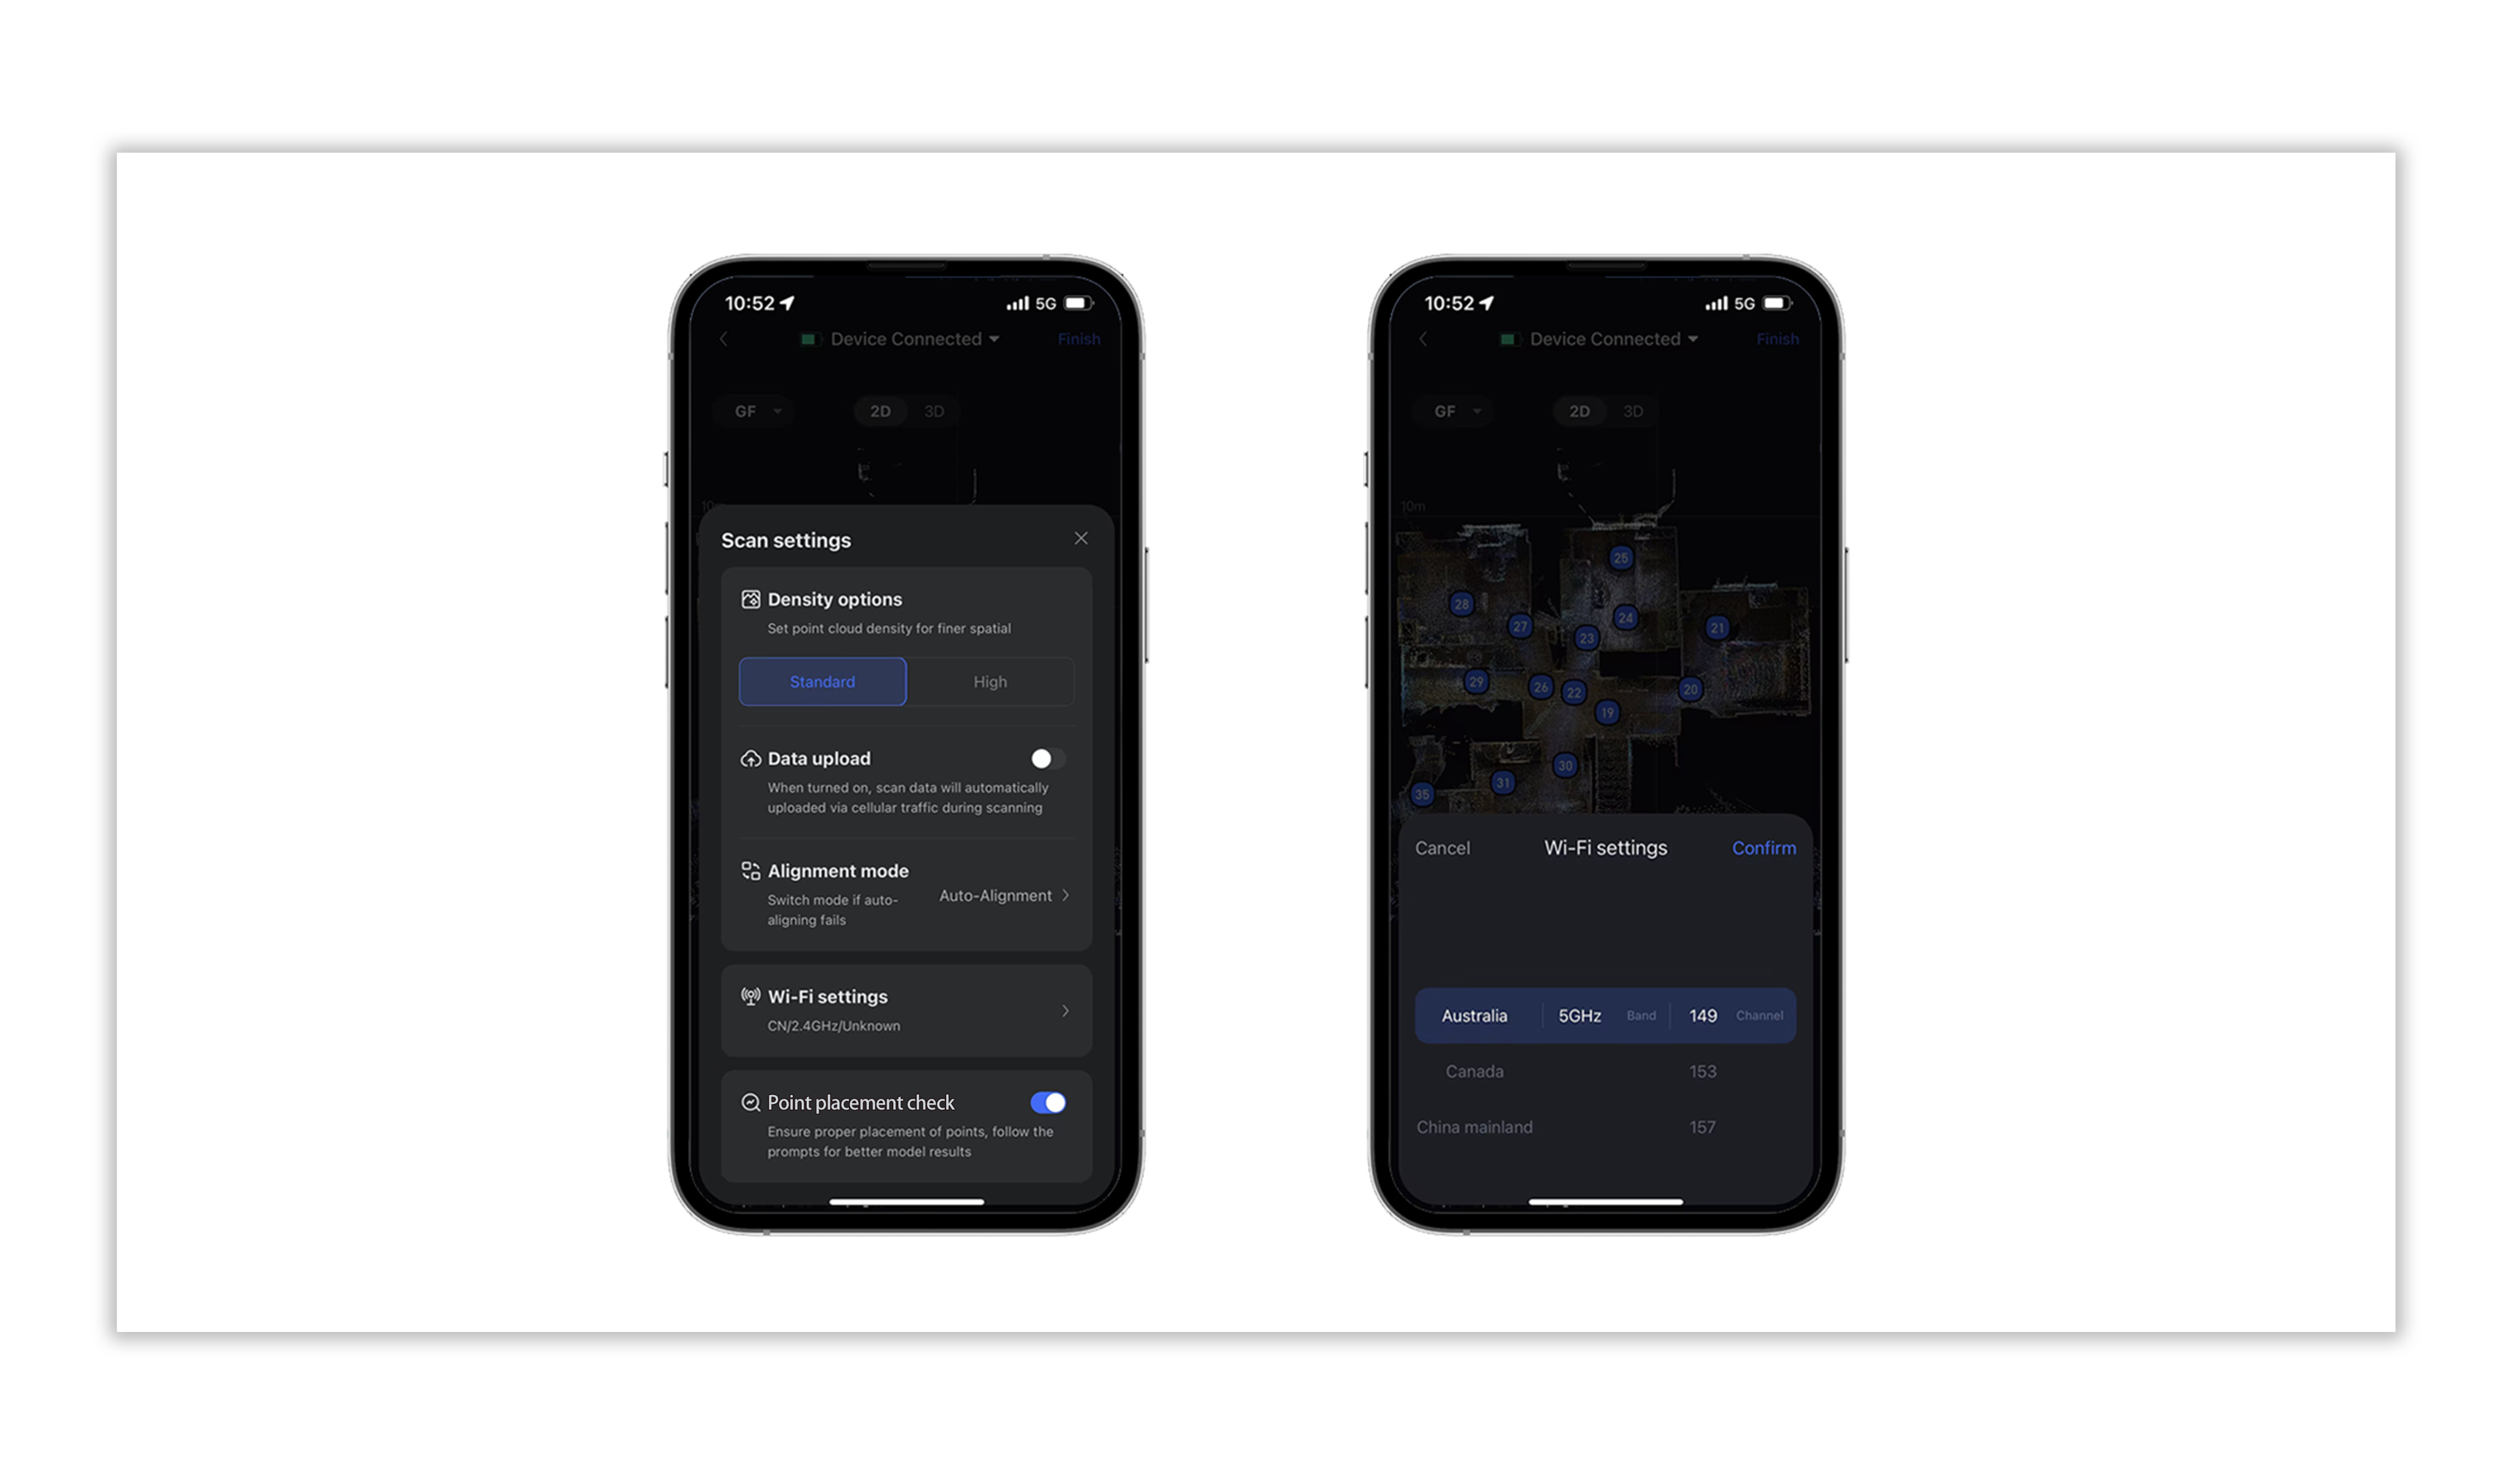
Wi-Fi Settings
During the Galois capture process, users can adjust the Wi-Fi settings based on their environment. They can select the appropriate country/region and switch between 2.4GHz/5GHz modes. However, if 5GHz is not supported, using 2.4GHz is recommended to ensure a stable connection during capture.
Operation Steps: Click the Wi-Fi Settings.
Alignment Mode
The Galois Alignment mode is divided into Auto-Alignment Mode and Manual-Alignment Mode, catering to different capturing spaces and user groups.
- Auto-Alignment Mode: Suitable for standard spaces and continuous capture, such as museums and hotel areas.
- Manual-Alignment Mode: Designed for large, open spaces with fewer visual features, such as factories and warehouses.
Operating Steps: Settings-Alignment Mode-Mode Selection.
Note: Switching modes during the capture process will not affect point stitching or the presentation of VR.

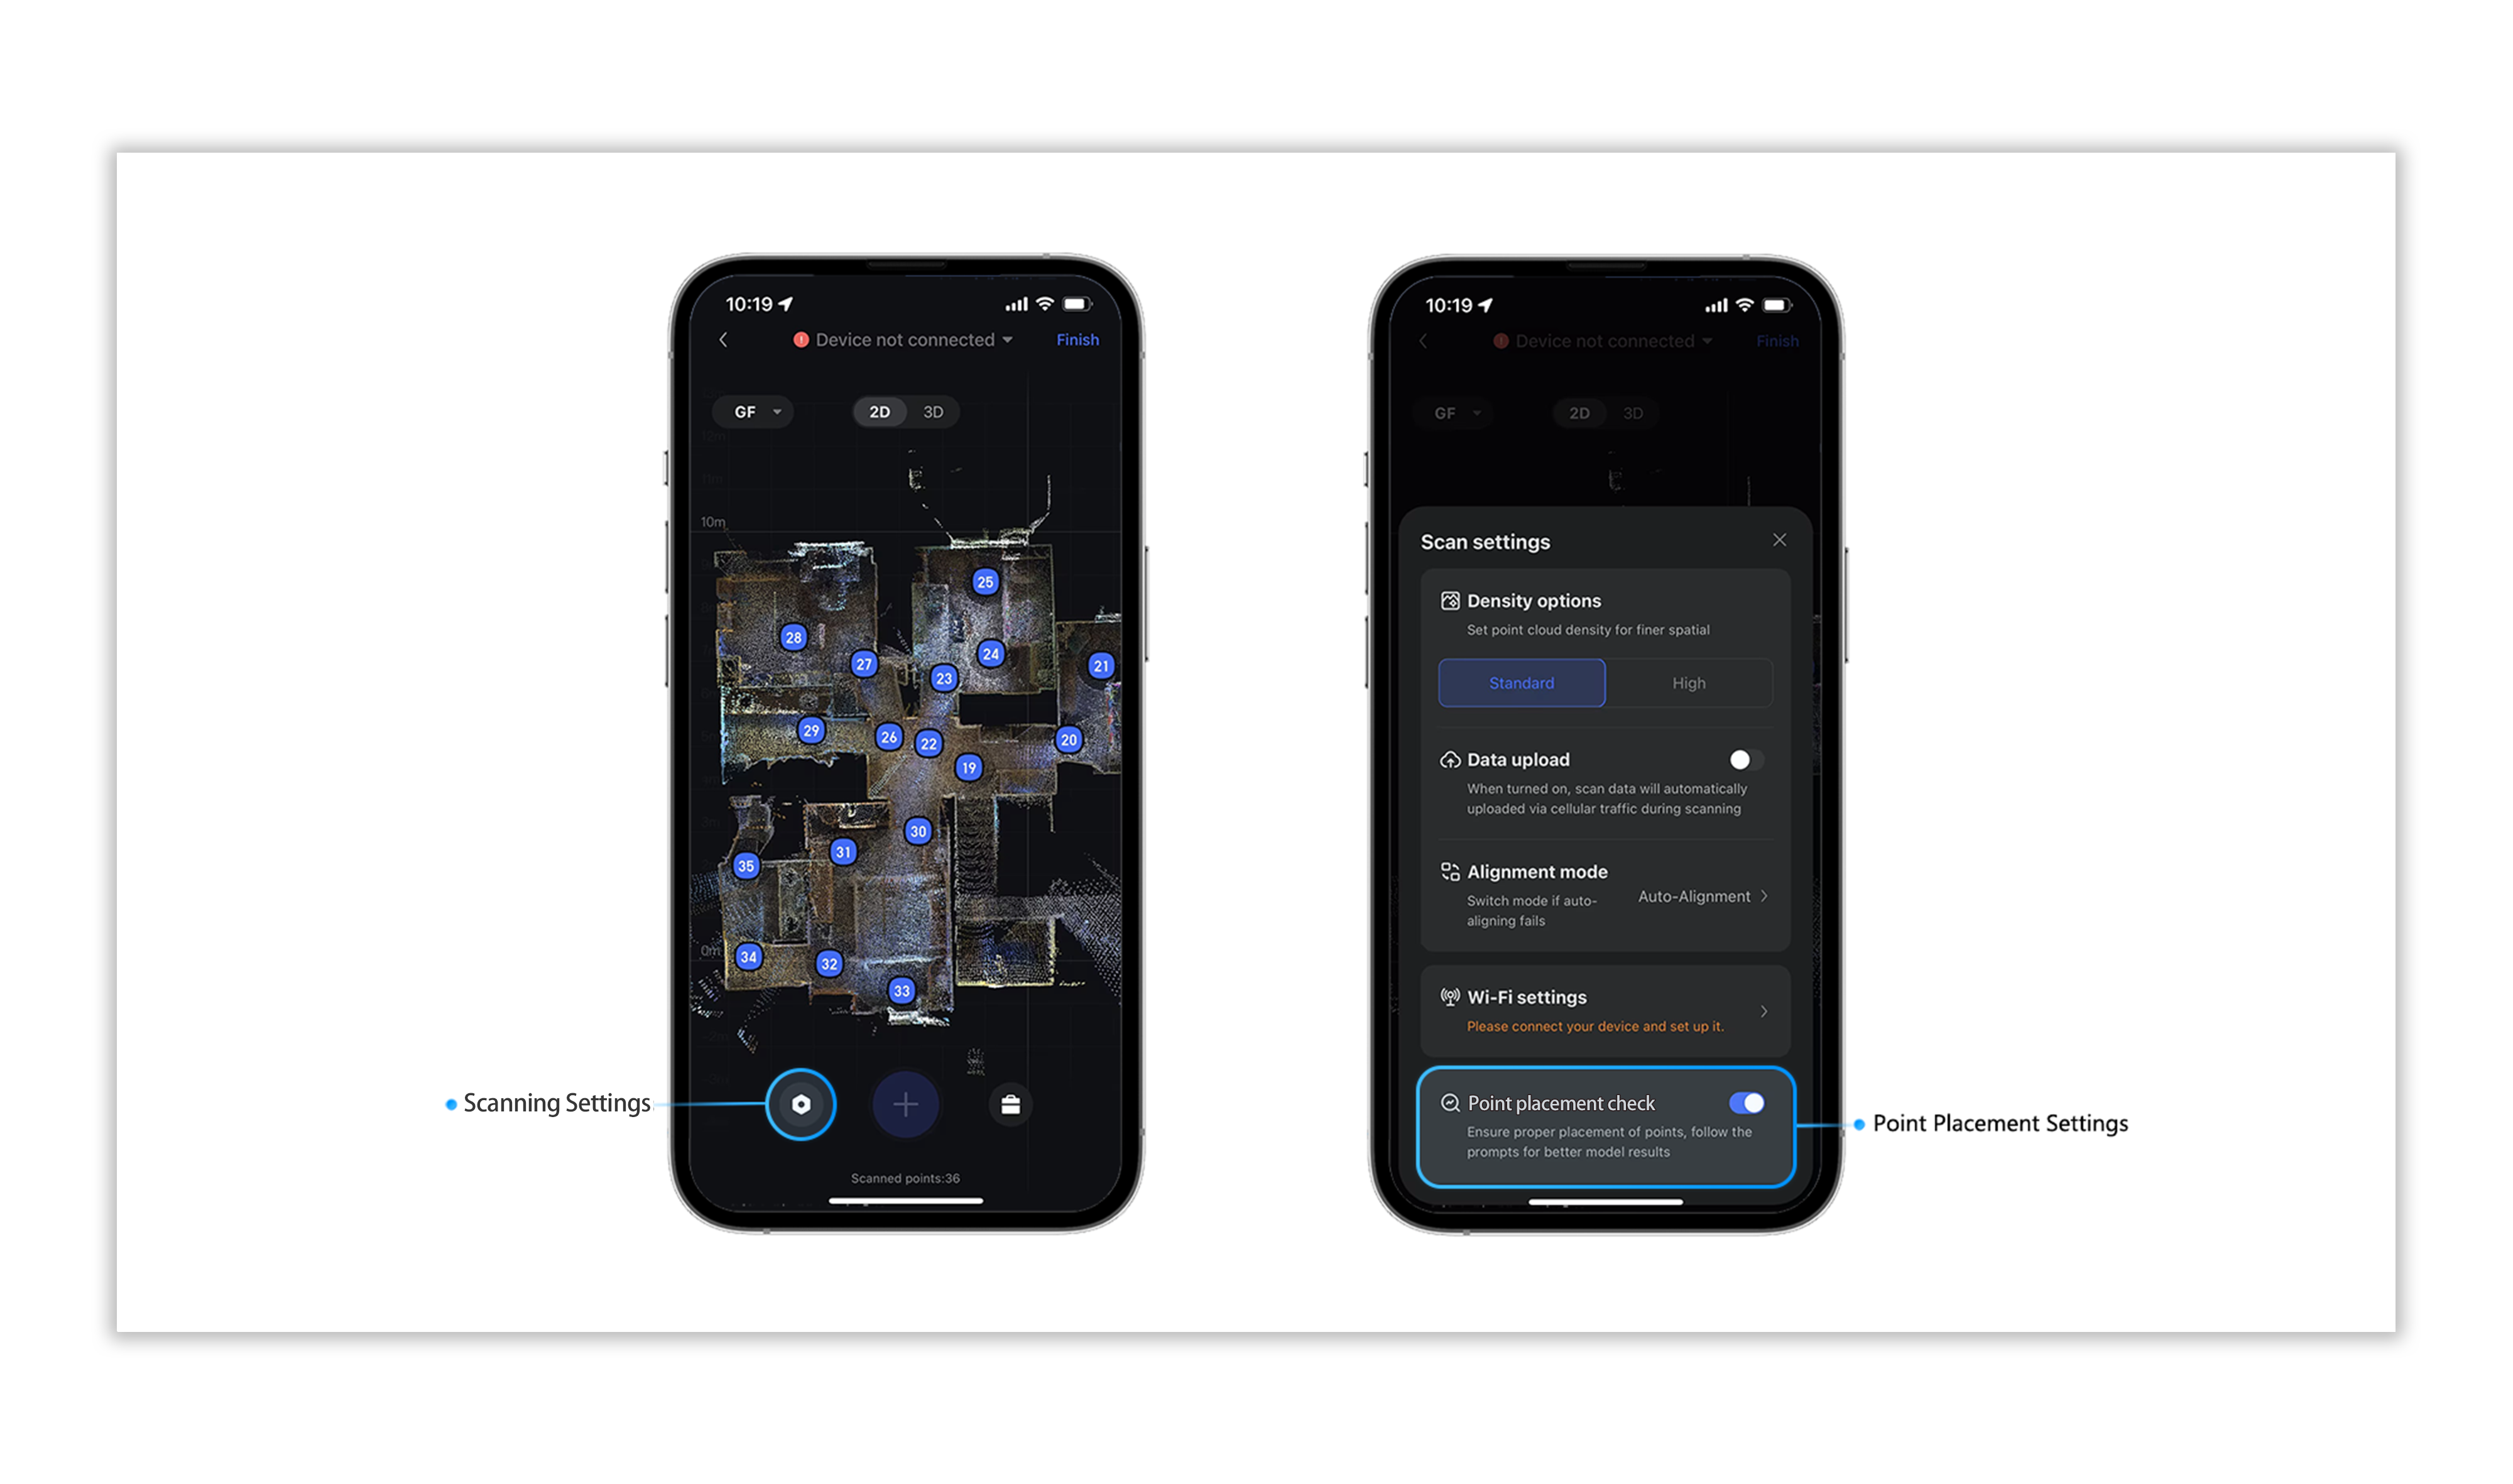
Point Placement Detection
During the Galois capture process, the system automatically enables the Point placement check feature, which assists users in monitoring point placement. (Currently, this feature can be manually enabled or disabled.)
Operating Steps: Settings-enable Point placement check button.
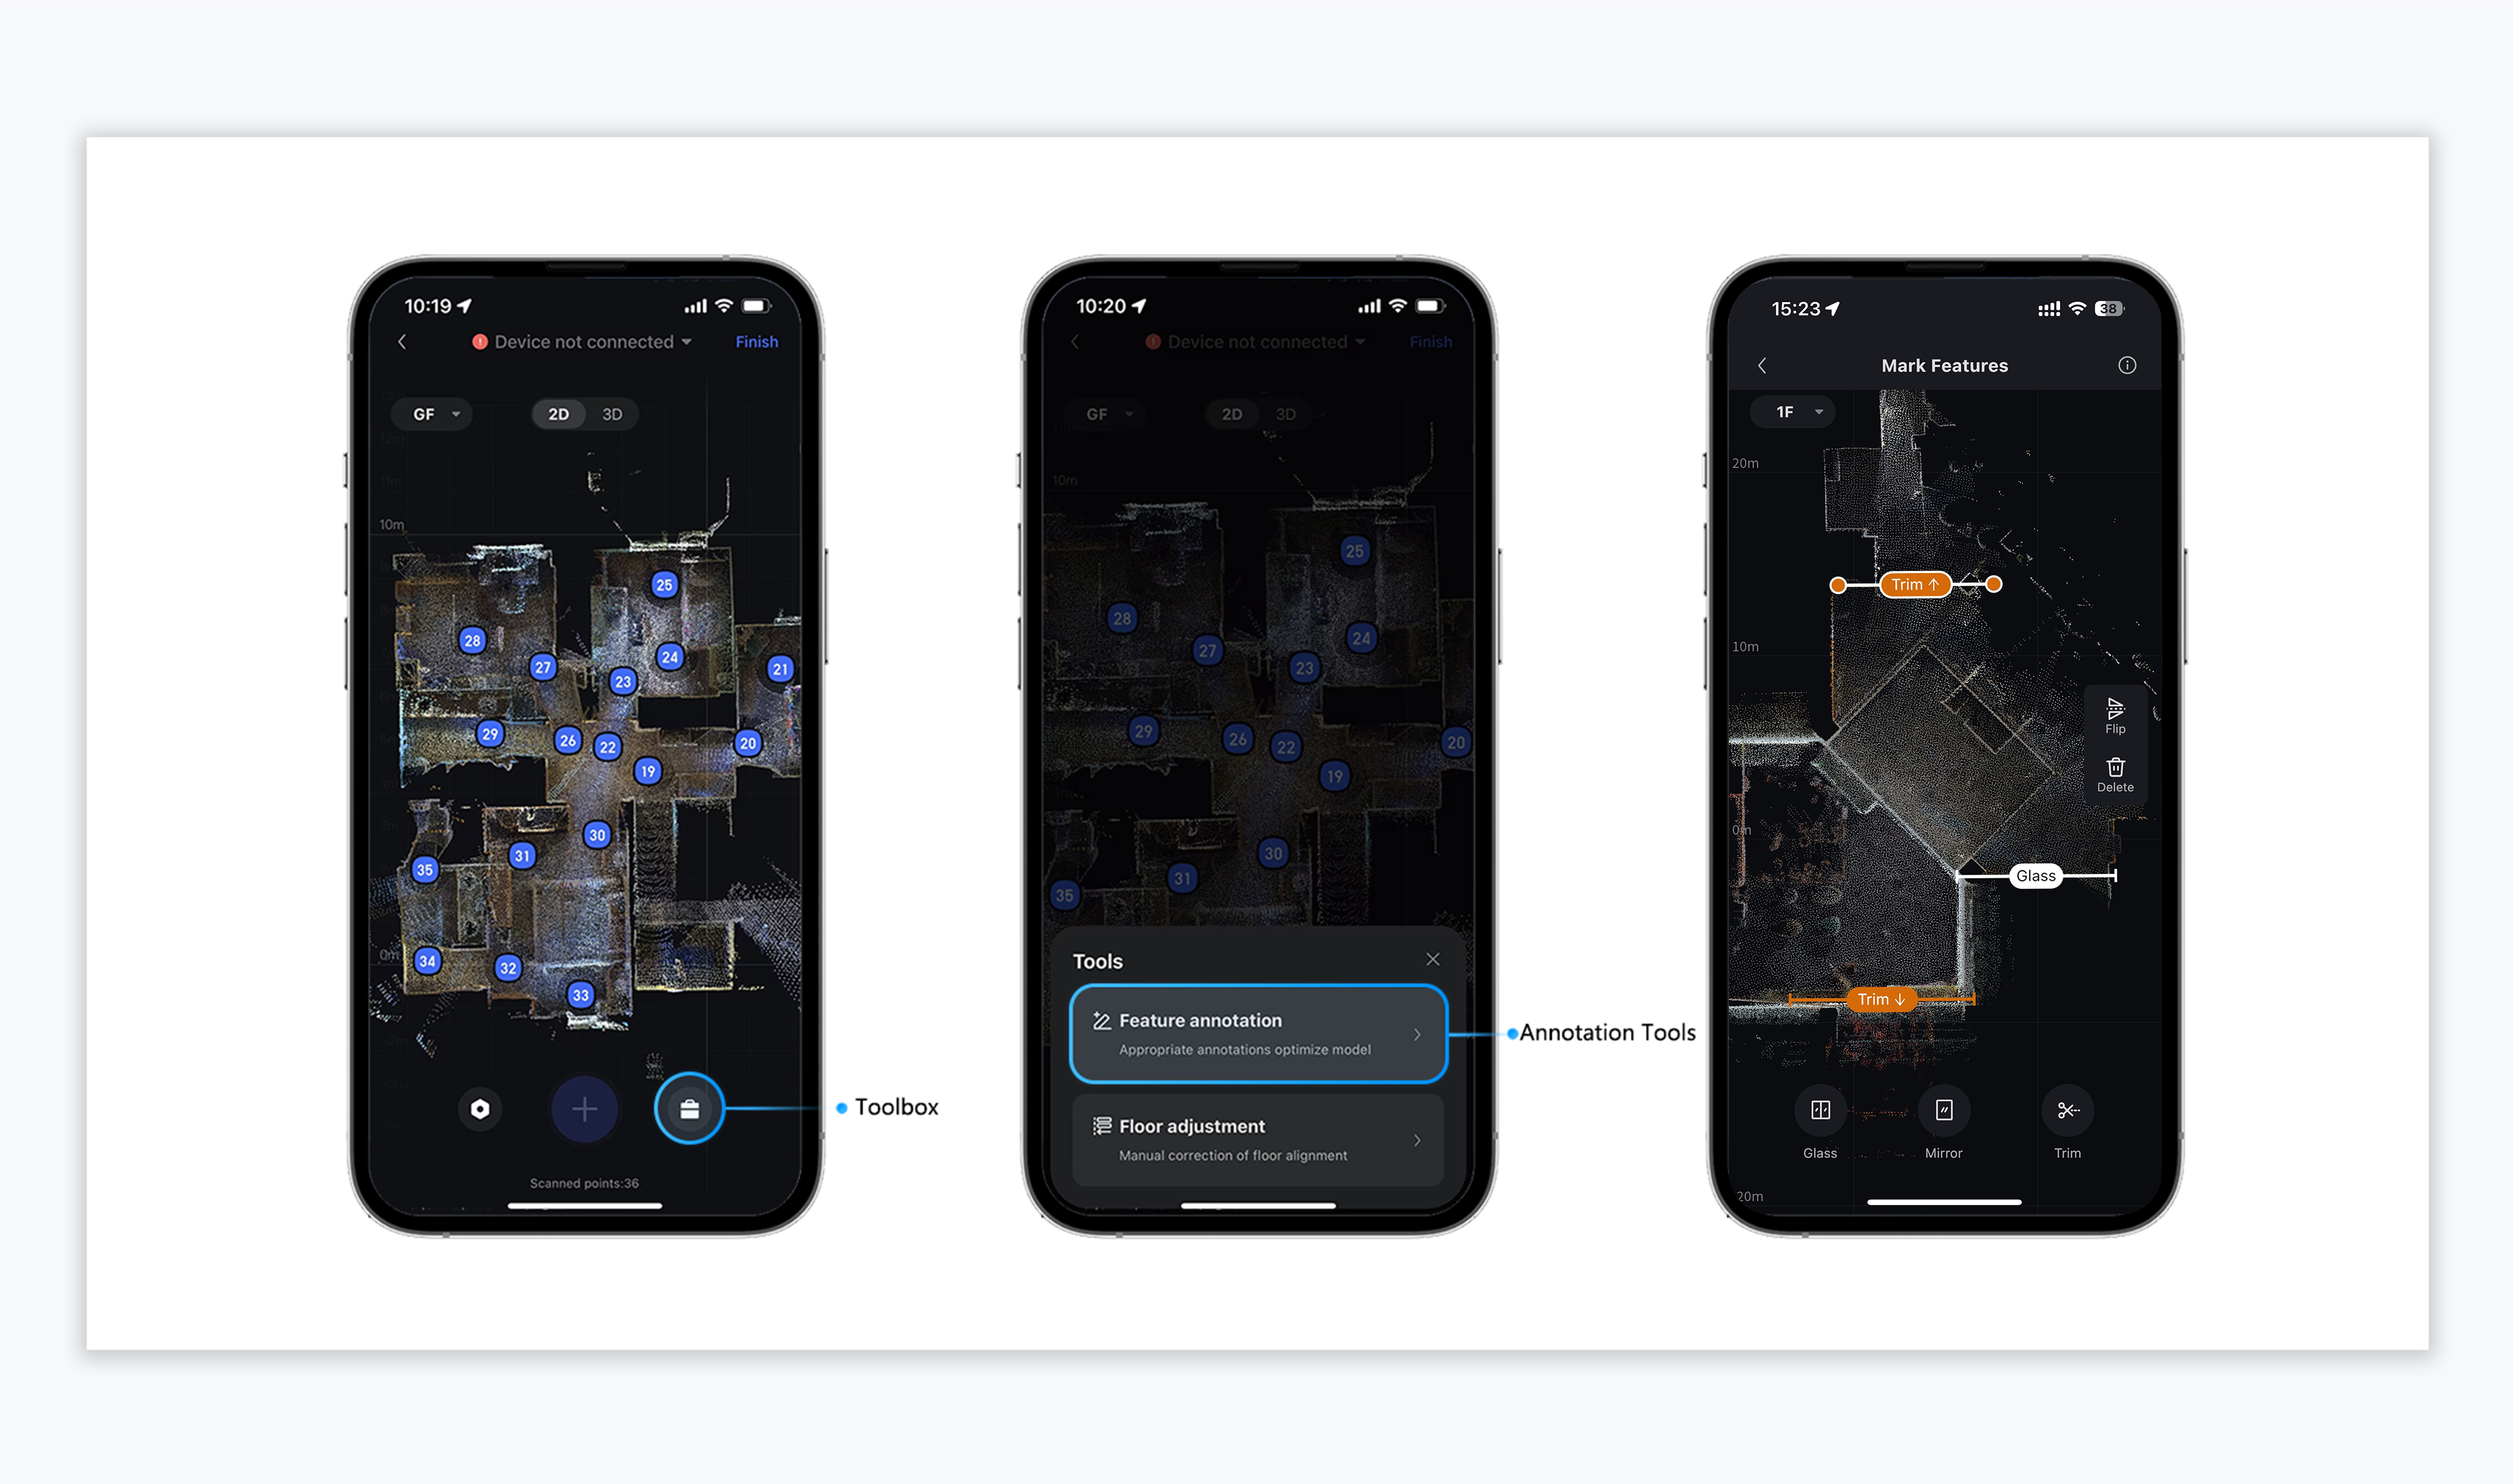
Feature Annotation
Galois utilizes LiDAR for depth data collection. Due to the characteristics of the LiDAR, scanning may cause specular or diffuse reflections on glass surfaces, leading to excessive models. The Feature annotation tool helps effectively address issues with glass, mirrors, and similar materials.
- Mark Glass: It is recommended to mark the glass in areas with windows or glass materials (for transparent glass, such as glass partitions, the glass tool should be added on both sides).
- Mark Mirror: It is suggested to mark the mirror in areas with mirror materials (the mirror tool has a front and back based on the characteristics of the mirror material. Users should choose based on the mirror's orientation in the space).
- Mark Trim: The Trim tool can be used to trim off excess models.
Operating Steps: Toolbox-Feature Annotation-Choose appropriate tool.
Tips: For multi-floor spaces, the Feature Annotation tool should be used separately on different floors.
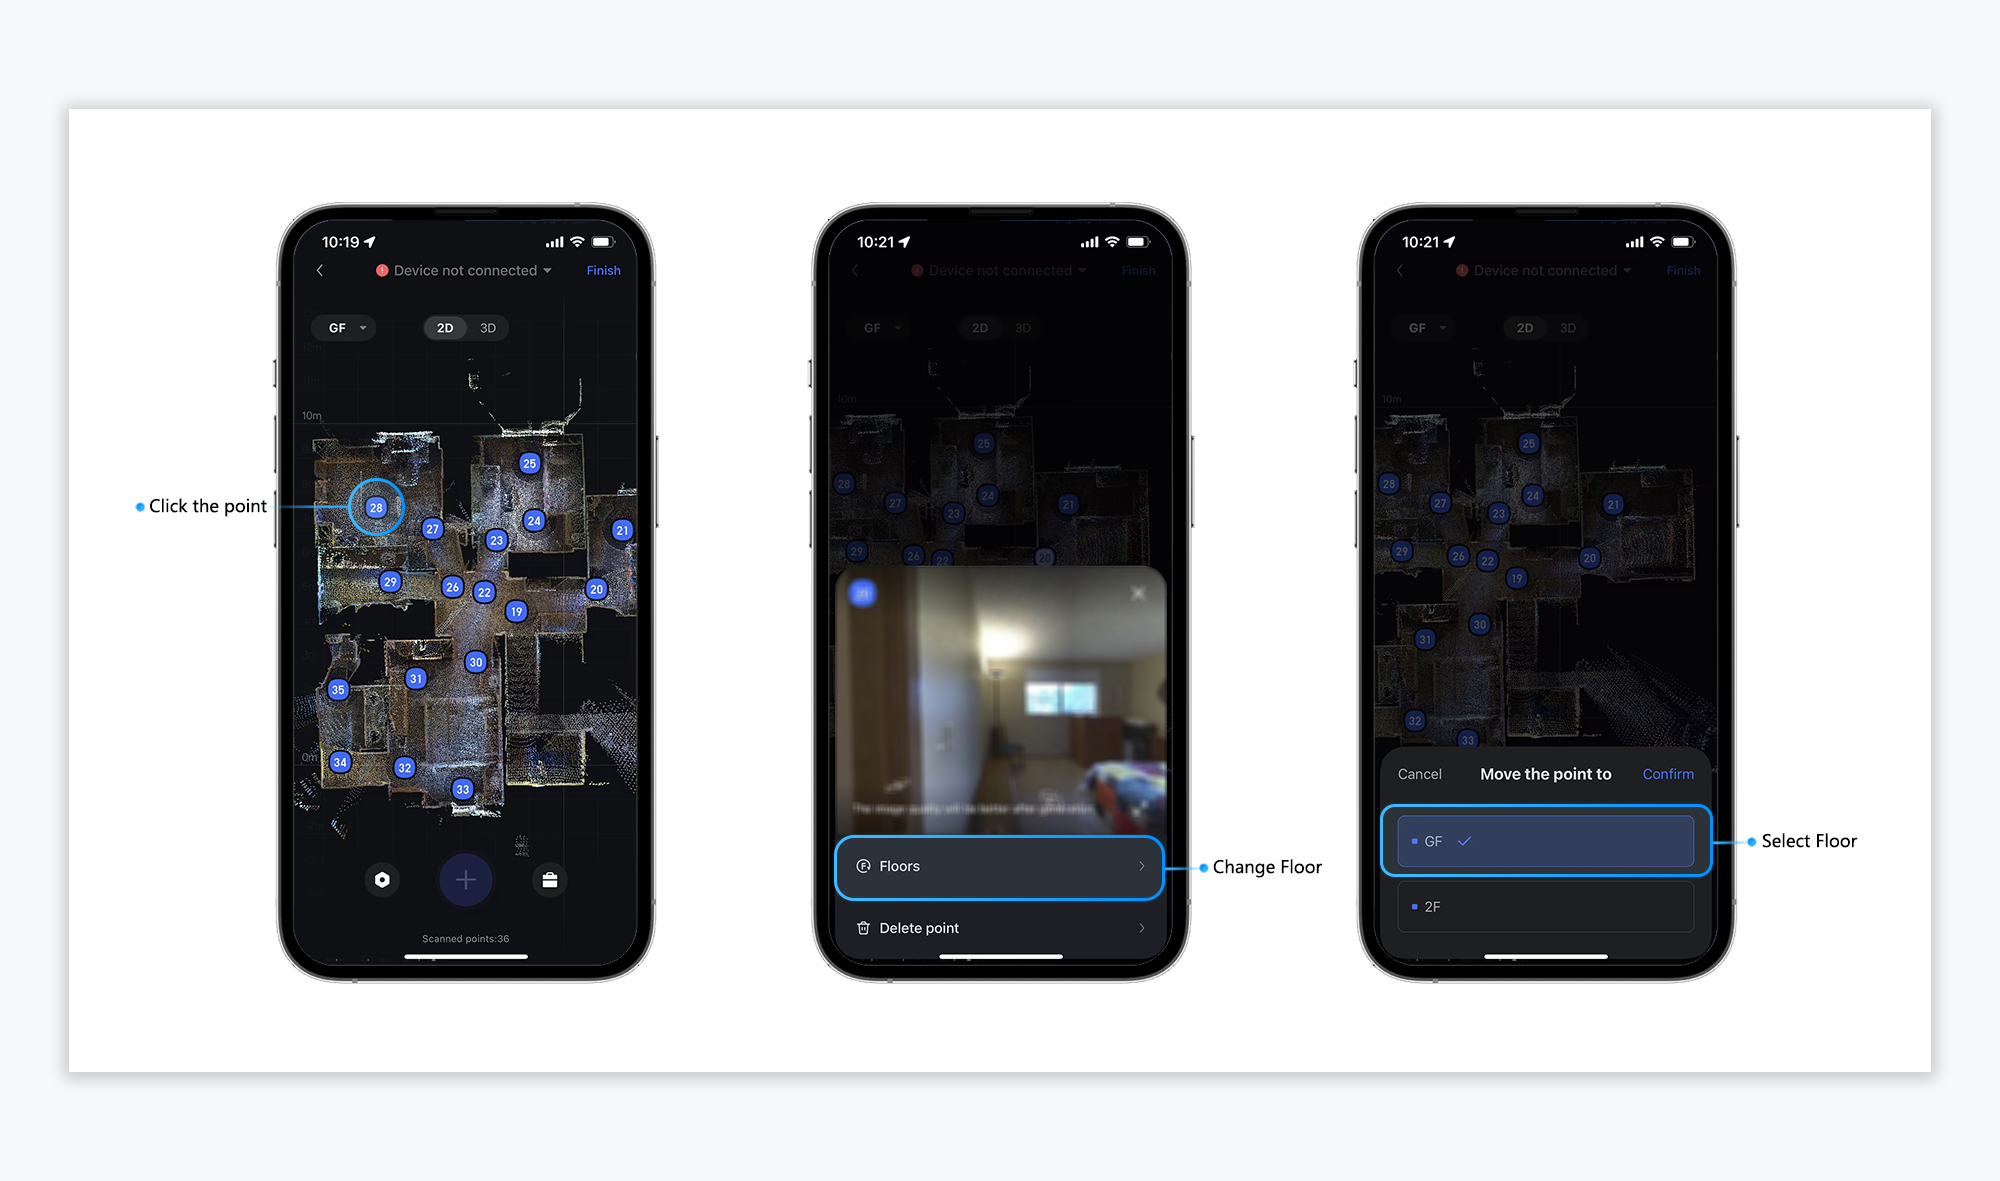
Point Operations
During the capture process, users can perform various operations on individual points, including changing floors, deleting points, and previewing panoramic images.
- Panoramic Preview: After completing the scanning of a single point, users can click on the point to view its panoramic image.
- Change Floor: When capturing across multiple floors, if a point's location does not match its assigned floor, users can reassign it to the correct floor.
- Delete Point: If a captured does not meet expectations, users can delete it.
Operating Steps:
Click on the corresponding point.
Perform the panoramic preview or other related operations.