Co-Capture Feature
Leverage Galois' Co-Capture functionality for efficient 3D scanning in large spaces.
Usage Scenarios for Co-Capture Functionality
- Simultaneous Capture in Large Spaces: When capturing a very large area within tight time constraints, multiple individuals can use separate Galois devices to capture simultaneously.
- Flexible Scheduling for Limited Personnel: In situations where there are fewer personnel available for a large space, captures can be scheduled across different time frames.
- Utilizing Collaborative Capture for Asynchronous Projects: For collaborative projects with asynchronous capture times or the need for supplementary data, the co-capture feature can be effectively utilized.
Prerequisites for using Co-Capture
- The projects involved in the merger must be the projects captured by Galois device.
- The merged projects must be successfully processed and the quality of the project (panorama, model, pose) has been validated and confirmed.
- The projects involved in the merger need to have at least one overlapping area (when shooting on site, the overlapping area between the two projects needs to be planned in advance, and the overlapping area cannot cross floors and must be on the same floor).
- Each project should have a minimum of 3 points in the overlapping area.
- The merged project can also be combined with up to 10 projects, with the total number of points in the merged project not exceeding 1000.
How to Use This Feature
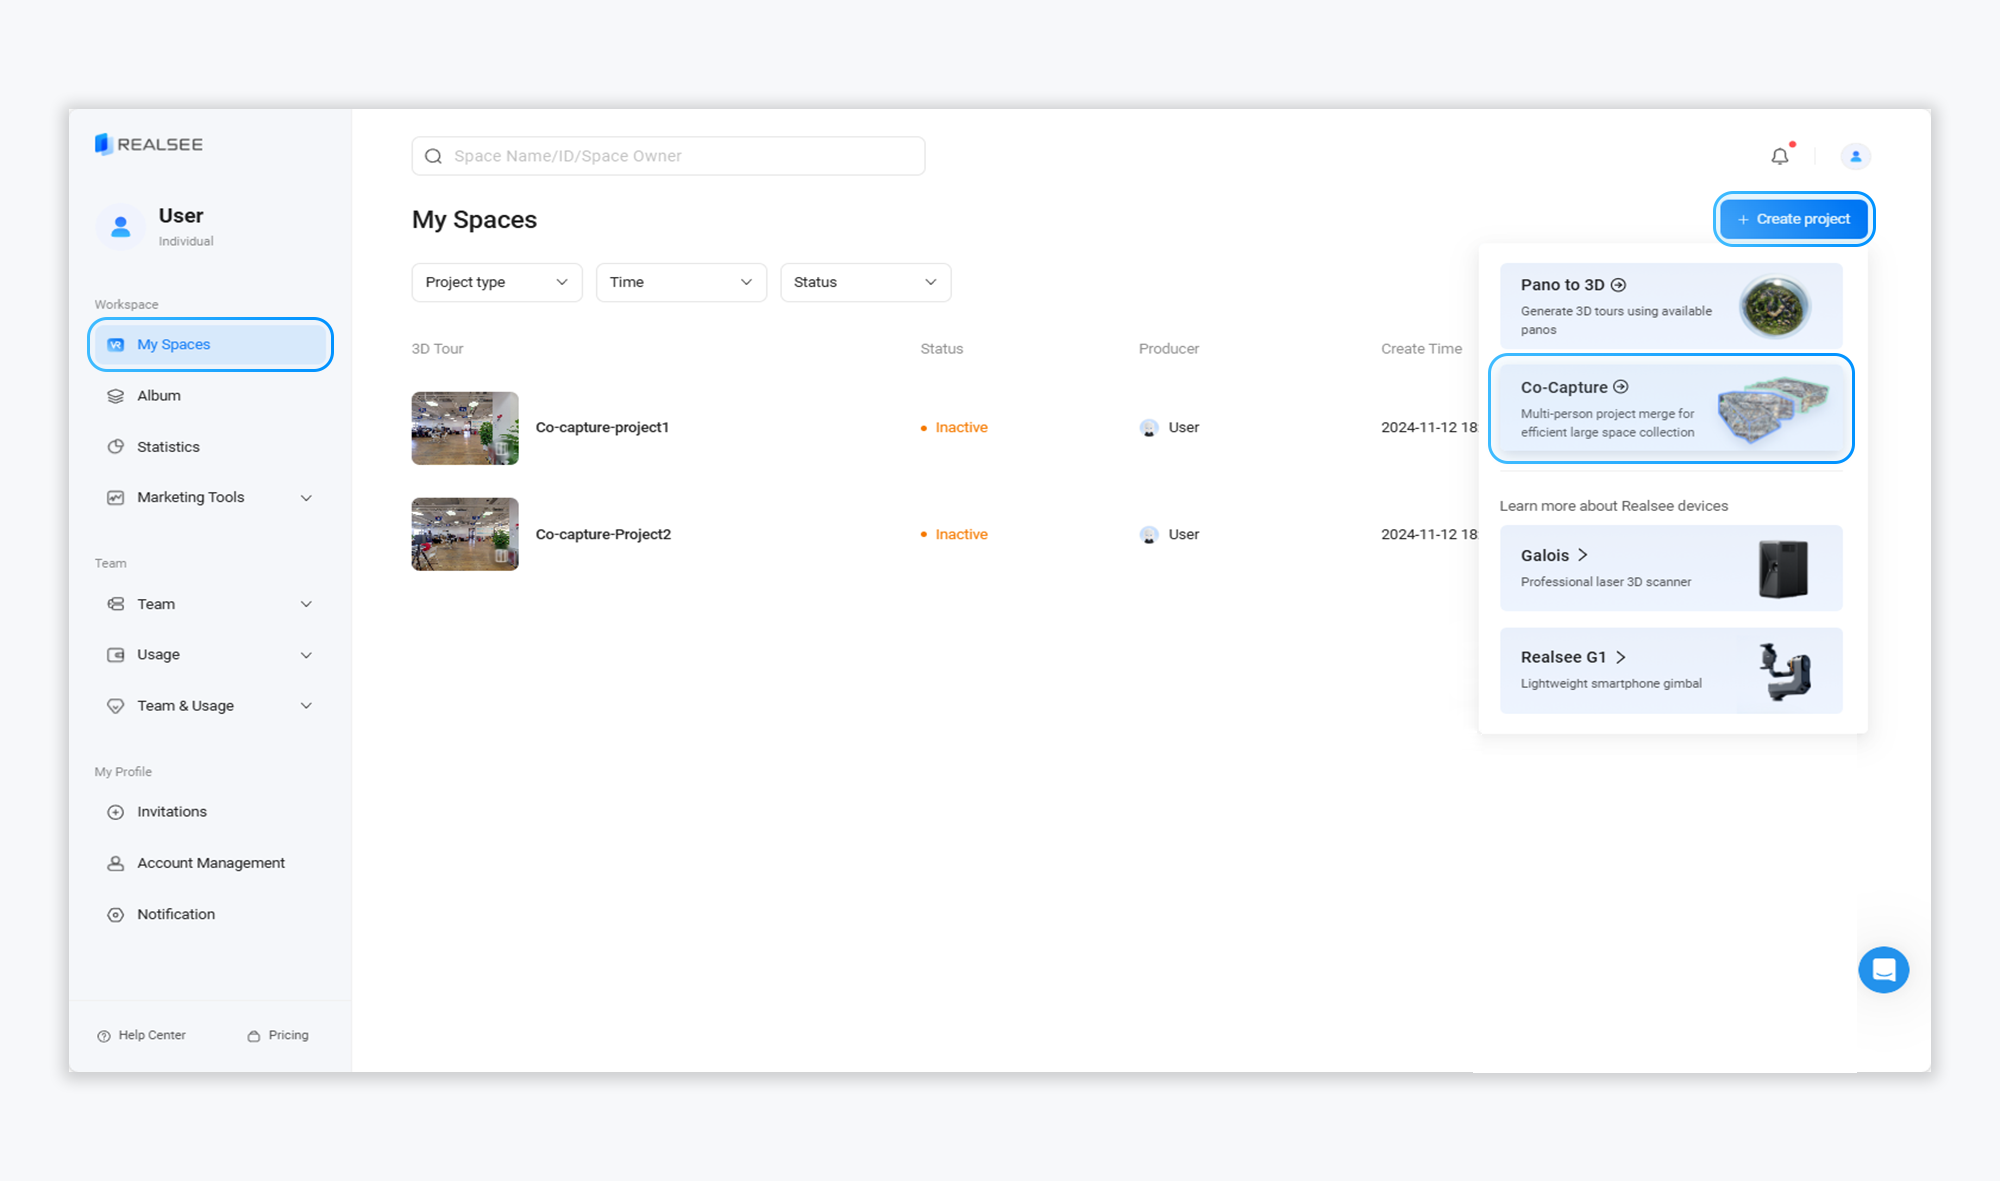
- Access the console backend, hover over the "Create Project" button, and click on the "Co-Capture" feature.
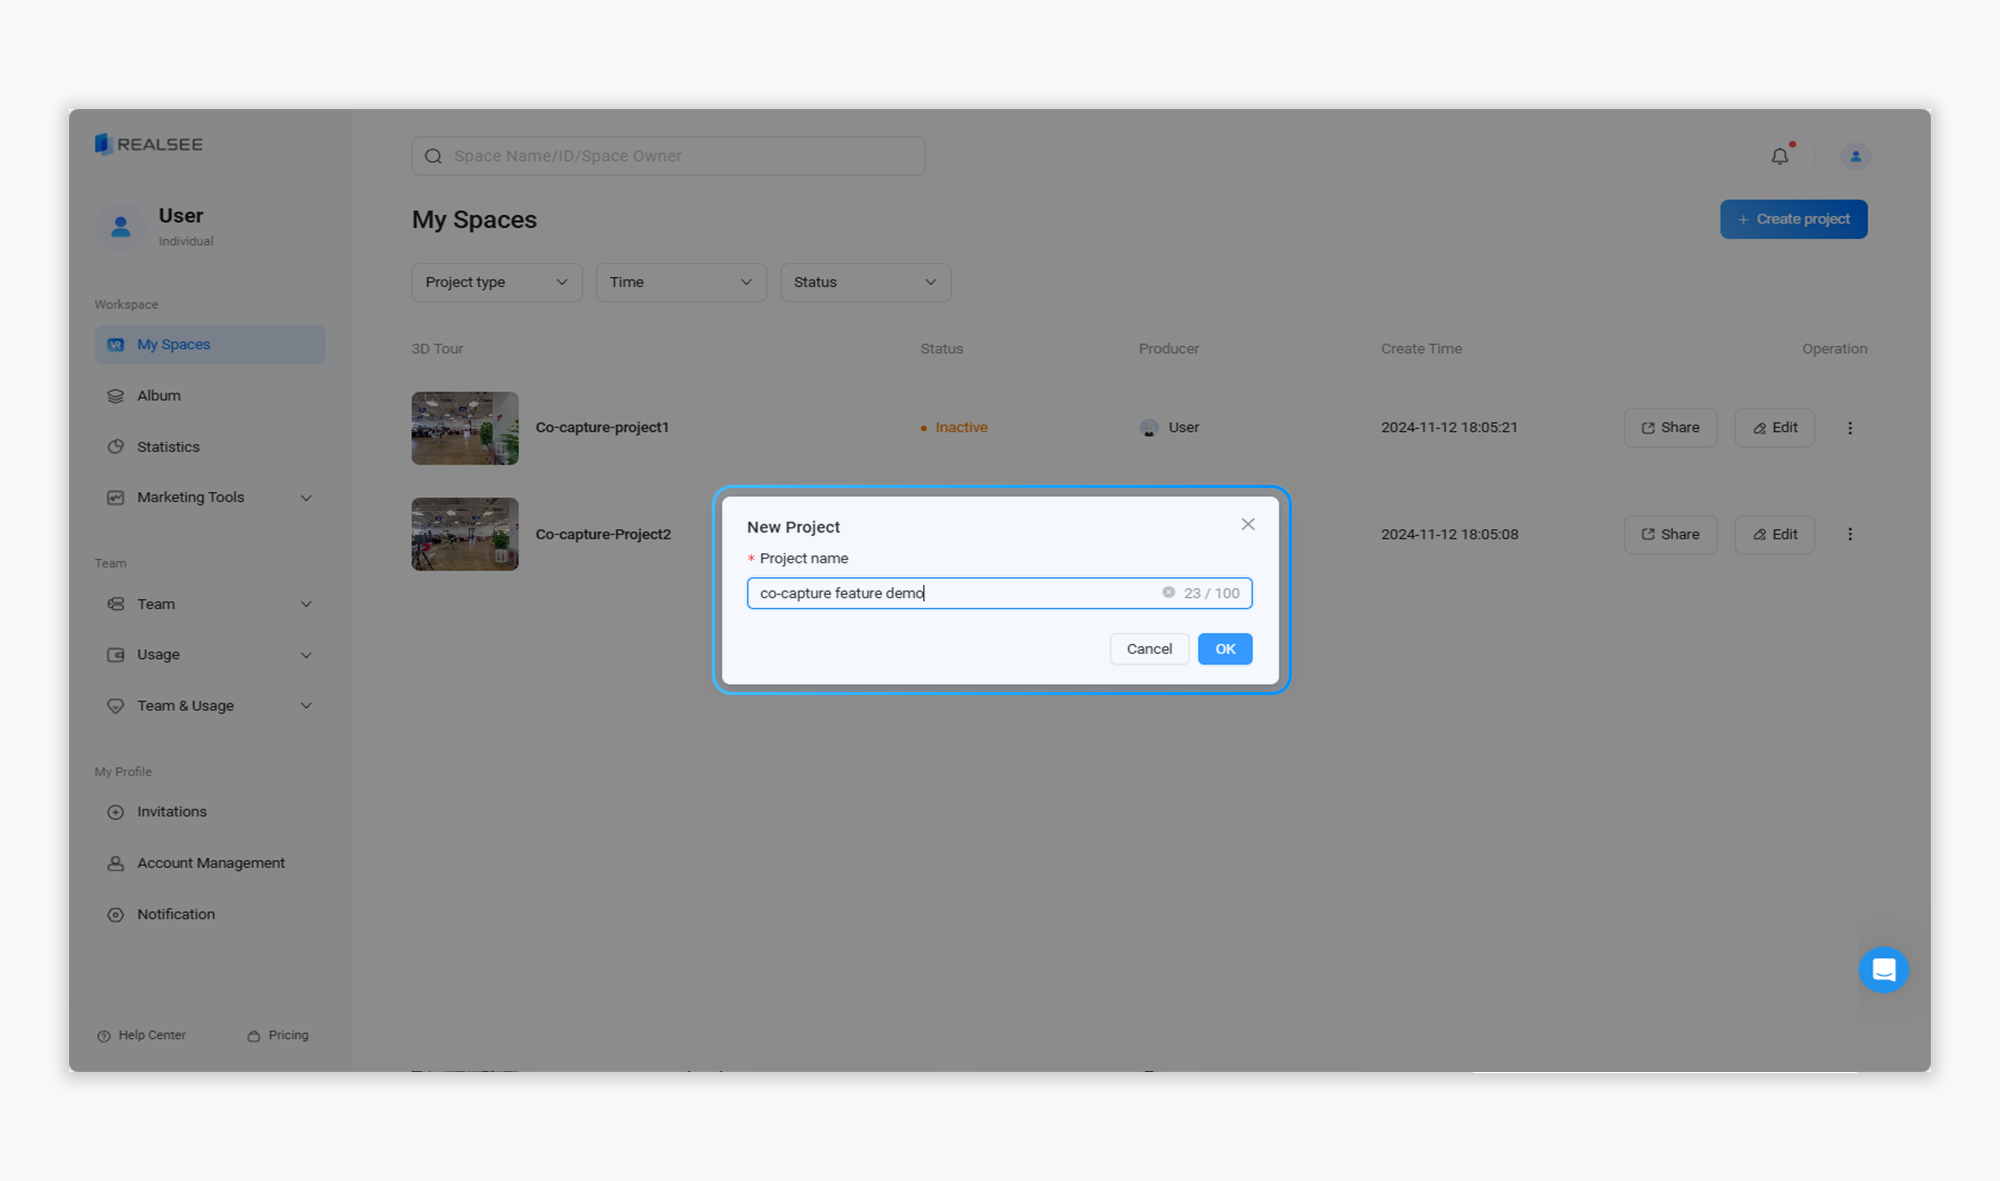
- Enter a name for the new project.
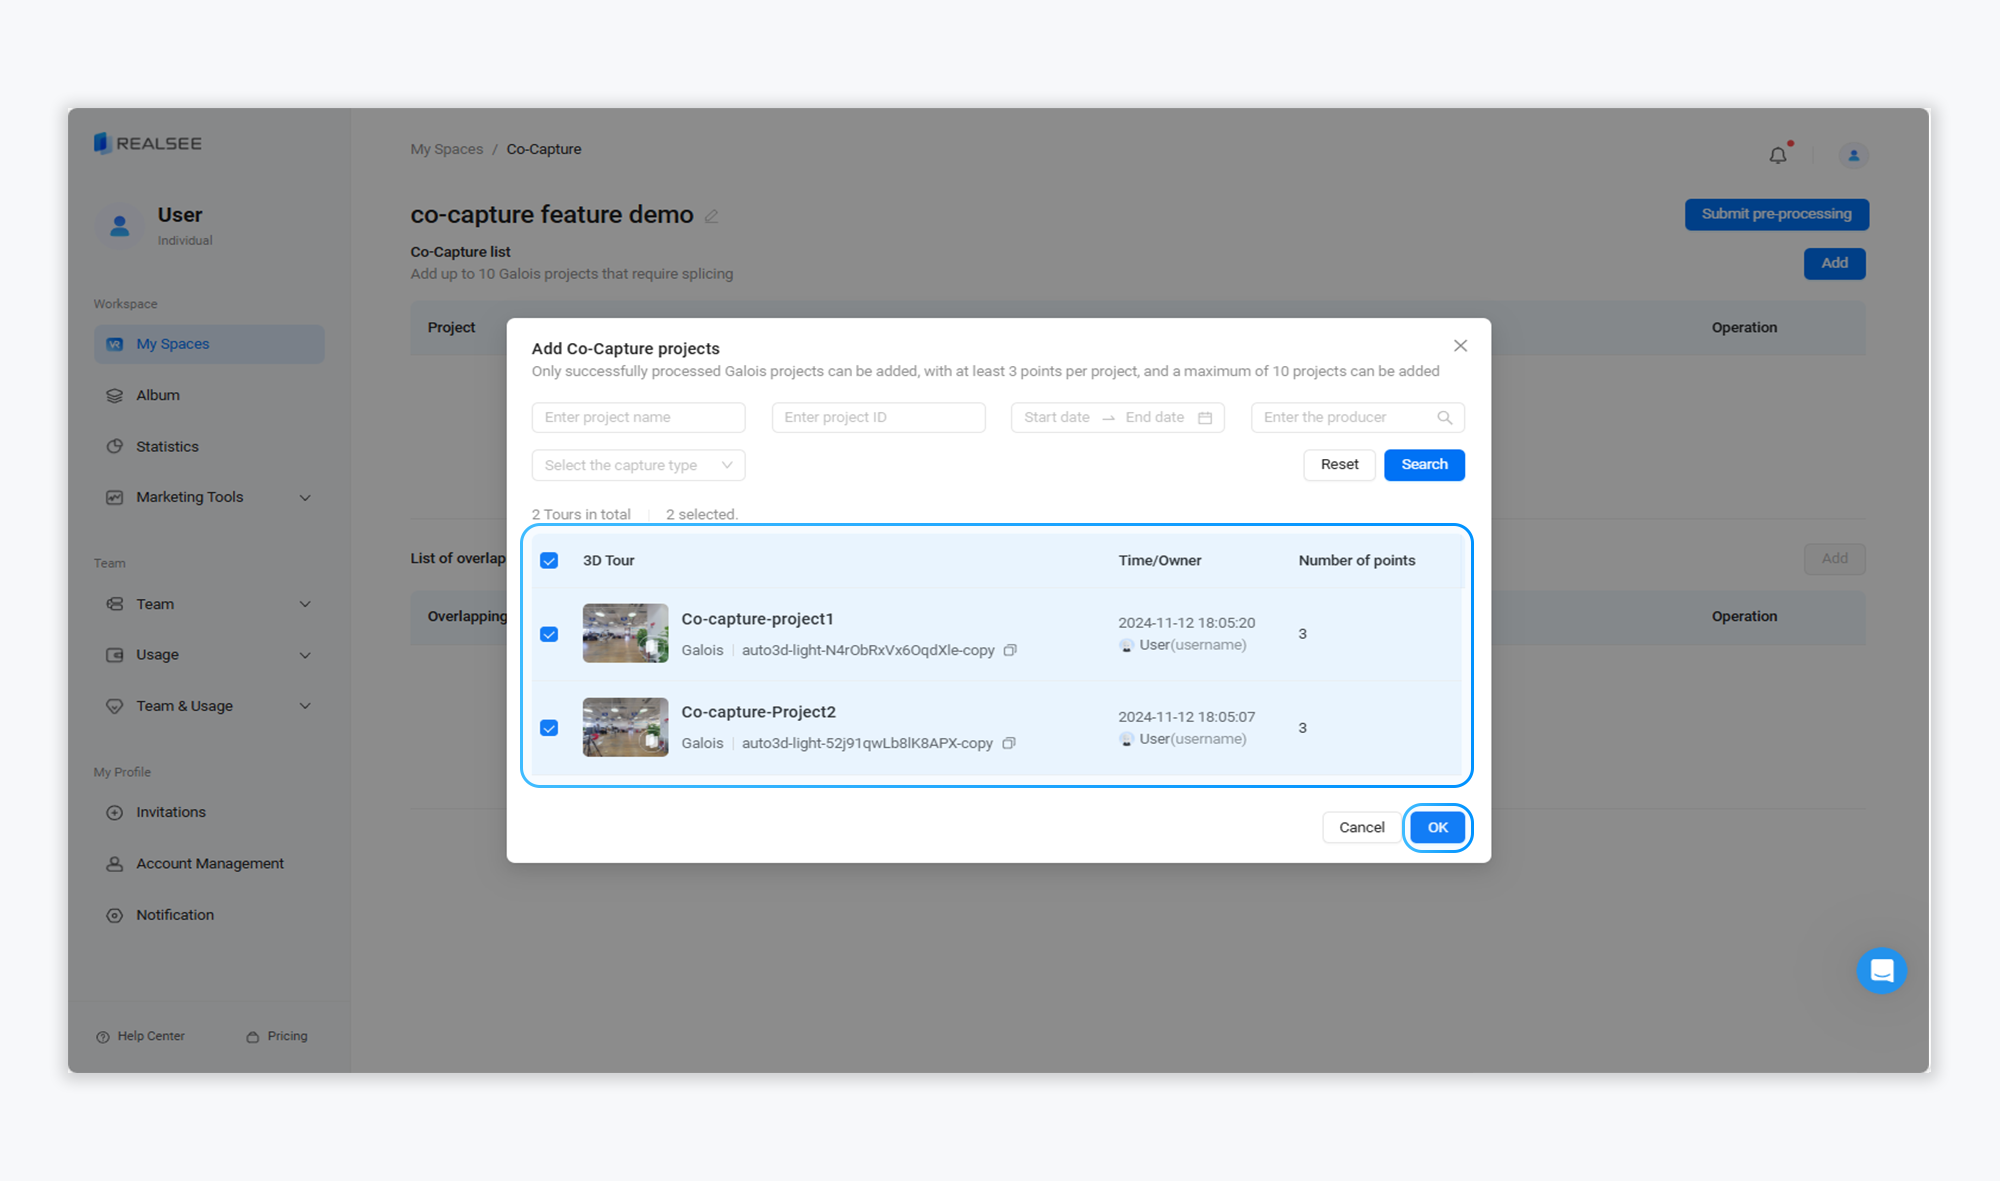
- Enter the co-capture management page and click the 'Add' button in the top right corner to add the projects you wish to merge.
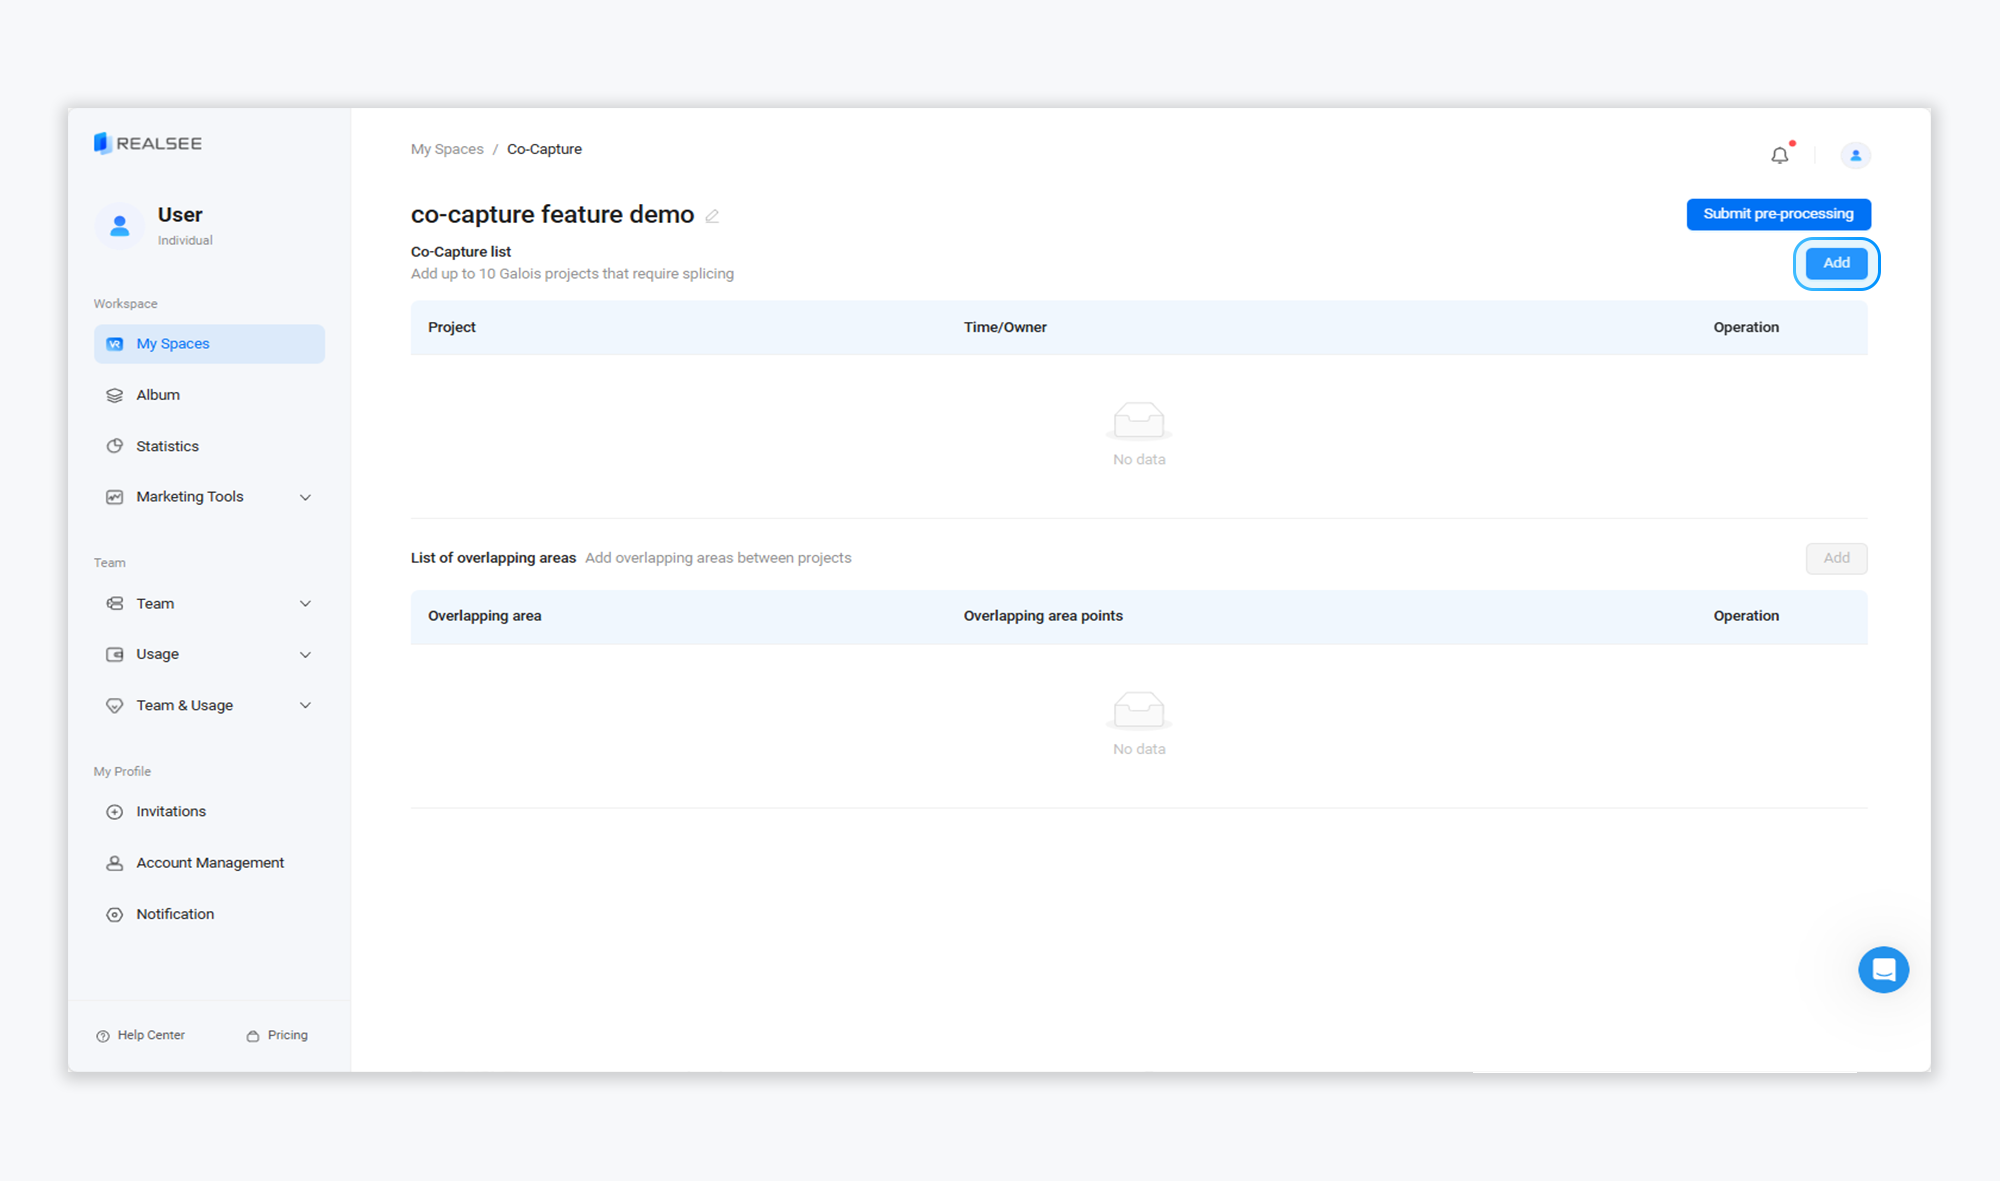
- Add projects that need to be spliced (only for Galois projects), with at least 3 points per project, and up to 10 projects can be added to a collaborative capture.
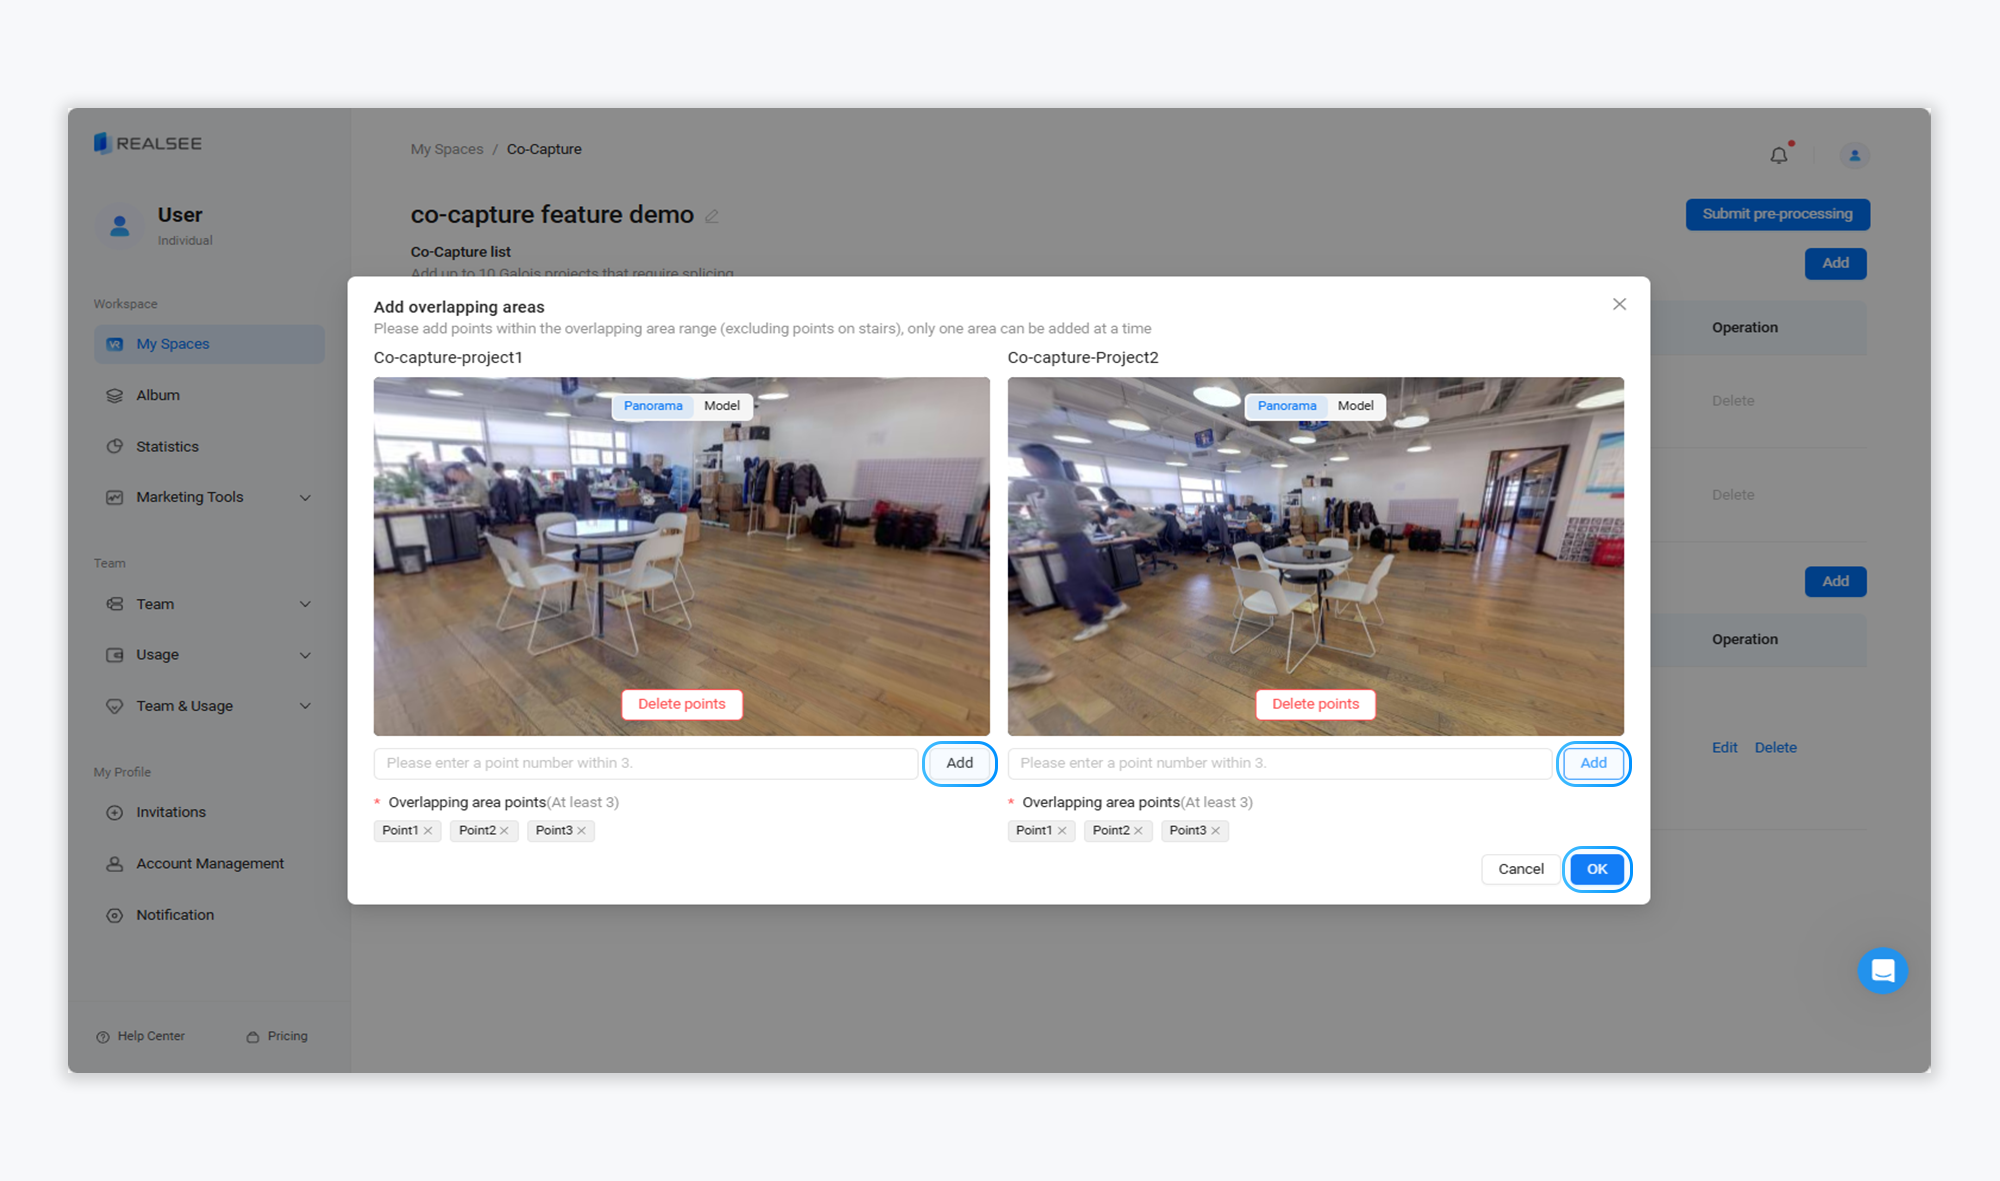
- Add overlapping area points between the projects.
Step 1: Select a pair of items that overlap with each other, and only one pair can be selected at a time.

Step 2: Add points within the overlapping area range, you can directly enter the point number to add, or you can add points in the VR (add at least 3 points per project)
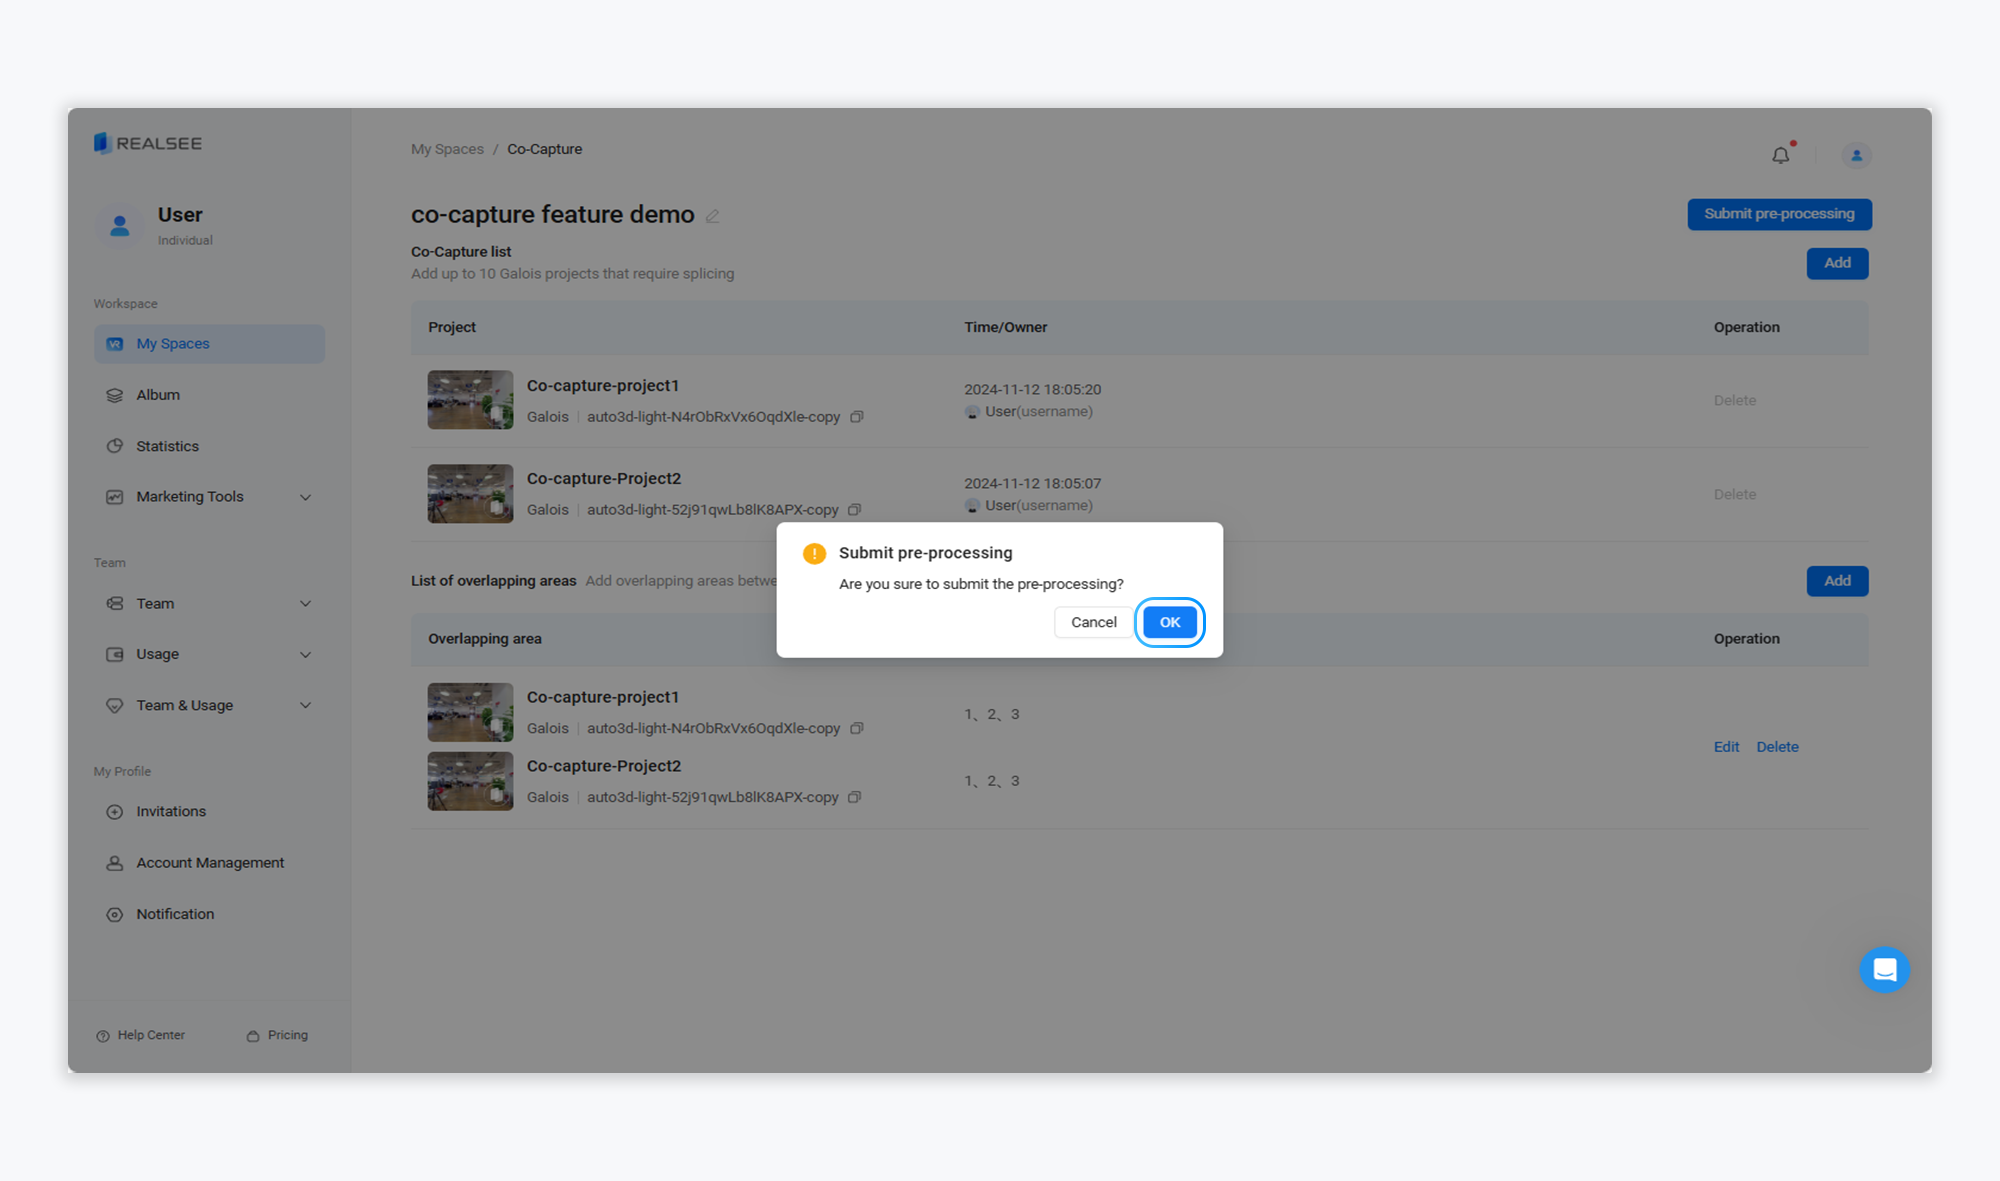
- After adding the projects that need to be merged and the overlapping area points between them, click the 'Submit Preprocessing' button in the top right corner and confirm the submission.
- The point adjustment function is needed to confirm whether the result of splicing two project points is accurate.
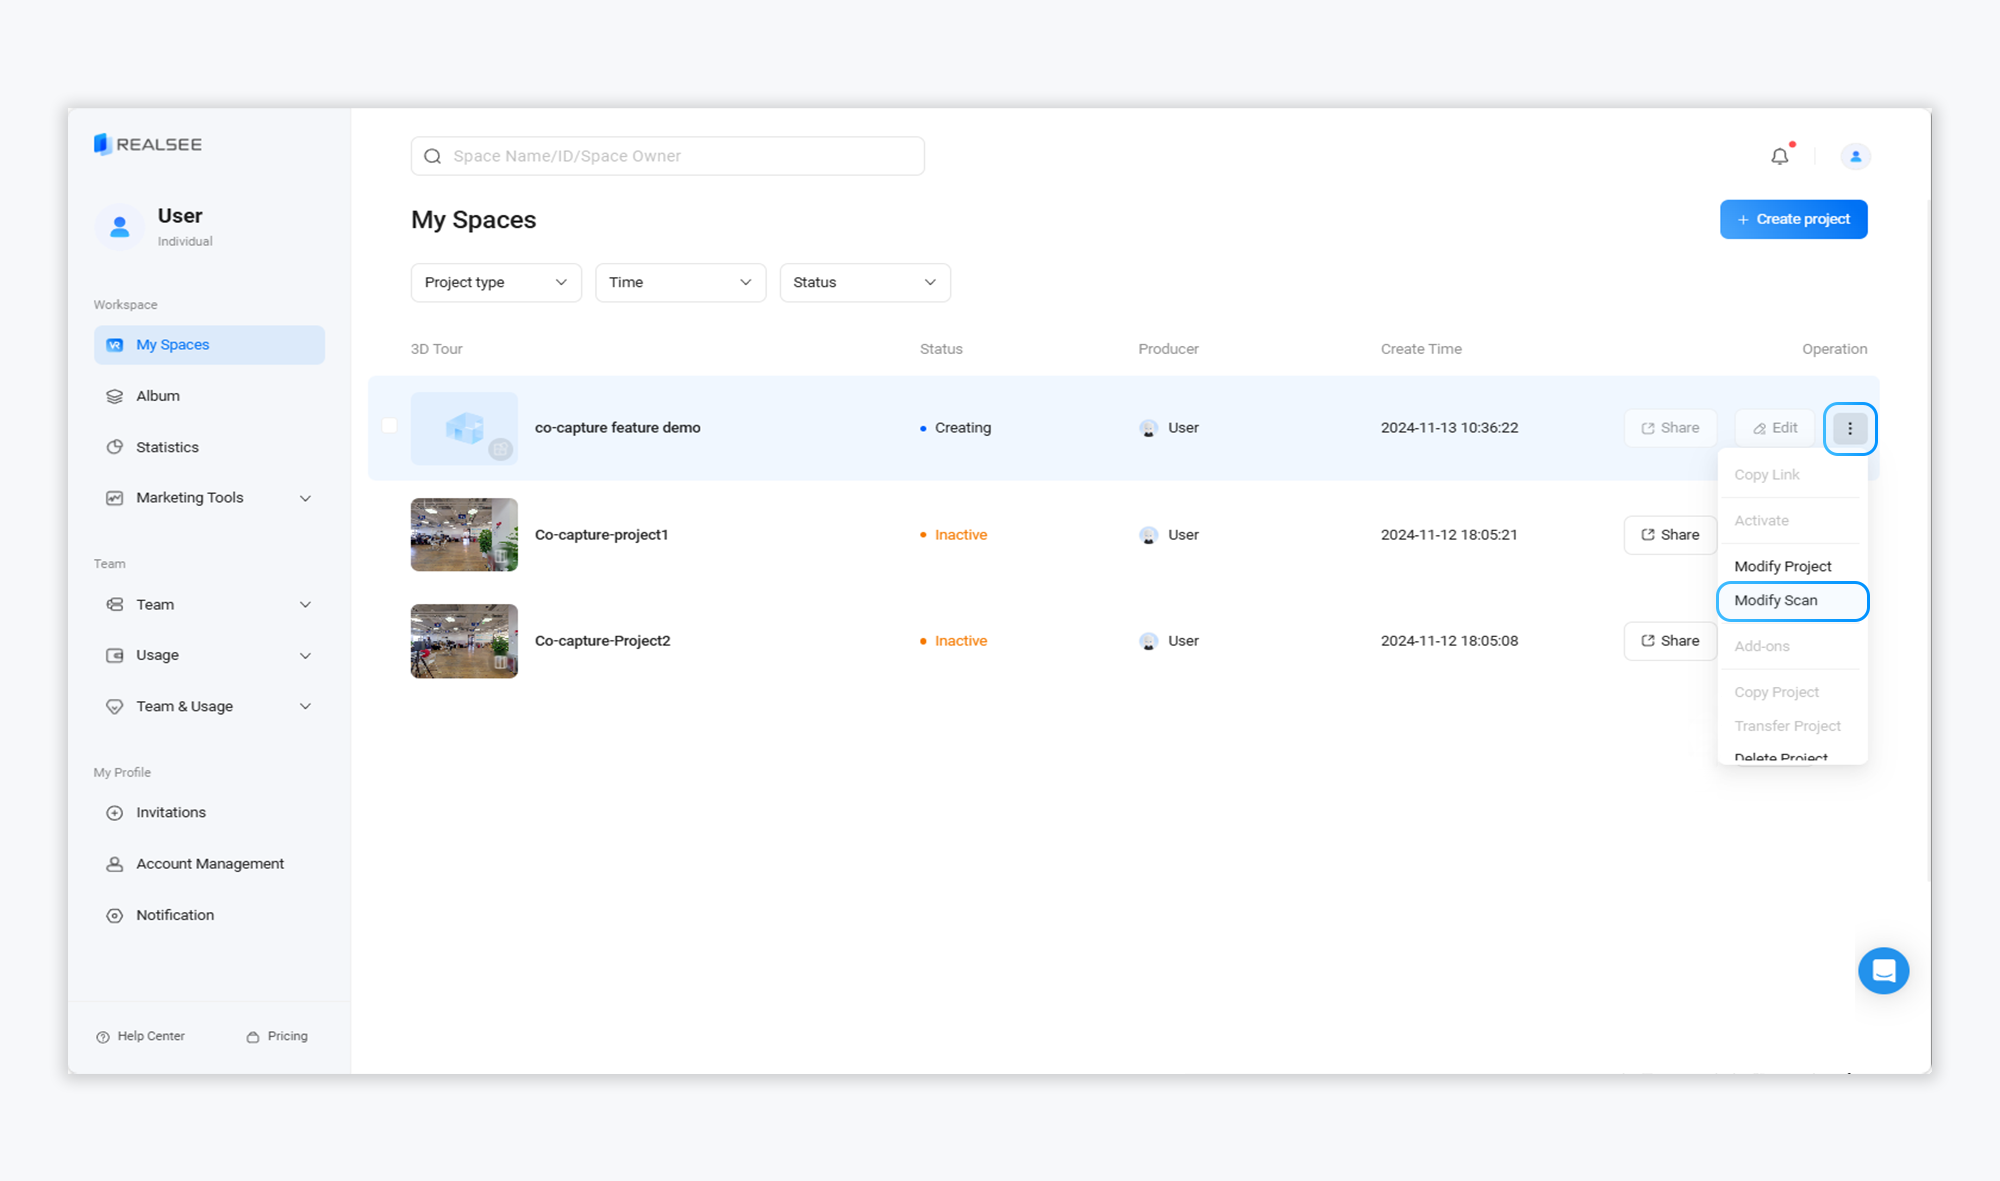
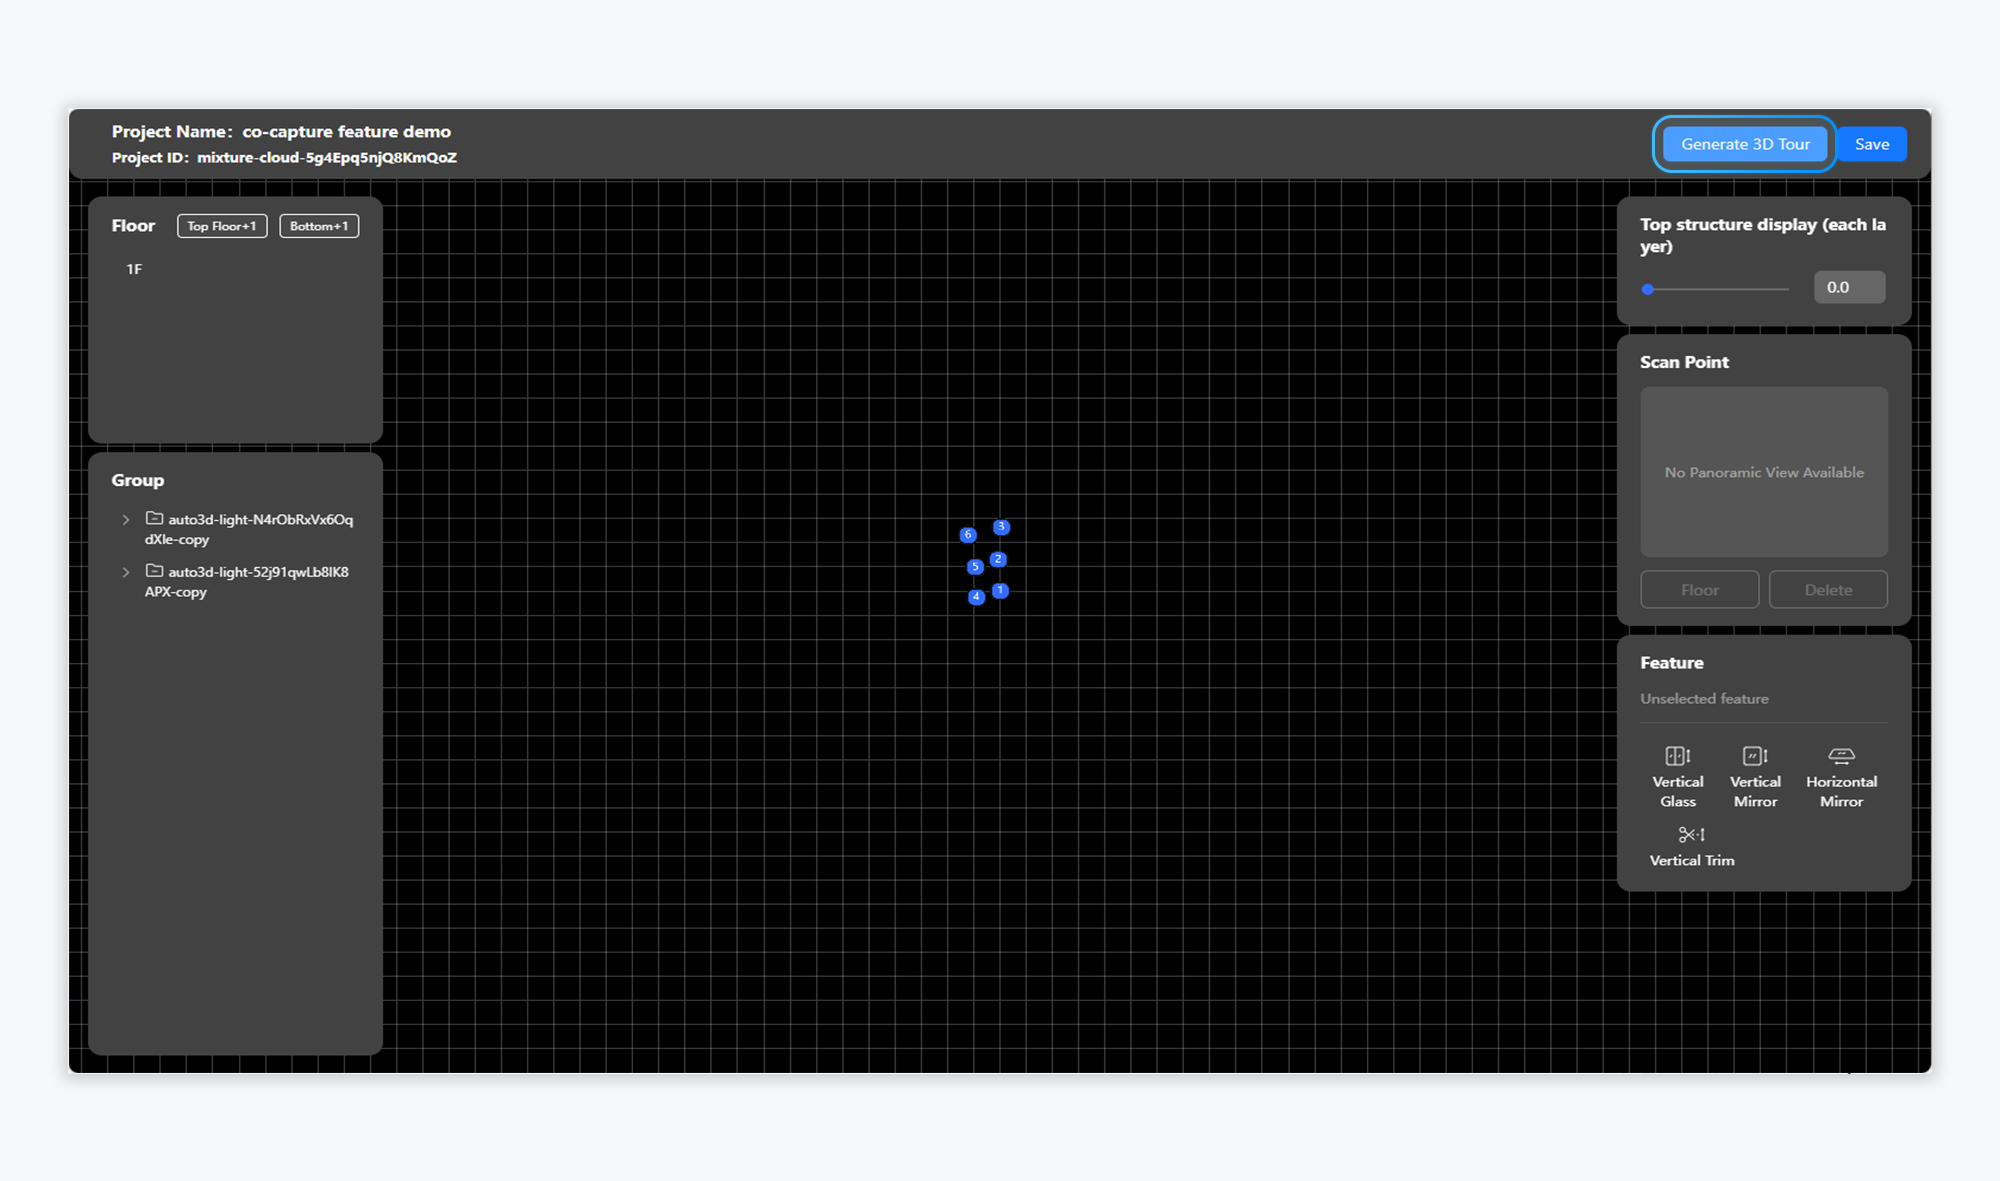
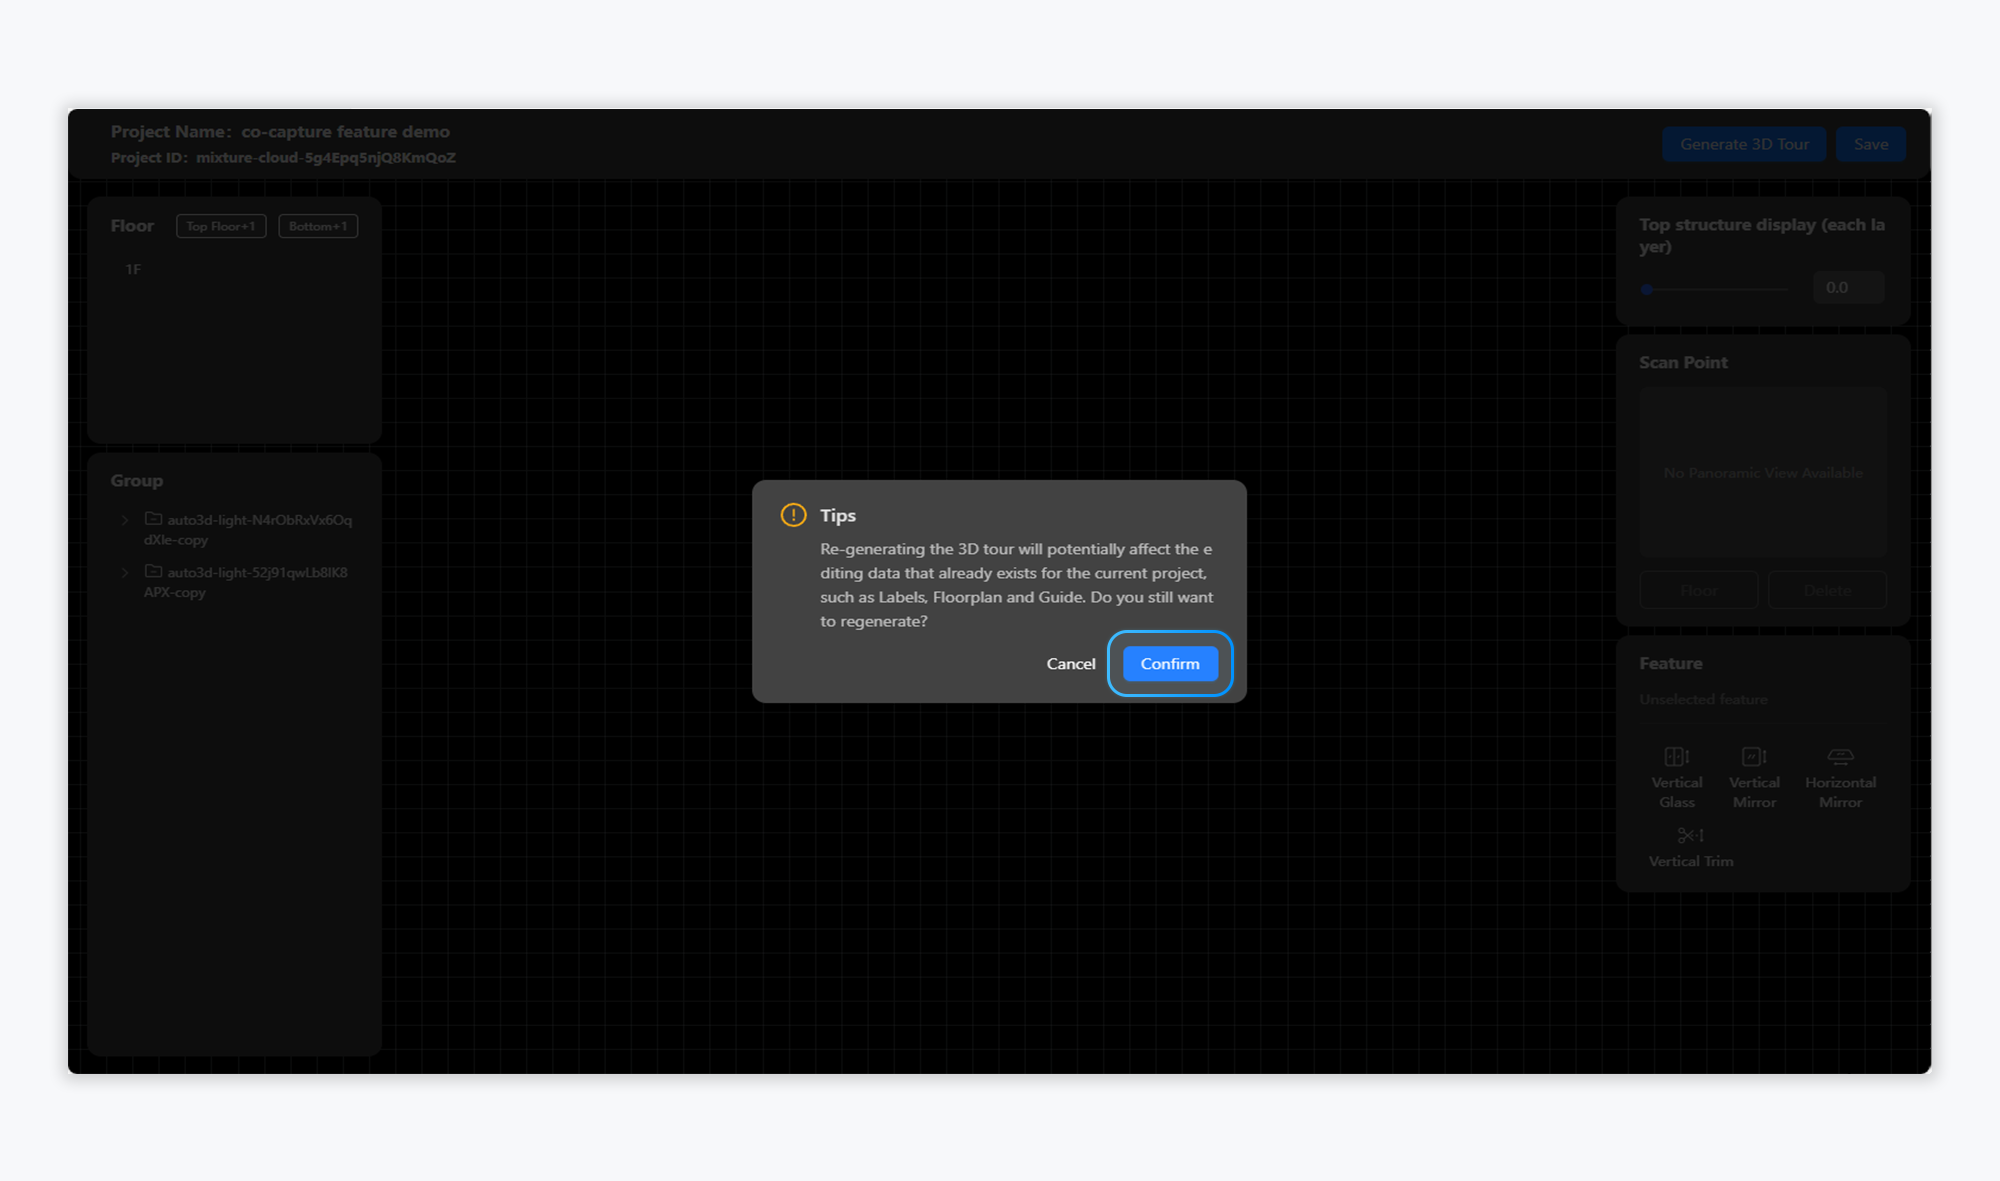
- If the splicing verification is successful, you can click the 'More' button (three dots) on the right to enter 'Modify Scan' and trigger the button to generate the 3D Tour. (If 'Modify Scan' is grayed out, it indicates that the data is still being verified. Please wait and try again later. If 'Modify Scan' remains grayed out after 60 minutes, you may contact us to report the issue.)
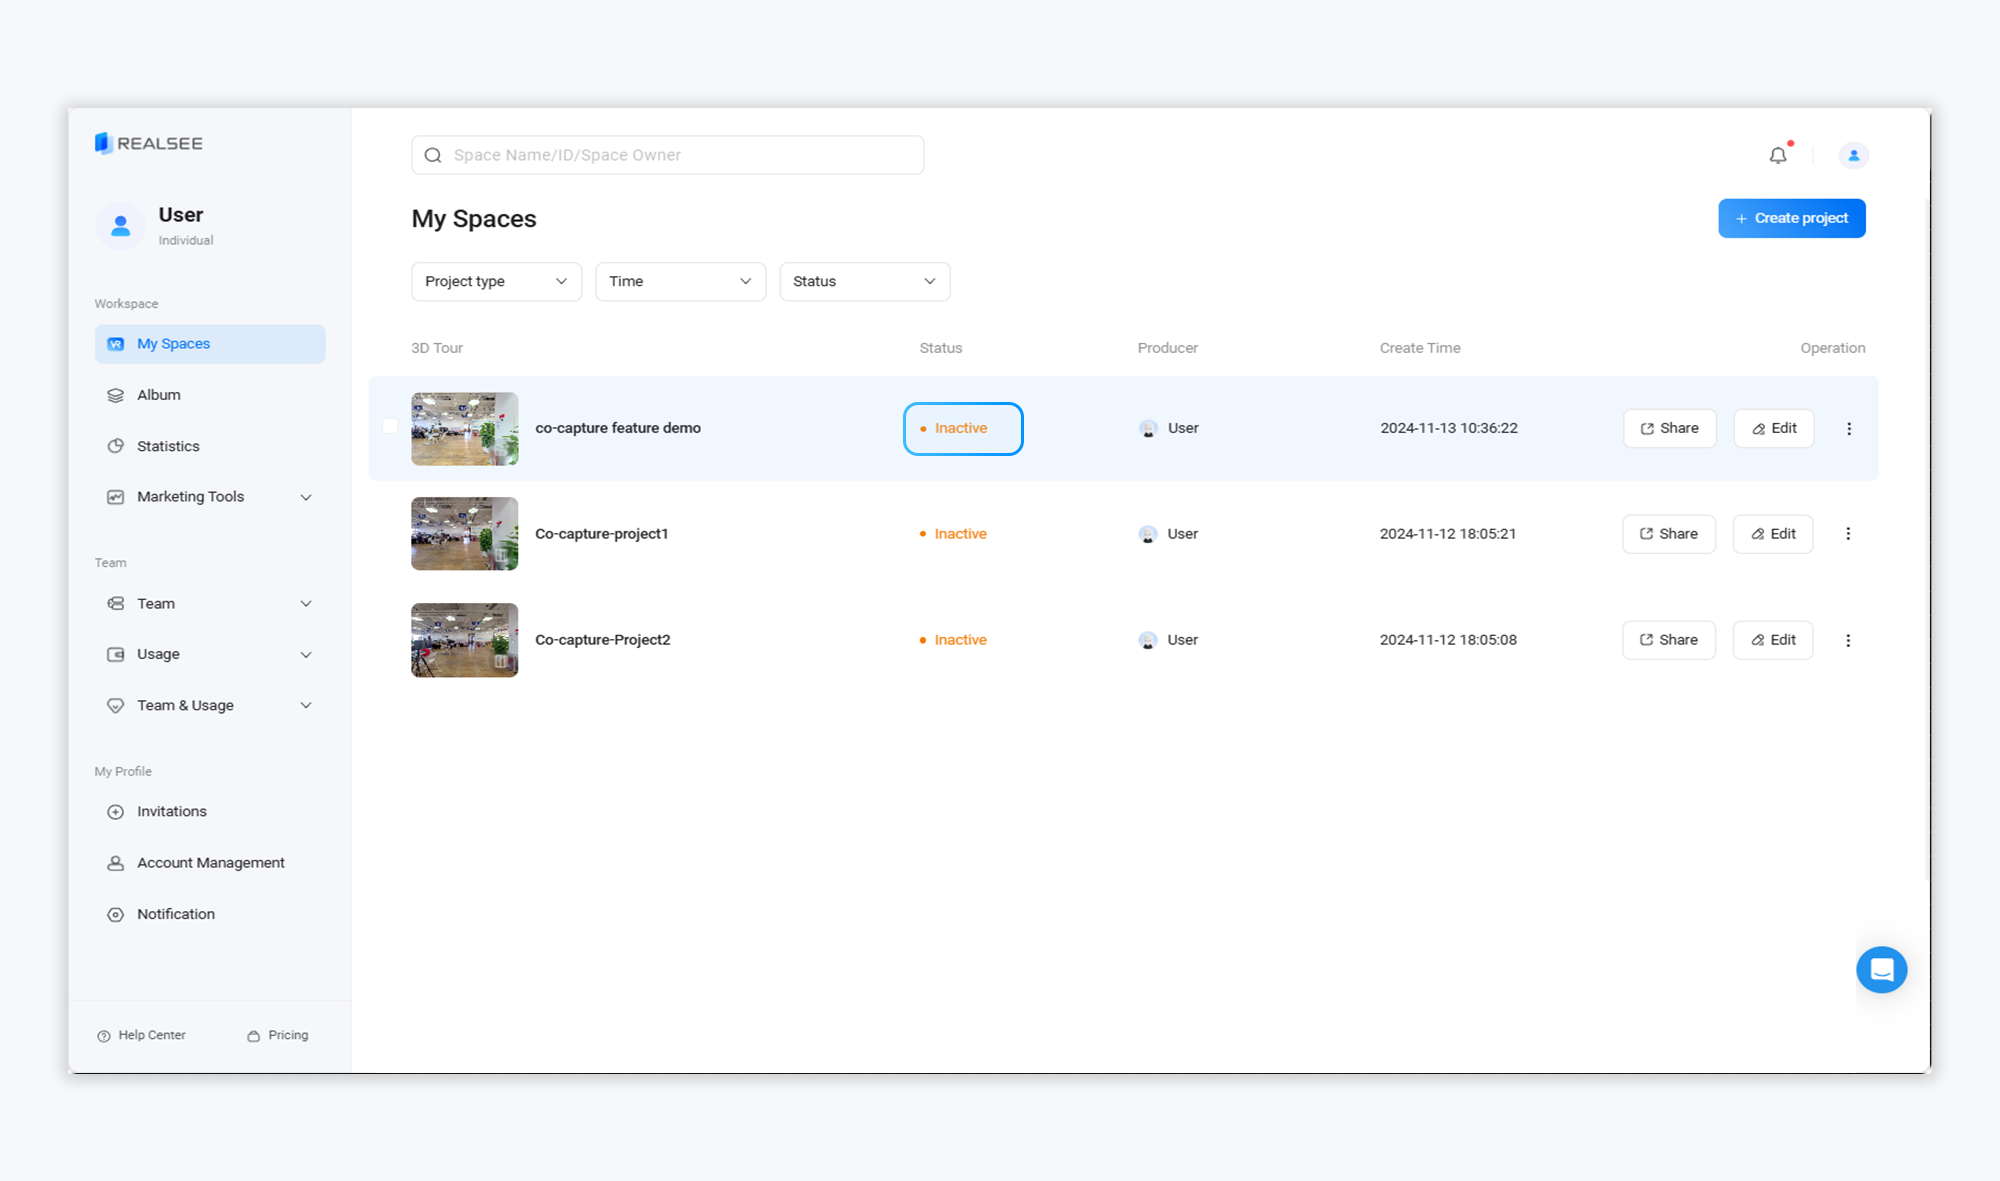
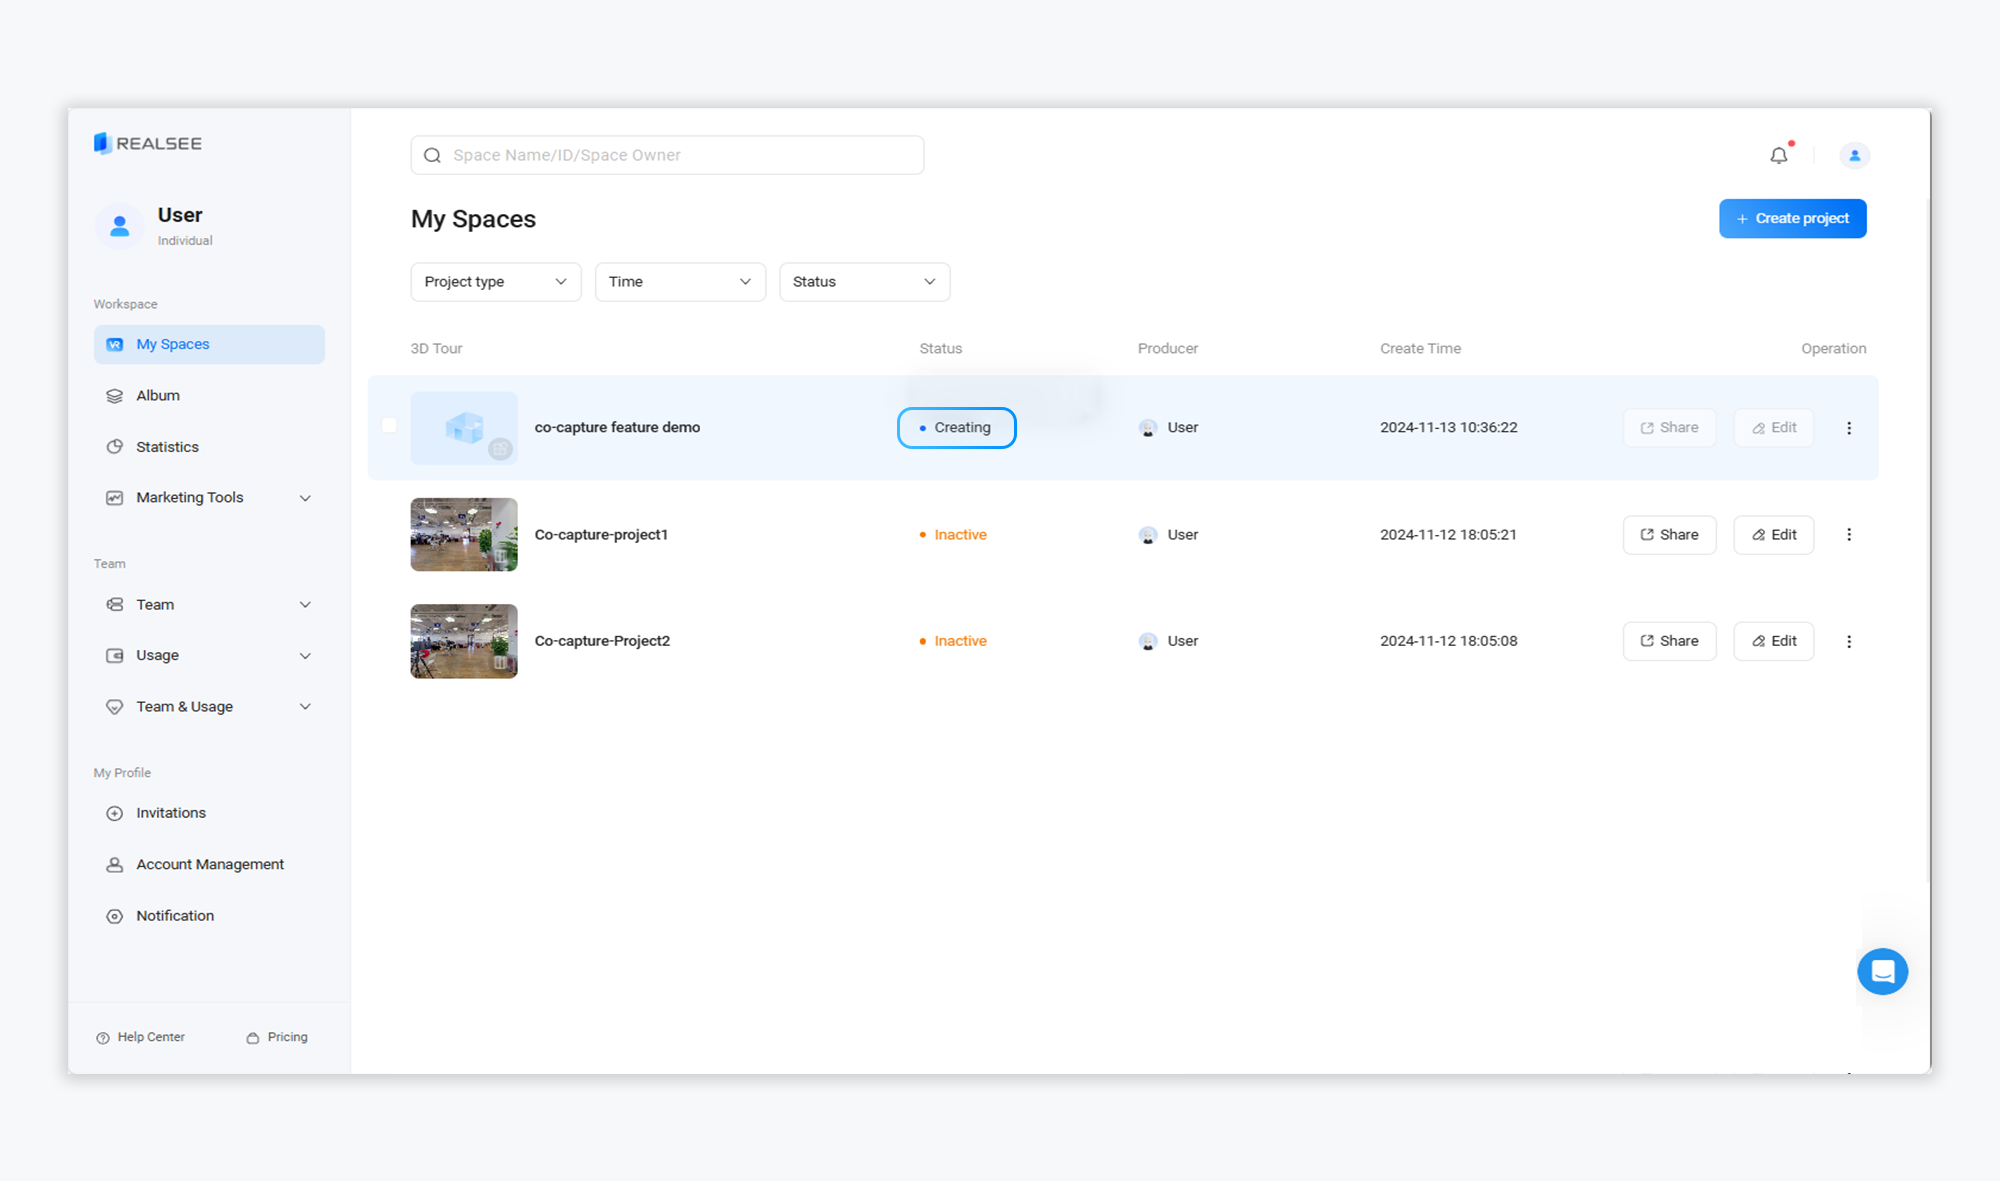
- The generated project can be viewed in the Console-3D Tour list.
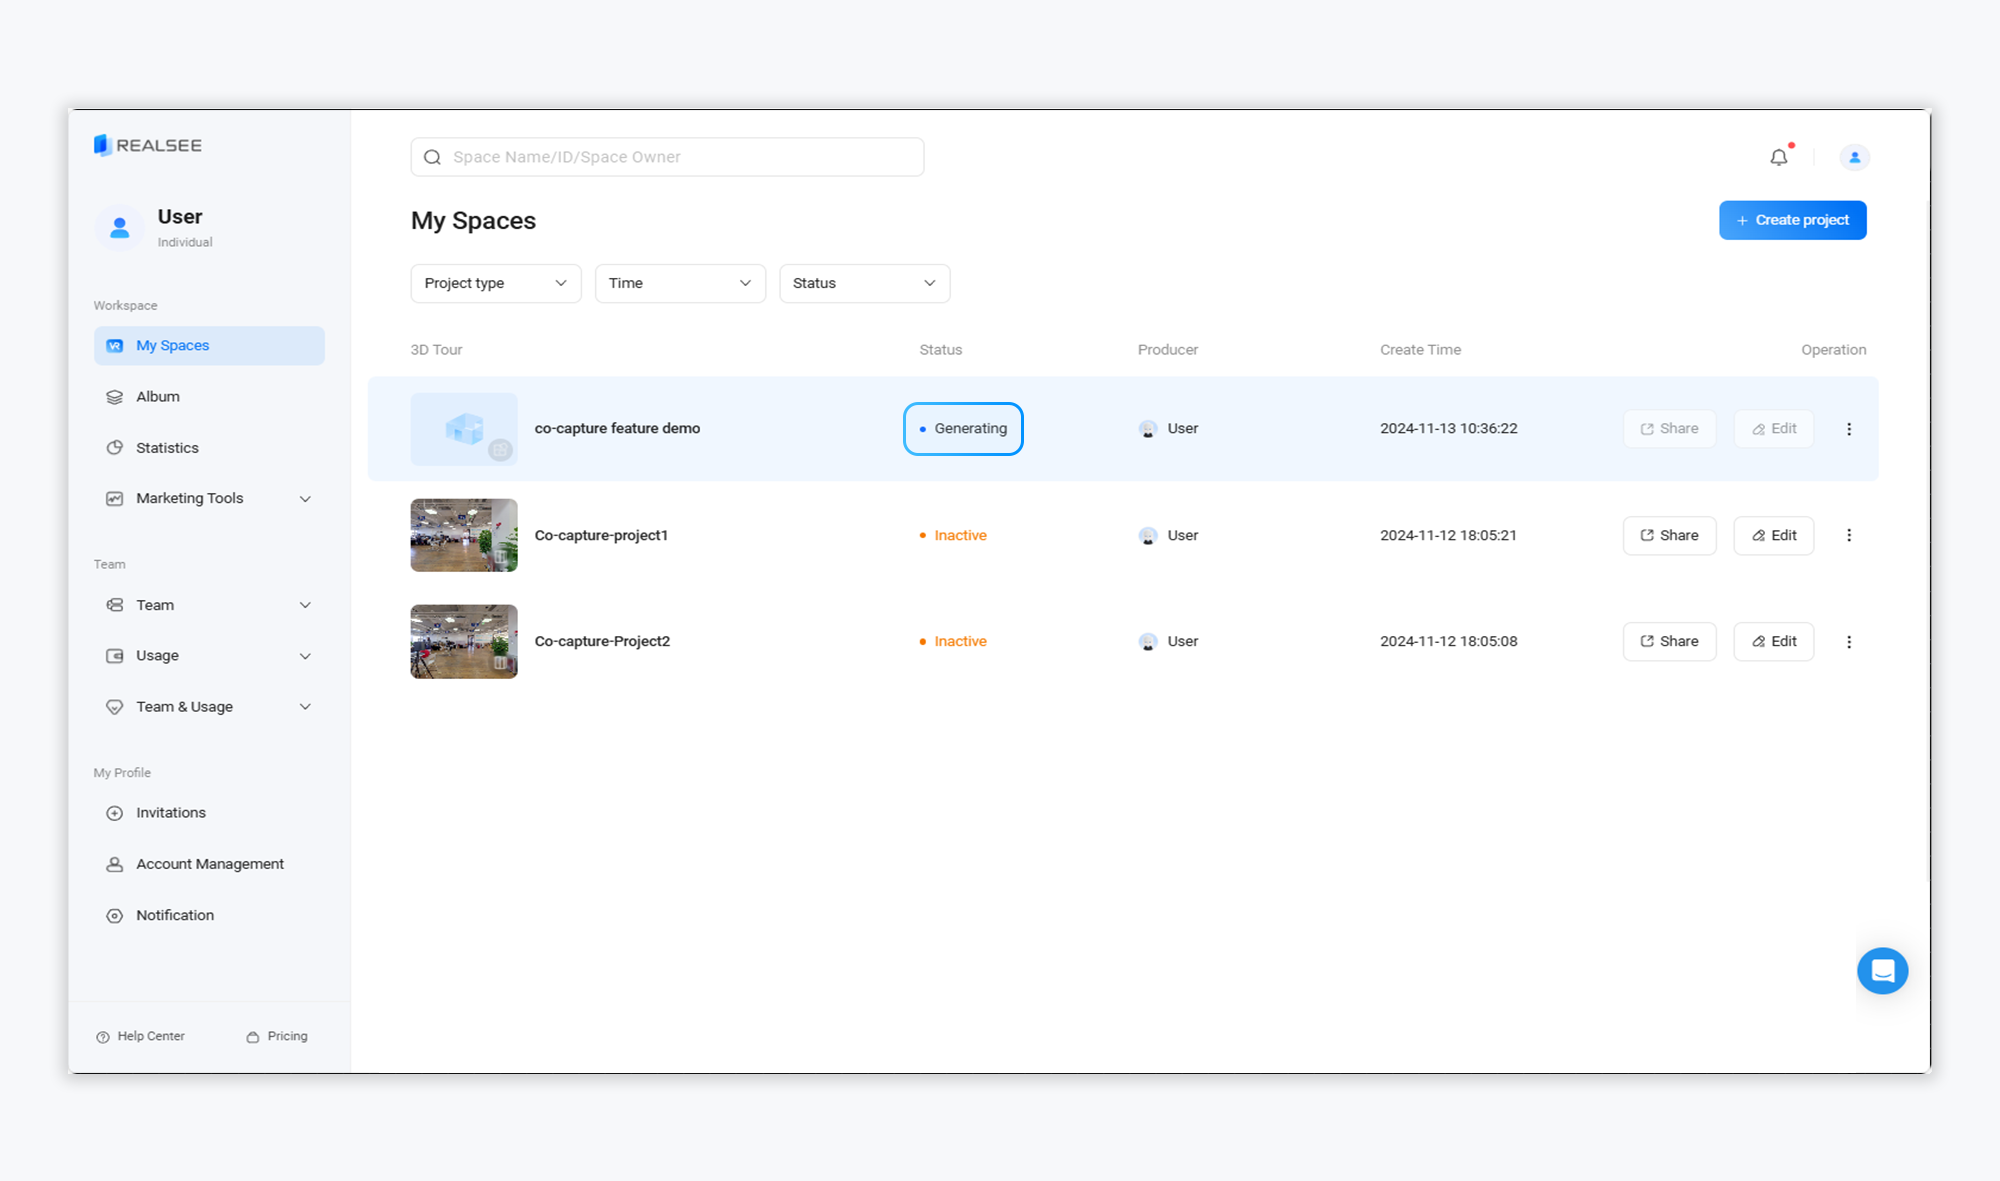
Once the 3D tour generation is complete, the project status will change to Inactive. You can activate the project and perform actions such as sharing it.